Bronco Forum - Full Size Ford Bronco Forum banner

Rodan's rear bumper build

1 reading
46K views 102 replies 41 participants last post by  Rodan  
#1 · (Edited)
Today I started on building a rear bumper. Basic construction will by 2x6 rectangular tube. The plan is to incorporate a dual swing-a-way, tire and jack on one side and fuel/water cans and cooler on the other, and the usual recovery points. It will also have quarter panel protection which will also support a roof rack.

Today was mostly about getting the stock bumper off, and getting brackets fabbed up. After considering sinking a receiver in the bumper, I decided I wanted to keep the frame mounted hitch, as it has a lot more support. It did hang pretty low, so after removing the stock bumper I flipped the crosstube, raising the receiver position and giving around 4" more ground clearance on the departure angle.

Image


Next, I fabbed up plates to mount the bumper to the stock location. I borrowed a plasma cutter from a friend while he's out of town for a couple of months so I could work on this and the front bumper. Boy, do I NEED one of these!! What a time saver. Mounting plates are 1/4", and support will be added after they are tacked on.

Image


Brackets bolted in place:

Image


Here's a shot of the bumper, not yet cut to length, but the notch to clear the receiver is roughed in. It will later be angled out a bit and closed off.

Image


That's it for today. Hopefully I can get the bumper tacked to the brackets tomorrow, get the length cut, and work on some gussets for the brackets. I still need to order the swing-a-way hinges, latches and the recovery points, so that stuff is a couple weeks out.

More to come... :rockon
 
#3 · (Edited)
Good progress today. Finished up what I have materials and parts in stock for...

Got the bumper positioned and brackets tacked, then pulled it off to add 1/4" bracing and weld.

Image

Image


I would have preferred a slightly higher position for the bumper, but I was limited by clearance with the tailgate down. Here's what I ended up with - around 1/2" all the way across:

Image


The relief around the hitch receiver leaves enough room to get my locking pin in/out. I am going to have to buy a bigger drop hitch...

Next I cut the taper on each side (I really love this plasma cutter!), and mounted it up.

Image

Image


I had built the bracket for the license plate a couple of weeks ago, and it will remain on the spare tire when the new carrier gets built.

The ends are still a bit long, and will get trimmed back after I finalize the quarter panel protection/roof rack support. I also need to weld in steel to close everything off, and I'll do that after getting the recovery points and hinges welded in. I'll be ordering some parts this week, but probably won't get back to the project until weekend after next.
 
#4 · (Edited)
Got some work on the bumper done today.

I added the quarter panel protection, which will also support uprights for a roof rack, and shortened the bumper slightly after I had the fitment worked out. Also closed in the cutout over the receiver hitch.

Image

Image

Image


Ordering the hinges and recovery points got put back a week, as I decided to buy springs and sway bars for the wife's car. Looks like next weekend will be tree removal weekend anyway....
 
#5 ·
Ordered hinges, shackles and mounts, and tire carrier plate this morning.

In addition to cutting down some trees tomorrow, it's our 17th wedding anniversary this weekend, so no fab work will be happening. Hope to have it close to finished the following weekend.
 
#7 · (Edited)
Got more goodies today:

Image


Here's one of the hinges disassembled:

Image


The spindle rides in a sleeve that gets welded to the bumper to reduce the amount of heat put into the spindle to prevent overhardening and crystallization. Supposed to lessen the chance of the spindle breaking.

Also had a schedule change at work, so I'm off tomorrow... :D
 
#10 · (Edited)
The round/square combo ties in to the sliders, and the front bumper will have something to maintain the 'theme', although I haven't quite figured the front out in my head yet.

Image


The quarter protection (and the sliders) will also support uprights to carry a roof rack independent of the 'glass topper (so it can be removed). Something similar to this:

Image


Wish I could give credit, but I don't know who's rig that is, just snagged the pic off google.

The spindles are from http://www.comp4x4.com/home.php
 
#11 · (Edited)
Judging by your photos, your bumper strength and tire carrier spindle thickness will both bear the weight of a single swing-arm with tire and accessories. Any reason you prefer two arms ?

What are you using to lock the arm(s) when open ? Our Bronco has a Warn locking hub to lock it open, built by the former owner and it works very well.
 
#12 · (Edited)
I went with double arms just to avoid having all the weight on one long arm... it can be cumbersome in daily use, and takes up more space to swing out.

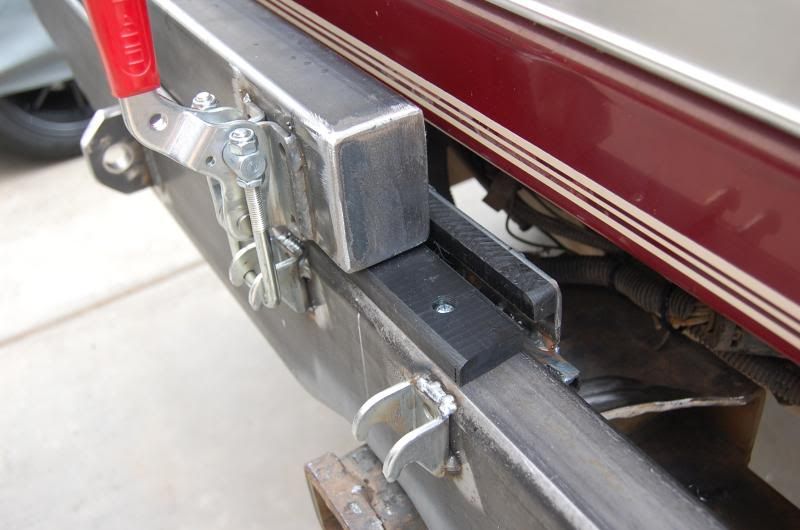
I honestly hadn't thought about locking it in the open position, but I can see the sense of that on certain inclinations. I do intend to build a travel stop to prevent over rotation. I have toggle clamps coming for closure, which should arrive this afternoon.

Here's some new pics from this morning's work:

On the truck, with hinges and recovery points installed, and the bumper all welded up. I still have some sanding and smoothing to do, but that will wait until all the fabrication is done.

Image


The hinge spindle, in the welded sleeve. The spindle itself is welded just on the bottom to prevent putting a lot of heat in it.

Image


With the lower of the two bearings the carrier rides on:

Image


Carrier installed with castle nut:

Image


And the dust cover (which is not fully seated, just placed for the photo):

Image


Bumper with clevises:

Image


I like the hinge system, and it went together pretty easily. I'm a little worried about distorting the carrier when welding the cross bar on, but I'll just have to go slowly so it doesn't get overly hot.

Well, off for something to eat and to buy some more steel... ;)
 
#13 ·
It's a great fabricated custom job to your own design, looking forward to seeing the continued fast progress.
 
#14 · (Edited)
Thanks!

Finished up for the day...

Image

Image

Image


Still got lots to do. And don't fret, there will be additional support for the tire carrier. Just ran out of time. I did receive the toggle clamp latches today, though I didn't take photos or have time to do anything with them.

This weekend I'll try to finish up the tire carrier, get the latches installed and start on the high-lift jack mount.
 
#15 · (Edited)
More progress today... got to the "it's useable" point, and really, the tire carrier side is pretty much done.

Additional tire carrier support added, over rotation stops installed and toggle clamps installed:

Image


Toggle clamps:

Image


Swingouts are boxed in, and I added delrin pads, on which the carrier arms ride when closed, to eliminate clanks, clunks and other unpleasant noises; and to provide a solid base for the toggle clamps to secure against:

Image


Tire on:

Image


Side view:

Image


I probably could have had the tire closer to the tailgate, but my original plan was to put the high-lift behind the tire. Unfortunately, that didn't work out the way I wanted it to. I still need to figure out the high-lift mount, and get dimensions for fuel/water cans so I can plan out the other swingout. I also need to add the mounting points for the roof rack support to the quarter panel protectors. Hopefully, one more weekend will see this thing done... then I get to start on the front... :banghead
 
#48 ·
...Swingouts are boxed in, and I added delrin pads, on which the carrier arms ride when closed, to eliminate clanks, clunks and other unpleasant noises; and to provide a solid base for the toggle clamps to secure against:

...
Great idea on the delrin pads. The more stress you can take off the pivots, the better. The pivots tend to suffer from metal fatigue right at the step where they're turned down for the bearings.

Looks clean and nicely done!
 
#17 ·
Cheesehead said:
Love it. But what is the purpose of the driver's side swing away section?
Driver's side will carry 2-3 fuel/water cans + high lift. I will probably also figure out a removable cooler carrier over the cans.

I'd really like to use the Scepter milspec cans, but I don't relish the idea of spending $300+ on fuel/water cans...

Anyone know of a good (reasonably priced) source for them?
 
#21 ·
Really nice work Rodan. Impressive attention to details and strength.
Shame you got the tire out so far but I can see how plans change and problems emerge.
Still, very nice and very strong. Look forward to seeing the left side finished up. :thumbup
 
#23 ·
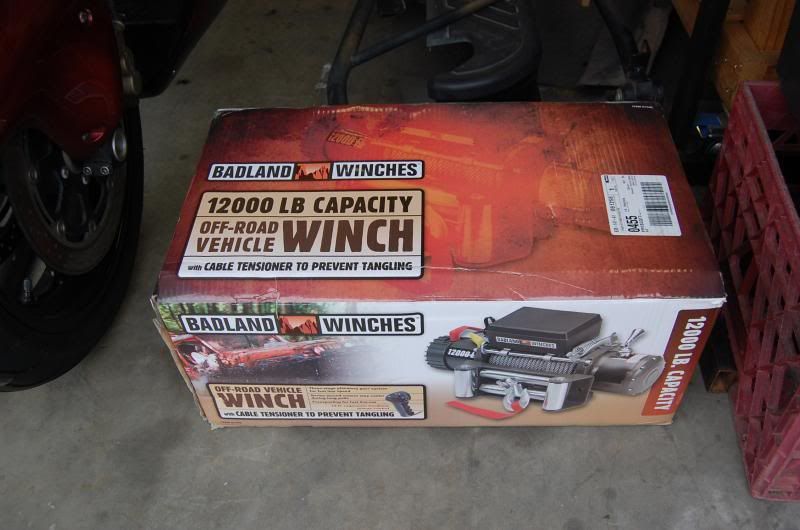
No progress on the rear bumper to report... but I did pick up the first piece of the front bumper build:


Yeah, I know... chinese junk... :goodfinge

Truth is they have a good rep online, and have had solid reviews in the mags. And for $299, you really can't go too wrong....

Anyway, installing springs and sway bars in the wife's hotrod this weekend, so no work on the Bronco...
 
#25 ·
Don't worry... I get all the coupons. :histerica

BTW, the 20-25% coupons are mostly BS. They're only good on things that aren't already 'on sale' (most everything in the store), and specifically exclude most of the more expensive stuff (tool boxes, welders, jacks, etc.).
 
#27 ·
Rodan, I'm halfway through a stick welding course for my auto addiction, not as a profession (a MIG course can be taken after completion of stick). I'm not proficent enough yet to see photos and know which method used, are you using MIG or stick welding ? cheers