

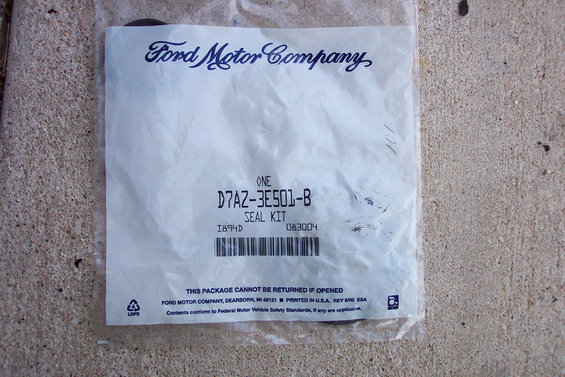
After my Saginaw pump swap, I developed a horrible gearbox leak at the input shaft that I ignored for some time while it attracted more dirt than I ever imagined. I finally bought the two seal kits and resealed the box. I didn't include how to R&R the box itself; if you need instructions on that, you shouldn't be attempting this. This is not really that difficult, but it's heavy, awkward, and a bit time-consuming. It doesn't require any special tools besides some snap ring pliers and a pitman arm puller.
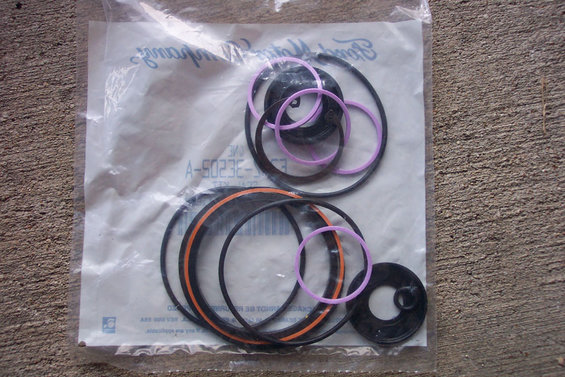
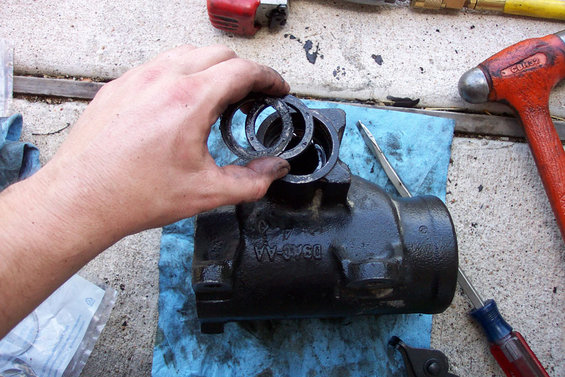
Input shaft seal kit
![Image]()
Input shaft seal kit. There are lots of pieces, but you will have three left over.
![Image]()
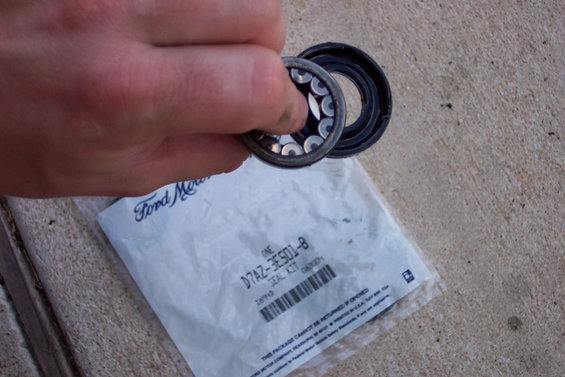
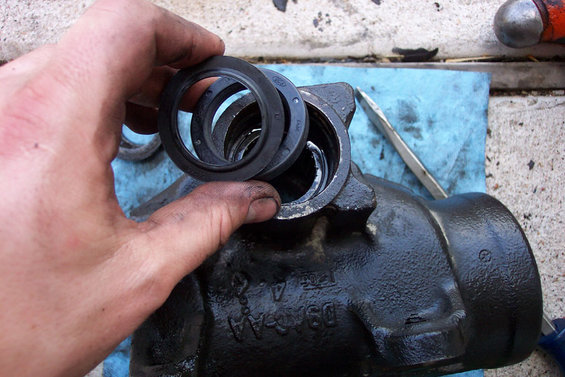
Sector shaft seal kit
![Image]()
Sector shaft seal kit. You will use all of the pieces.
![Image]()
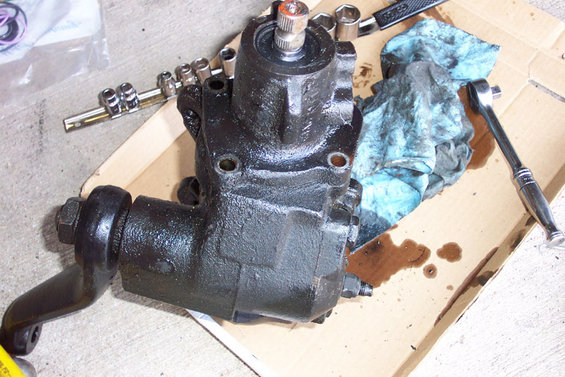
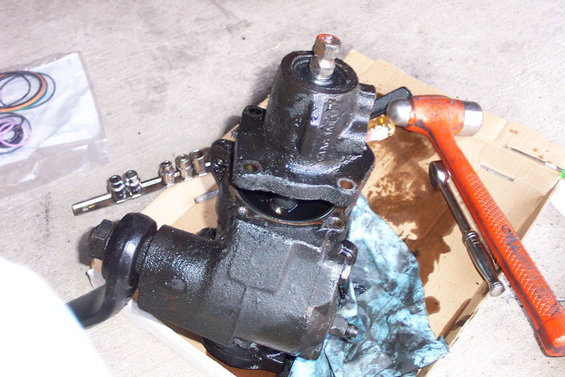
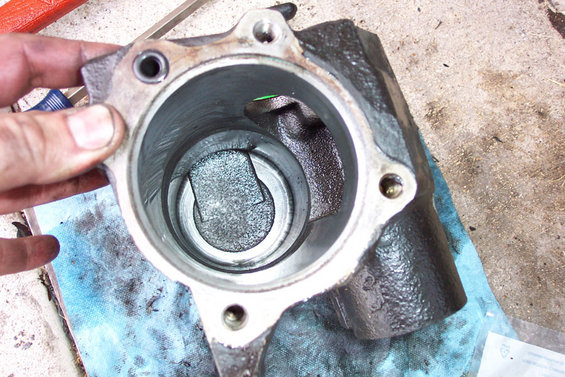
The gearbox removed from the vehicle
![Image]()
Remove the valve body bolts
![Image]()
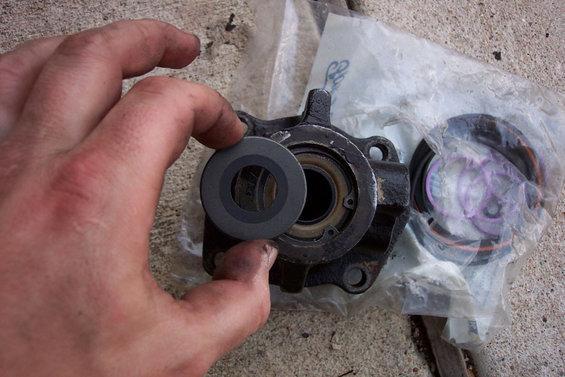
Pry out the dust cap
![Image]()
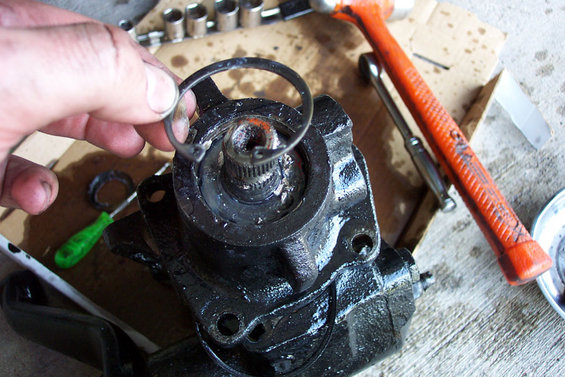
Remove the snap ring
![Image]()
Separate the valve body. Just underneath it, there is an allen-head set screw. Remove this, and then you can use a drift and hammer to remove the large nut that holds the worm drive into the valve body. Sorry, no pics of that.
![Image]()
Use a large socket and extension to drive the bearing and seal out of the
valve housing. This shows how they are oriented relative to each other.
![Image]()
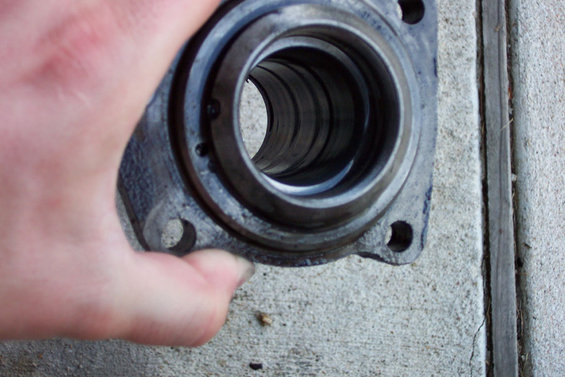
Here is the valve body by itself. There is a large o-ring that goes between this and the gearbox.
![Image]()
Reinstall the bearing, then drive the seal just far enough in so that you can reinstall the snap ring.
![Image]()
Reinstall the dust cap in this orientation.
![Image]()
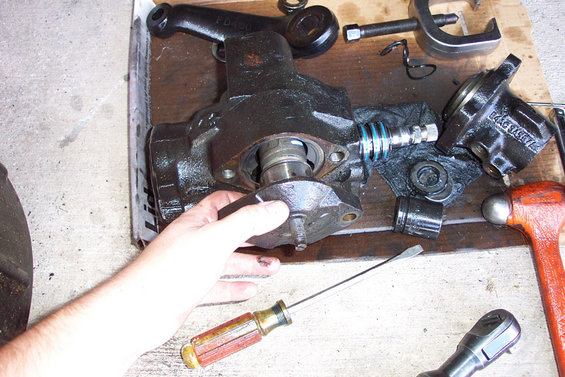
Remove the two bolts that hold the sector shaft in, then drive it up from the bottom. Do NOT remove the adjusting nut like I did. The sector shaft must be centered (gearbox centered) in order for you to remove it.
![Image]()
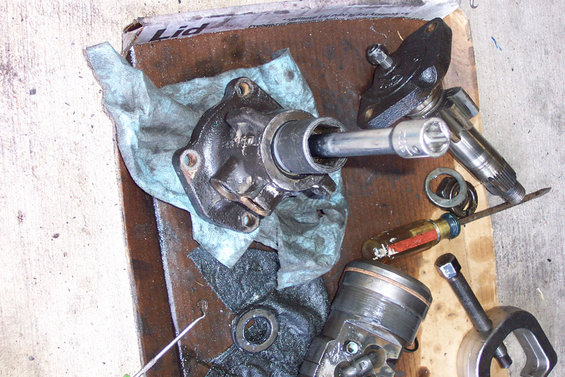
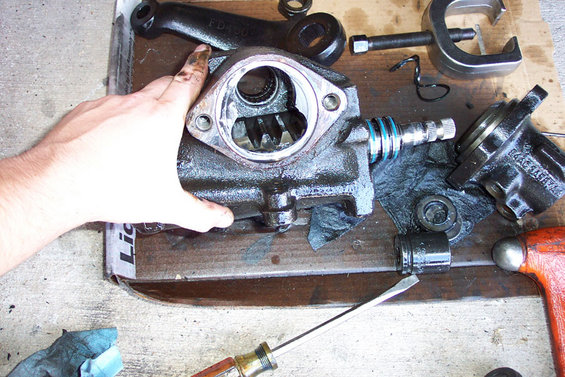
Here it is with the sector shaft out. You can now pull the piston and worm gear straight out of the box.
![Image]()
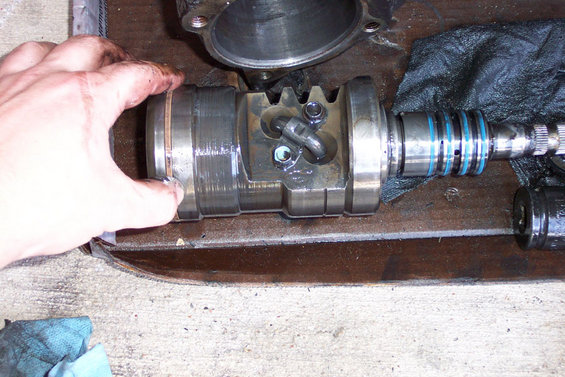
Here is the piston with worm gear installed. Remove the two bolts, and then the two half-moon ball bearing guides. Rotate the worm gear to drive out all of the balls. Do not lose any of them or you'll be sorry.
![Image]()
Here is the worm drive. You will need to cut or slide off the old teflon seals and install the new ones, being careful not to stretch them too much. You will have to stretch them, but they will shrink back to size after sitting for a while.
![Image]()
Reinstalling the worm gear. Notice that the ball retainer is not installed yet. You will need to rotate the worm gear back and forth to get all the balls in.You will need to remove the teflon seal at the bottom of the piston, and the o-ring underneath it. Replace both of these with new ones from the kit.
![Image]()
Here is the piston and the valve body, ready for reinstallation.
![Image]()
Remove the o-ring over the sector shaft, then remove the seals. You may have to use a pick to remove the rubber around the o-ring in order to compress it enough. You'll see what I mean when you try it.
![Image]()
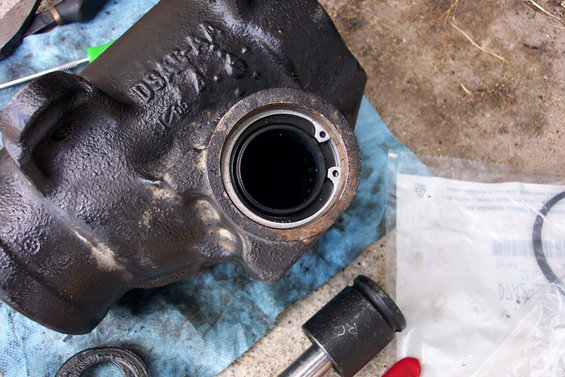
Install the new sector shaft seals. This is the correct orientation. That lip is what makes the old snap ring difficult to remove. Again, just drive the seal far enough in to clear the snap ring.
![Image]()
Here are the new seals and snap ring installed.
![Image]()
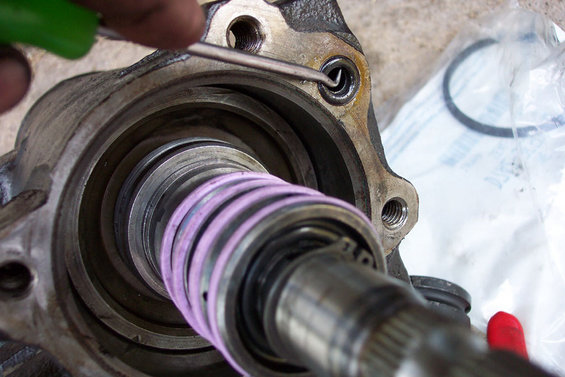
Reinstall the piston and position it like this. I found it helpful to coat the teflon ring in fresh power steering fluid before installing.
This is where you will use the final seal from the sector shaft kit.
![Image]()
Don't forget to replace this small o-ring before reinstalling the valve body.
Lubricate the four teflon rings with fresh power steering fluid before reinstalling the valve body. There are stamped indentations in the large nut for the worm gear/valve body; keep tightening the nut until one lines up perfectly with the set screw hole.
Final note: you may have to rotate the piston slightly to get the sector shaft reinstalled. It will be obvious when you go to install it.
![Image]()
Here is the empty gearbox
![Image]()
Here is the sector shaft itself
![Image]()
Here are my ex-snap ring pliers. Time to invest in some Snap-On ones.
![Image]()
Input shaft seal kit

Input shaft seal kit. There are lots of pieces, but you will have three left over.
Sector shaft seal kit
Sector shaft seal kit. You will use all of the pieces.

The gearbox removed from the vehicle

Remove the valve body bolts
Pry out the dust cap

Remove the snap ring
Separate the valve body. Just underneath it, there is an allen-head set screw. Remove this, and then you can use a drift and hammer to remove the large nut that holds the worm drive into the valve body. Sorry, no pics of that.
Use a large socket and extension to drive the bearing and seal out of the
valve housing. This shows how they are oriented relative to each other.
Here is the valve body by itself. There is a large o-ring that goes between this and the gearbox.
Reinstall the bearing, then drive the seal just far enough in so that you can reinstall the snap ring.
Reinstall the dust cap in this orientation.
Remove the two bolts that hold the sector shaft in, then drive it up from the bottom. Do NOT remove the adjusting nut like I did. The sector shaft must be centered (gearbox centered) in order for you to remove it.
Here it is with the sector shaft out. You can now pull the piston and worm gear straight out of the box.
Here is the piston with worm gear installed. Remove the two bolts, and then the two half-moon ball bearing guides. Rotate the worm gear to drive out all of the balls. Do not lose any of them or you'll be sorry.
Here is the worm drive. You will need to cut or slide off the old teflon seals and install the new ones, being careful not to stretch them too much. You will have to stretch them, but they will shrink back to size after sitting for a while.

Reinstalling the worm gear. Notice that the ball retainer is not installed yet. You will need to rotate the worm gear back and forth to get all the balls in.You will need to remove the teflon seal at the bottom of the piston, and the o-ring underneath it. Replace both of these with new ones from the kit.

Here is the piston and the valve body, ready for reinstallation.

Remove the o-ring over the sector shaft, then remove the seals. You may have to use a pick to remove the rubber around the o-ring in order to compress it enough. You'll see what I mean when you try it.
Install the new sector shaft seals. This is the correct orientation. That lip is what makes the old snap ring difficult to remove. Again, just drive the seal far enough in to clear the snap ring.
Here are the new seals and snap ring installed.
Reinstall the piston and position it like this. I found it helpful to coat the teflon ring in fresh power steering fluid before installing.
This is where you will use the final seal from the sector shaft kit.

Don't forget to replace this small o-ring before reinstalling the valve body.
Lubricate the four teflon rings with fresh power steering fluid before reinstalling the valve body. There are stamped indentations in the large nut for the worm gear/valve body; keep tightening the nut until one lines up perfectly with the set screw hole.
Final note: you may have to rotate the piston slightly to get the sector shaft reinstalled. It will be obvious when you go to install it.
Here is the empty gearbox
Here is the sector shaft itself

Here are my ex-snap ring pliers. Time to invest in some Snap-On ones.


