Bronco Forum - Full Size Ford Bronco Forum banner

6R80 Transmission Swap Info

162K views 243 replies 32 participants last post by  Burntoutaccountant  
#1 · (Edited by Moderator)
Not really a section for this so chose to post this in Nobbie section. If mods think it belongs elsewhere please move it.

I have been considering swapping to a 6R80 6 Speed automatic transmission. Currently my plan was to use a ZF5-47 manual transmission, but behind the modified Big Block Ford I think it's life would be short lived. Besides my old legs and hips just can't handle city driving with a manual transmission. The 6R80 has a double overdrive so engine rpm can be lower at highway cruise speed. Hoping for something around 2000-2500 rpm. First gear is lower than what the C6 or AOD would offer and about the same as the ZF5. The 6R80 torque converter is a lockup style and aftermarket convertors are available with multi-disc lock up.
Gear Ratios:
  • 1st 4.171
  • 2nd 2.344
  • 3rd 1.521
  • 4th 1.143
  • 5th 0.867
  • 6th 0.691
  • Rev 3.403

These transmissions can be found in a variety of vehicles. No you might not find one in your local Pull-A-Part or LKQ. Salvage yards may want a premium for a late model one.

So far my research has turned up the following donor vehicles. Please correct me if I am wrong.
  • 2009–present Ford F-150
  • 2009–present Ford Expedition
  • 2009-2010 Explorer
  • 2009–present Lincoln Navigator
  • 2009-2010 Mercury Mountaineer
  • 2011-2017 Ford Mustang V6, GT, Ecoboost(15-17)
  • 2011-present Ford Ranger 2.2L, 3.2L
  • 2015-present Ford Transit

Naturally if swapping into a Bronco you would be looking for a 4WD model, but don't worry if you can't find one. You can use a 2WD model with just swapping the tailshaft housing as the output shaft is the same.

Do not think of this transmission as a weak late model transmission. In stock form can easily handle 500-600 HP with a good quality rebuild and improved clutch discs. There are no clutch bands in the 6R80 like the C6 has. It is all handle by clutch to clutch switching.

Now for the bad points.

I guess for most cost is going to be a concern. This is not a cheap swap, expect to spend a minimum of $2500 plus whatever the rebuild cost you.

Currently there is not a transfer case adapter to fit the NP205 transfer cases. I have been in contact with the person that designed the 6R80 to Dana 20 transfer case adapter for Advance Adapters. We have discussed the possibility of designing one for the NP205 transfer case, and he seemed open to the idea.
50-3901 : Ford 6R80 to BRONCO DANA 20 ADAPTER KIT | Advance Adapters

The output shaft of the 6R80 is 31 spline so it will mate directly to the Ford NP205 input. If your transfer case has a different input shaft spline count, the original 31 spline input is no longer available, but a two piece input shaft and gear is available new from Advance Adapters.
716044-F : GEAR-INPUT FORD NP205 31 SPLINE | Advance Adapters

The 6R80 is electronically controlled from the factory ECU. There is a standalone controller available from U.S.Shift that can be used with a carb or EFI engine. These are the same people that offer the controller for the AOD-E.
Quick 6 Clutch-to-Clutch Transmission Control

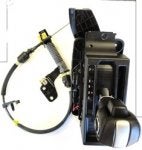
You will need a shifter to match the transmission. I haven't seen anyone convert a column shifter for use with the 6R80 so you will need a floor shifter. There are several options out there even from GM. Some of you may recognize the shifter PRNDS or PRDM. I believe it was designed by ZF for Ford and GM. There are variations out there but the assembly is the same just the mount is different. Most likely candidate is from a Mustang or Malibu. Notice the button on the side of the shifter, that is for manually shifting, bump up or down. For those that want to get fancy there are paddle shifters that will work with the controller, but you will still need floor shifter.

Image


Block adapters are available for either Small Block of Big Block. I would recommend that you also buy the block plate and flexplate from the same source as it may effect fit of torque converter and starter. Some block plates are dual fit, they will work with either automatic or manual trans starter.

You will need an oil cooler adapter to fit the transmission. There are several sources for these. Cooler lines need to be a minimum of 1/2" or -8AN or you will have shift problems because of the cooling circuit design. No reusing your existing 1/4 or 5/16 inch cooler lines.

The 6R80 is considered a sealed for life transmission. There is no way to check trans fluid without placing vehicle on a lift. There is no dipstick. If you would like one, B&M makes a nice sealed locking dipstick that you don't have to worry about puking transfluid out of.
B&M 22200 B&M Locking Automatic Transmission Dipstick & Tube - Billet Aluminum/Stainless Steel Braided

Info and Parts sources:
Designer of transfer case adapter. Also source for salvage swap parts. Builder of the Raptor Bronco and 6R80 swaps in EBs.

Source for complete trans swap kits and components including block adapters, block plates, flex plates.
Performance Automatic

Top of the line torque converters. Notice I did not say cheap! Hang on to your wallet.
Circle D Specialties. Ford

Transmission parts and swap components.

Transmission components

Transmission components
BCA Transmissions Online Storefront

Paddle Shifter you will still need the floor shifter
Paddle Shifters - Twist Machine

Proof these aren't weak weeny transmissions and expert builder. Not saying you need his billet parts but he does build some great transmissions without his billet parts.
Build 6R80 Six-Speed Autos For 7-Second Runs With These Billet Bits


That is it so far if anyone has anything else to add or question please feel free.
 

Attachments

#159 ·
Agreed
 
#160 ·
Here is the front drive shaft fully compressed.

IMG_20201024_132958.jpg

Here is the rear fully extended. Remember this is a nine inch rear.

IMG_20201024_133111.jpg IMG_20201024_133121.jpg
 
#161 ·
I decided to have my pilot machined down ans a press on bushing made to extend the pilot. Here is the bushing being made. It will add 3/8" to the length of the pilot.

PXL_20201027_191653049.jpg

This is the adapter he made to go inside the tube so he wouldn't damage the outer surface.

PXL_20201027_191701448.jpg

You can see he has turned down the diameter of the Pilot. He is going to press the bushing on.

PXL_20201027_191713924.jpg

A couple more pics

PXL_20201027_191707814.jpg PXL_20201027_191705673.jpg

I also dropped the front driveshaft off to be cut and balanced. They said $50 to do it. I've decided this is the way to go for now. I feel this will act as a sheer pin for the front axle. I just think the u-joints in the front drive shaft are tiny. I haven't given them the final length yet. I still need to fully compress the suspension to verify that length. It looks like it will be the shortest compressed and the rear seems to be the shortest at full droop.
 
  • Like
Reactions: canuckistan97
#162 ·
Here is the finished product.

PXL_20201028_201904617.jpg PXL_20201028_201859467.jpg PXL_20201028_201848364.jpg PXL_20201028_201852892.jpg
 
#163 ·
I can turn the engine over now but there is no play between the TC and the flywheel. I was pretty bummed at this point. Mind you I am doing this myself so disassembling and reassembling is a lot more difficult that it used to be. Anyway, I pulled it back apart checked the pilot to make sure it wasn't buried and binding in the crank. It was not. It say it's perfect. Sooooo that leaves the, as Hillbilly stated, goofy assed threaded things are too long. I verified this by using grade 8 1/2" washers as spacers for the bell housing. These are slightly thinner than the engine spacer plate which I may reinstall. You can see the gold color in these pics

PXL_20201029_211359498.jpg PXL_20201029_211349225.MP.jpg PXL_20201029_211327455.jpg

Here is the result. I threaded one TC nut just to touch the flex plate. I then tightened the rest. Here is how much play I have now. Funny it's the exact thickness of the washers I installed.

PXL_20201029_210834758.jpg PXL_20201029_210800220.jpg
I'm going to install the engine spacer/ dust cover and all should be good.

If I am someone looking to do this swap and reading what I am doing to make it work, I probably would have punted on the idea. I'm way to deep now so I hope it's everything I am expecting.
 
  • Like
Reactions: Hillbilly Heaven
#164 ·
I made a bone head mistake. I put the spacer plate on and got everything bolted down. I have the correct amount of play between the TC and the flex plate. The problem is as I was tightening the last TC nut I noticed the starter hole didn't line up the Trans adapter corrects the starter location. It never crossed my mind until I glanced over at it. I said a few choice words then relaxed on my creeper for a minute. I grabbed my phone to take a pic of my error so you all don't do the same. Here is the spacer installed.

PXL_20201030_201754044.jpg

Here is the depth of the new pilot extension. You can see the wear marks to tell how far it inserted in the crank.

PXL_20201030_201837504.jpg PXL_20201030_201847316.jpg

This is pics of the f'up.

PXL_20201030_214529484.jpg PXL_20201030_214525058.jpg PXL_20201030_212153233.jpg PXL_20201030_212031282.jpg

I like having the spacer because is closes in the flex plate. It looks like I will be able to use the original dust cover at the bottom.

PXL_20201030_212129468.jpg

One of the many things I don't like about this adapter kit is the way it leaves gaps at the top and nearly 1/3 of the flex plate exposed at the bottom. The spacer plate closes everything off.


Attachments
 
#165 · (Edited)
Finally finished with the install. I still have to figure out a shifter and buy the controller. I ended up cutting the starter area away on the spacer. I smashed a piece of fuel tube in the gap at the top of the adapter. I will cut some sheet metal to make a panel to close in the bottom. I also want to make a cover for the starter area. If you do this swap make sure you take more time than I did and slowly remove material from the bell housing. You could make this fit right to the starter. Here are a few more pics.


I copied these from my build thread to keep all the trans info in one place. I'm jumping around doing other stuff that would convalute the trans info. I'm going to move on to other things on my build. When I do things that include or effect the trans I will copy it here.
 
  • Like
Reactions: canuckistan97
#167 ·
I have no idea. I found it in the corner of the shop. If I was going to bet I would say auto. Either way it needs to be removed because it shims the starter back away from the flywheel. The block adapter was designed to have the starter bolted directly to it.
 
#168 ·
Time to provide some transmission cooler info.

Warning!! Do NOT plumb your 6R80 thru the cooler built into the radiator. It restricts the flow to the transmission. Also there is always the possibility of the coolant leaking into the transmission. Minimum coolant line size is 1/2 inch or -8 AN.

Selecting a cooler for the 6R80 is bit more complex than for your C6 or AOD. No cooler with push on barb or pipe fittings are going to cut it. You need -8 AN fittings. Cooling the 6R80 isn't cheap. Expect to spend $400 to $600 on cooling components.

First you need an adapter at the transmission for fittings.
There are a couple of good ones and a handful of marginal ones. I disregarded ones that used pipe fittings like Power By the Hours adapter.
Here are my two favorites. Either one will work, choice of which one is really based on which one is in stock.

First choice is from Fat Fender Garage, I like it because it has the temp sensor port built into the outlet port. It reduces some extra plumbing and an adapter. It is a beautifully machined and appears to be all one piece. Not a bunch of separate pieces, fittings and brackets. Reduces the amount of point of failures.


You want to select the "Cool-Sensor Port and Temp Sensor" I do not like their cooler because it is just a tube and fin type cooler and has brazed fittings. I would expect better of a cooler for the money.

Image
Image
Image
Image


My 2nd choice would be the cooler adapter manifold from Bowler Transmissions. Also a nice billet machined piece. It may or may not use O'ring AN adapter fitting. Pics show it both ways.This is better than the ones that use pipe fittings. It will require a temp sensor port adapter I will get to later.


Image
Image

Image


This adapter will require an additional fitting to control the cooling fan. You will need to select 8AN as the size and either 180 or 190 as the temp. Myself I would pick 190. It must be mounted to the lower fitting at the transmission or the same line at the cooler. It should be sensing fluid out temperature.

Now onto the cooler. Some may cringe at my recommendation and their butt cheeks may clamp shut. You have made it this far and shelled out significant dollar amount already. No need to ruin it with a cheaper inferior cooler.

This is the cooler you really need. you need the 500 Series 20 Row with the fitting adapters for the -8AN fittings. Also you will not need mounting brackets, but you will need the 520 Fan shroud with the 9 inch suction or pusher fan depending on where you are mounting the cooler. Go ahead an order the Spal fan relay kit it will help protect your temp sensor. One feature I like is the fittings are on the side so makes plumbing much neater. Not to scare you but I came in at $565.

Image
Image

Image
Image

Image


For plumbing I have nothing but great things to say about XRP ProPlus XK hose with aramid braid. It is smooth bore PTFE with convolutes in the outside of the PTFE tube under the braid. The smooth bore means more flow and with the convolutions on the outside of the tubing it is still flexible without kinking. You don't need crimp fittings. Use the XRP Race Reusable fittings. Never mix brands of hoses and fittings. Everyone has slightly different specs. We have tested this hose on our fuel pump flow bench at the shop and it really does outflow other brands.
 
#190 ·
Time to provide some transmission cooler info.

Warning!! Do NOT plumb your 6R80 thru the cooler built into the radiator. It restricts the flow to the transmission. Also there is always the possibility of the coolant leaking into the transmission. Minimum coolant line size is 1/2 inch or -8 AN.

Selecting a cooler for the 6R80 is bit more complex than for your C6 or AOD. No cooler with push on barb or pipe fittings are going to cut it. You need -8 AN fittings. Cooling the 6R80 isn't cheap. Expect to spend $400 to $600 on cooling components.

First you need an adapter at the transmission for fittings.
There are a couple of good ones and a handful of marginal ones. I disregarded ones that used pipe fittings like Power By the Hours adapter.
Here are my two favorites. Either one will work, choice of which one is really based on which one is in stock.

First choice is from Fat Fender Garage, I like it because it has the temp sensor port built into the outlet port. It reduces some extra plumbing and an adapter. It is a beautifully machined and appears to be all one piece. Not a bunch of separate pieces, fittings and brackets. Reduces the amount of point of failures.


You want to select the "Cool-Sensor Port and Temp Sensor" I do not like their cooler because it is just a tube and fin type cooler and has brazed fittings. I would expect better of a cooler for the money.

Image
Image
Image
Image


My 2nd choice would be the cooler adapter manifold from Bowler Transmissions. Also a nice billet machined piece. It may or may not use O'ring AN adapter fitting. Pics show it both ways.This is better than the ones that use pipe fittings. It will require a temp sensor port adapter I will get to later.


Image
Image

Image


This adapter will require an additional fitting to control the cooling fan. You will need to select 8AN as the size and either 180 or 190 as the temp. Myself I would pick 190. It must be mounted to the lower fitting at the transmission or the same line at the cooler. It should be sensing fluid out temperature.

Now onto the cooler. Some may cringe at my recommendation and their butt cheeks may clamp shut. You have made it this far and shelled out significant dollar amount already. No need to ruin it with a cheaper inferior cooler.

This is the cooler you really need. you need the 500 Series 20 Row with the fitting adapters for the -8AN fittings. Also you will not need mounting brackets, but you will need the 520 Fan shroud with the 9 inch suction or pusher fan depending on where you are mounting the cooler. Go ahead an order the Spal fan relay kit it will help protect your temp sensor. One feature I like is the fittings are on the side so makes plumbing much neater. Not to scare you but I came in at $565.

Image
Image

Image
Image

Image


For plumbing I have nothing but great things to say about XRP ProPlus XK hose with aramid braid. It is smooth bore PTFE with convolutes in the outside of the PTFE tube under the braid. The smooth bore means more flow and with the convolutions on the outside of the tubing it is still flexible without kinking. You don't need crimp fittings. Use the XRP Race Reusable fittings. Never mix brands of hoses and fittings. Everyone has slightly different specs. We have tested this hose on our fuel pump flow bench at the shop and it really does outflow other brands.
What do you think about this cooler? 30 row.
 
#169 ·
The 6R80 has an internal thermostat for cooler bypass. I has a major flaw and everyone I know that is building these transmissions are eliminating the thermostat.
The flaw is when the thermostat fails it fails in the closed position meaning that there is no fluid going to the cooler resulting in a ruined transmission. This is the reason for the temperature controlled fan on the cooler.
There are several bypass kits on the market any of them will work.
The most common is the Superior Transmission Parts STL009 Sure Cool bypass control valve. Not expensive about $40


Online source for it.

Installing does require removing the pan and filter plus the valve body assembly. Best to do it on the bench as there are parts that are held in by the valve body assembly. It is a simple drop in job once you drop the valve body assembly. You do not I repeat do not have to disassemble the valve body itself There are some seals that you need to be aware of. Now would be the perfect time to replace the seals that you can also get from Global. Nothing complicated you just to pay attention and move slowly. Not a job to be rush.
Here is a video that show what is actually required to do the job.
 
#170 ·
You are the man!
 
#172 ·
If it is mounted in front of the condenser does it need a fan?
 
  • Like
Reactions: TS 90F150
#173 ·
173124


I found this picture. In an Off Road article. Maybe I can fit something or 2 something's in there.
 
  • Like
Reactions: TS 90F150
#174 ·
The only way I think a cooler without a fan would work in this particular use would be if the top bottom and side gaps between radiator condenser and cooler were covered. It doesn't have to be fancy OEMs use rubber or plastic. Same material that is used in some front fender wells to fill the gap between fender well and frame.

Trust me I have been fighting the problem with my 79 with coolers for trans oil and pwr steering. I did find a nice power steering cooler that does make it easier.

The cooler and fan combo I posted above is only 4-1/4" thick so I think it would be fine behind the grill. The cooler itself is 9-3/4 tall by 11-1/2 wide add probably 3 inches to height for fan shroud flanges.
 
#175 ·
The only way I think a cooler without a fan would work in this particular use would be if the top bottom and side gaps between radiator condenser and cooler were covered. It doesn't have to be fancy OEMs use rubber or plastic. Same material that is used in some front fender wells to fill the gap between fender well and frame.

Trust me I have been fighting the problem with my 79 with coolers for trans oil and pwr steering. I did find a nice power steering cooler that does make it easier.

The cooler and fan combo I posted above is only 4-1/4" thick so I think it would be fine behind the grill. The cooler itself is 9-3/4 tall by 11-1/2 wide add probably 3 inches to height for fan shroud flanges.
Those dimensions sound like they will work. I have an aftermarket mesh grill that I will be using. That will give me more space.
 
#176 ·
Did we cover external filters yet? If not fire away. I'm trying to get parts together.
 
  • Like
Reactions: CDA 455
#177 ·
Nope we hadn't because they are not required. Remember you want no restriction in the cooler lines and that includes filters.

While we are on bits and pieces I want to add some items to the list. Pans and Dip Sticks.

There are a few different pan options out there. Anyone of them will work, it is more less personal preference. All of them add additional capacity which means better cooling. Although they are deeper they all keep the filter height the same as factory. None of them lower the filter.

First up and my choice is the pan from AFE. It adds 7 additional quart capacity. It also has a temperature sensor port which I recommend adding.
Transmission Pan, Machined Fins

Mag-Hytec adds 4 quarts with temperature sensor port.

B&M adds 3.25 quarts and has a temperature sensor.

PML Covers adds 3 quarts and $45 charge to add temperature sensor port.

You may have noticed the 6R80 doesn't have a traditional dipstick. Reason being that it is what is considered "Filled For Life" by Ford.
I highly recommend changing out the tiny dipstick on the side of the transmission. The only way to check fluid level when hot while running is either crawling under the vehicle or on a lift.
There are a few dipsticks options out there but I consider only one is practical for us.

B&M makes a nice locking dipstick that is firewall mounted.
I recommend following the directions on installing exactly no shortcuts. There is a possibility of hot trans fluid puking all over you. NEVER NEVER remove the factory dipstick when hot and not running. Fluid has expanded and will pour out of the dipstick hole. Only remove hot with engine running. Now you see why you need a firewall mounted dipstick.
 
#178 ·
I already have that dipstick. Got it for Christmas. I'm still undecided on the pan.
 
#179 ·
Have we covered everything? Is there anything else I need to consider?
 
#181 ·
Yes there were problems with the lead frame (the plastic part that holds the sensors, range sensor, and contacts for solenoids). In particular it was the very early models pre 2011 with the ECM inside the transmission that had problems. Also there has been some updates to the lead frame for the 2011-2018 models. There was a recall or two to update the lead frame.

The Ford part number I have for the lead frame is al3z-7g276-d. There maybe later revisions I don't know. This part number is no longer available from Ford. Supposedly to order a lead frame assembly from a Ford Dealer you had to give him the VIN number of the vehicle which makes finding the right part difficult if you don't know the VIN.

There is one possible solution.
Dorman offers a lead frame for the 6R80. I don't know of anyone that has used one so like any aftermarket part supplier there is a risk. Notice Dorman calls it a conductor plate. I don't know if that is for legal reasons or not.

There is an additional part I would recommend is the electrical connector sealing sleeve. Might be wise to replace it even if not replacing the lead frame.
 
#183 ·
At that point I would question the harness connector. Sometimes a leaky lead frame or sleeve will allow transmission fluid to seep into the connector. I would suggest using some brake cleaner and clean the connector. Having the same problem with 2 new lead frames suggest that there is problems with the connector. This can also cause fluctuations in the output shaft speed sensor.
 
#184 ·
2011 F-150
 
#185 ·
Mine is from a 2011 F-150.
 
#188 ·
Contact Performance Automotive and explain to them what you have. You will face some serious challenges using the Performance Automotive swap kit just ask SHOme. Especially in the mating of the torque convertor to the flexplate and pilot adapter.