I hope everyone knows about the two major issues with the B/W 1356 T-Case. #1 Pump arm failure. (Actually the case web fails)
#2 Worn, busted shift forks. (Can be caused by #1)
They have been written up in several threads. (Do a search)
I have found a third problem on the manual shift T-Cases. (This wont happen on a electric shift) It showed up on two of my four T-Cases. (I have two trucks and two "back up" T-Cases. The one I wore out and the other was like this when I got the case from a yard.
The problem is the case bushing where the shift arm goes through. Actually I dont know if theres a bushing there. It may be just a hole in the housing gets worn. If you have a situation where the T-Case works in 2WD high range and 4WD low range, but not in 4WD high, You have the begining phase of this problem. If left like this, it eventually will lose all shift.
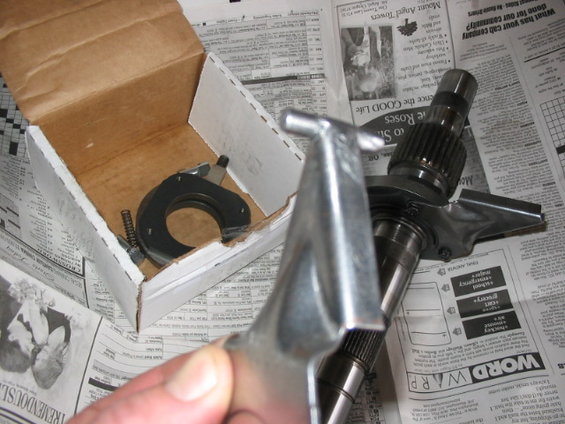
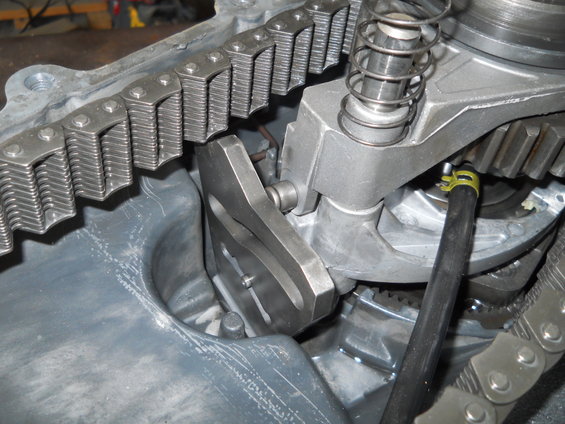
Let me show you whats happening. The shift arm that is outside the case has a shaft that goes through the housing and attaches to a "shift plate". The shift plate is what moves your shift forks. Here you see me holding it where it should be.
![Image]()
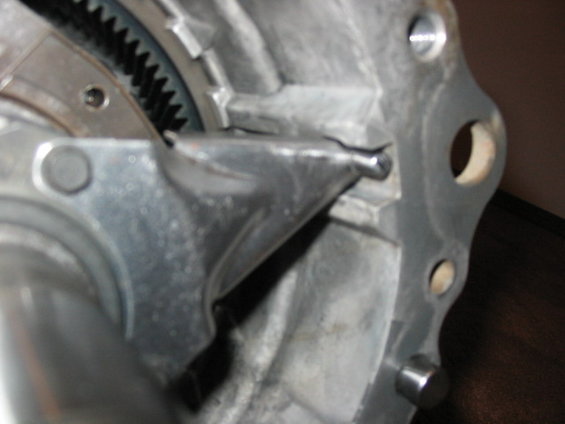
The plate is designed to pivot Northwest to Southeast in this pic to shift. If the housing gets worn, the shift plate can "pivot" Southwest to Northeast. As you can see here, the fork knob is just about to fall out of the plate.
![Image]()
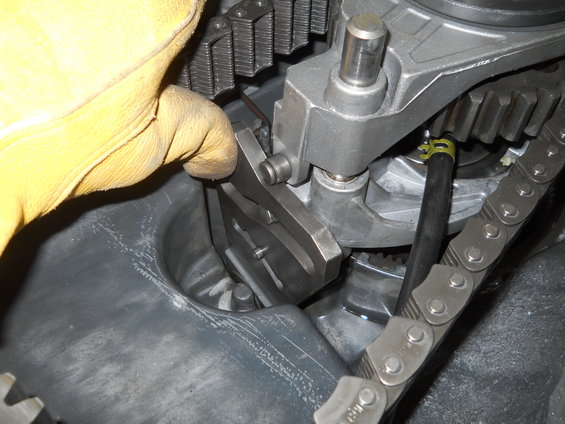
If the knob falls out of the plate, you will lose the top arm which controls 2WD to 4WD.
![Image]()
That top arm moves up or to you in this pic to get 4WD. The spring will keep it in 2WD. If you shift in to low range, the lower arm will move up and push the top arm in to 4WD. Thats why you have 2 high and 4 low. But eventually, the plate can pivot enough to lose all control of the lower arm also.
I dont have a fix for this yet. I got two cases to experiment with. When I get time, I will tare them apart and see what I can do. I will post to this thread what ever I come up with. if someone else has allready dealt with this, feel free to post your fix.
But for now, when you take your case apart to fix the pump arm or shift forks, be sure to check this. There is a big spring that holds the plate so it doesnt pivot eazy and you might not even notice that there is a problem. (untill your 400 miles from home and you bust a driveshaft and think "I can just drive in 4WD high range". NOT)
#2 Worn, busted shift forks. (Can be caused by #1)
They have been written up in several threads. (Do a search)
I have found a third problem on the manual shift T-Cases. (This wont happen on a electric shift) It showed up on two of my four T-Cases. (I have two trucks and two "back up" T-Cases. The one I wore out and the other was like this when I got the case from a yard.
The problem is the case bushing where the shift arm goes through. Actually I dont know if theres a bushing there. It may be just a hole in the housing gets worn. If you have a situation where the T-Case works in 2WD high range and 4WD low range, but not in 4WD high, You have the begining phase of this problem. If left like this, it eventually will lose all shift.
Let me show you whats happening. The shift arm that is outside the case has a shaft that goes through the housing and attaches to a "shift plate". The shift plate is what moves your shift forks. Here you see me holding it where it should be.
The plate is designed to pivot Northwest to Southeast in this pic to shift. If the housing gets worn, the shift plate can "pivot" Southwest to Northeast. As you can see here, the fork knob is just about to fall out of the plate.
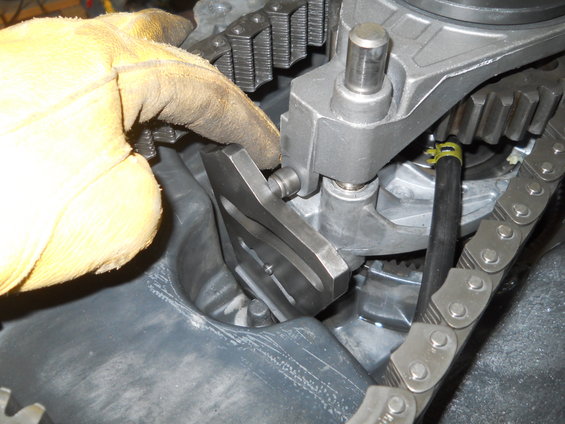
If the knob falls out of the plate, you will lose the top arm which controls 2WD to 4WD.
That top arm moves up or to you in this pic to get 4WD. The spring will keep it in 2WD. If you shift in to low range, the lower arm will move up and push the top arm in to 4WD. Thats why you have 2 high and 4 low. But eventually, the plate can pivot enough to lose all control of the lower arm also.
I dont have a fix for this yet. I got two cases to experiment with. When I get time, I will tare them apart and see what I can do. I will post to this thread what ever I come up with. if someone else has allready dealt with this, feel free to post your fix.
But for now, when you take your case apart to fix the pump arm or shift forks, be sure to check this. There is a big spring that holds the plate so it doesnt pivot eazy and you might not even notice that there is a problem. (untill your 400 miles from home and you bust a driveshaft and think "I can just drive in 4WD high range". NOT)