

So, apparently on New Year's Day of 2007, I changed my transmission fluid and filter, and took a bunch of pictures. Then I apparently ignored those pictures for a long time, until about July of 2007, when I resized and cropped them. Then I ignored them some more, until tonight, when I uploaded them to Supermotors, and wrote this howto. Whaddaya want for free, anyway? 🤣 (Thanks to DEMIGOD for the final kick in the butt to get this thing done.)
Here we go, then, changing fluid and filter on an E4OD (including the torque converter) (specifically my 1994 5.0L MAF XLT, not that that makes much difference in this case):
First things first, safety safety safety. Set your parking brake, and since I don't trust your parking brake, chock your wheels. Some things that we will do in this writeup will require your transmission to possibly be in gear with not quite enough fluid in it, which means it could roll uncontrollably as though it were in neutral. Set the parking brake and chock the wheels.
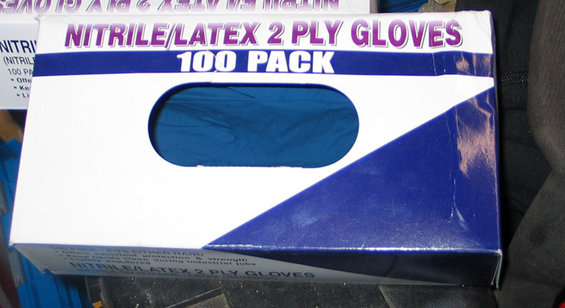
Wear gloves. I wear these:
![Image]()
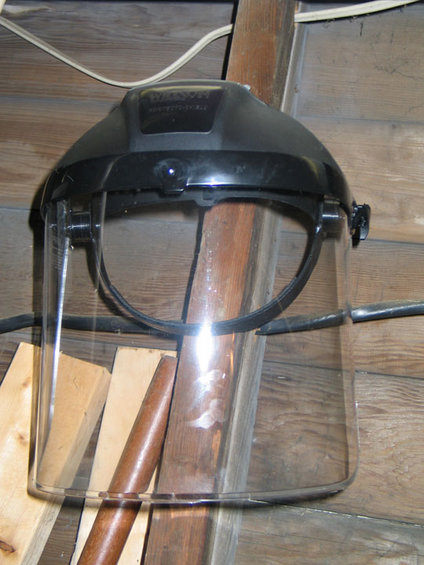
Wear eye protection, goggles or face shield or whatever.
![Image]()
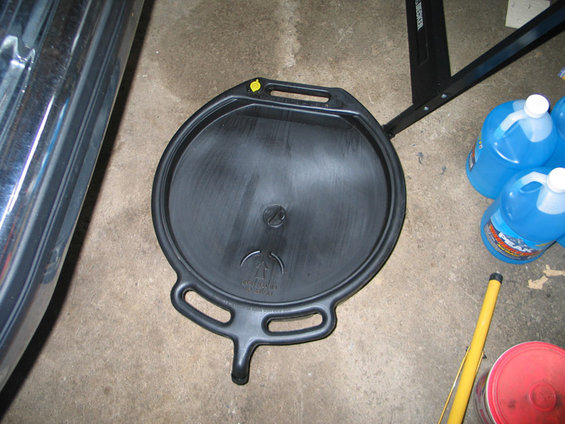
You'll want quite a large drain pan. I use this one:
![Image]()
A goodly amount of cardboard to protect your work floor would be helpful, too.
You'll need a filter replacement kit, preferably one that includes a new gasket. I like the rubber gaskets, myself. Some people prefer the cork. (I have no idea why I didn't take a picture of the filter kit part number.)
Edit:
need4racin gave this filter part number info:
MOTORCRAFT Part # FT113 - 2wd E4OD
MOTORCRAFT Part # FT114 - 4x4 E4OD, 2wd & 4x4 4R100
end of edit
You'll need some Mercon compatible transmission fluid (rather a lot, really). This is what I use:
![Image]()
I buy 2 cases of it (24 quarts). Stated capacity of the E4OD is 16.2 US quarts, but with the added external filter and large cooler, I figure it's better to have plenty of extra. Ford specifies Mercon, but I believe that a TSA came out recently that said that Mercon-V is usable in transmissions that formerly required Mercon. I just buy Mercon-compatible and leave it at that. You can do as you like, just don't blame me.
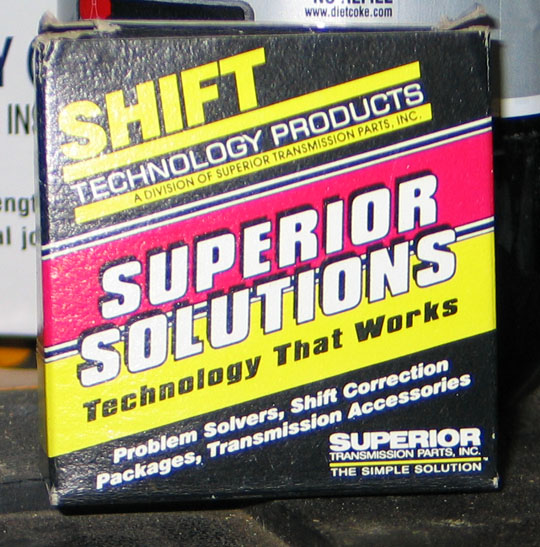
If you haven't already installed a filter clip, get one now and install it during this filter change. The E4OD is known for the filter dropping out of the valve body into the pan, and causing problems. The best-known symptom of this is that the truck stalls whenever you shift into reverse. There's a simple fix, though, and here it is:
![Image]()
![Image]()
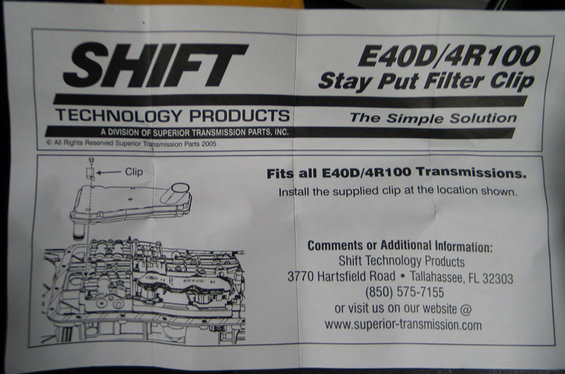
Inside that package you will find a couple of these simple sheetmetal clips, and a single page of instructions.
![Image]()
![Image]()
![Image]()
You only need one clip per transmission. I think I paid $4 for 2, plus shipping.
(That link is http://www.superior-transmission.com.)
(Wait, no, that's the manufacturer and they don't sell retail. Here's where I bought them: PATC Ford Transmissions, C6, AOD, 4R70W, 4R100, 5R110W and others)
My old pan is missing something.
![Image]()
A drain plug. I bought a new pan from Ford for about $45 or so. (You don't have to, and if you don't, just ignore the stuff in here about "new pan/old pan".)
![Image]()
(for searching purposes, that's an E4OD/4R100 4x4 trans pan with drain plug, part # F81Z-7A194-BA )
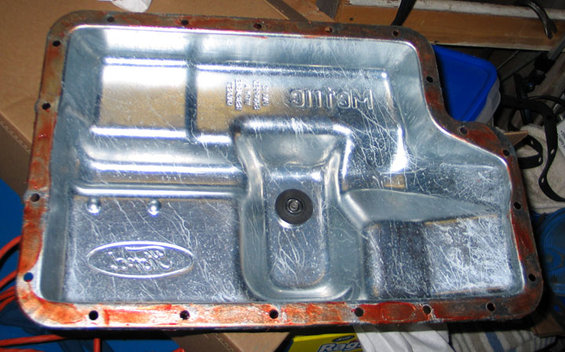
Looks like this:
![Image]()
Pull out the dipstick, clean it, and set it aside someplace where you won't bend or lose it. My dipstick looks like this:
![Image]()
and fits in here (on the passenger side of the engine):
![Image]()
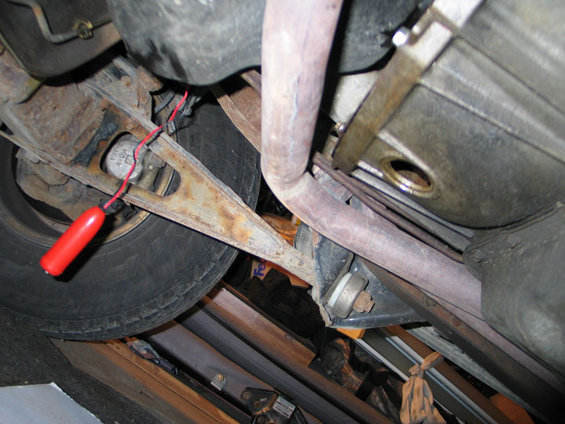
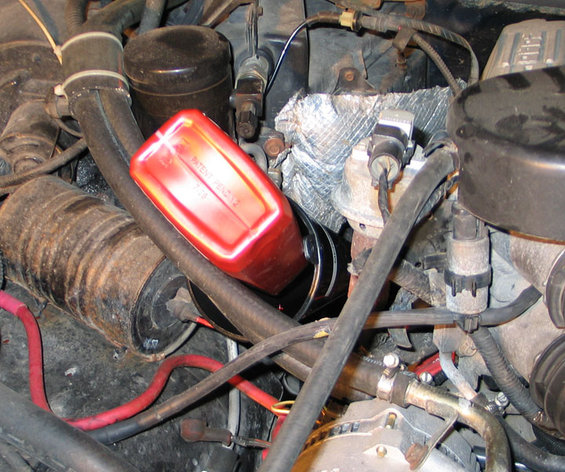
We'll start by draining the torque converter. (You don't have to drain the TC every time you change your fluid, but it's pretty easy.) The TC is bolted to the flexplate on the back of the engine, and spins with the engine. The drain plug is in the "side" of the torque converter, and we'll need to turn the engine over to line the plug up with the access hole. Here's the access hole cover (circled in red) in the bottom of the bell housing:
![Image]()
It's a rubber plug. Use caution removing it, so that you don't push it into the bell housing, and so that all the gunk that has collected above it doesn't cover your face when you get it out. If you do push it into the bell housing, you can remove the dust cover behind the exhaust crossover and get it back out.
I'm lazy, so I use the electric motor that the Ford Motor Company kindly attached to the engine to turn it. (You could also put a wrench on the balancer bolt on the front of the crankshaft, but for me this is easier.) See ignition upgrade and timing bump (no 56K) for instructions on how to hook up your remote ignition switch (and disconnect the coil wire, just to be sure), then dangle the switch down where you can reach it under the truck and it won't get caught in any belts or anything.
![Image]()
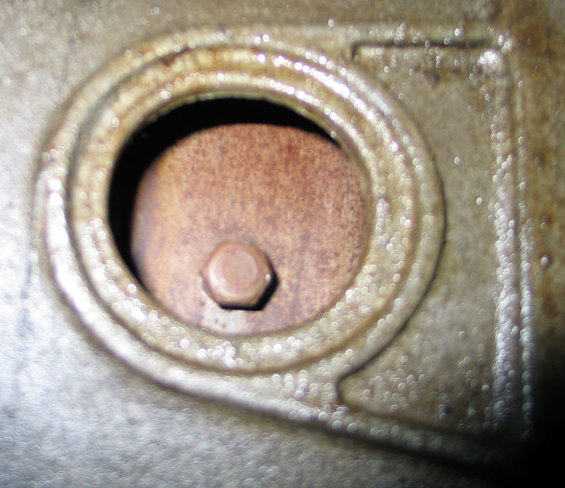
You need to bump the engine around until the drain plug shows up in the access hole.
![Image]()
Position your drain pan, and unscrew that bolt just like any other drain plug. I think it's a 10mm head on mine.
![Image]()
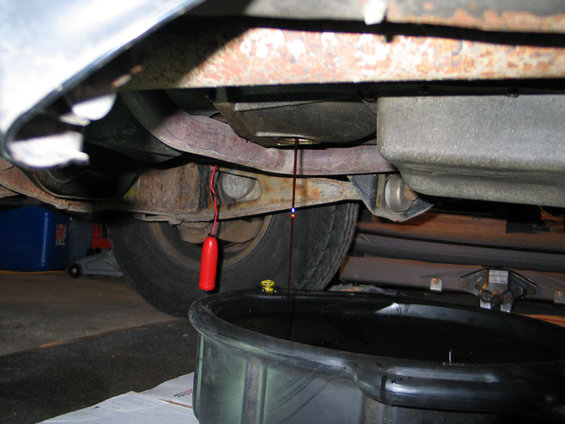
Let it drain out for a while.
![Image]()
After it's pretty much drained out, put the plug back in (don't crank on it, just put it in so it doesn't leak), and put the access hole cover back in place. (If the access hole cover won't stay in place, use a little RTV on it.)
Now we can start on the transmission pan itself. It's got 20 10mm bolts all around the perimeter. Loosen all of them a half-turn or so. Pick a corner, and remove the bolts nearest that corner. Then loosen each bolt moving away from the corner, so that the whole pan tilts towards that corner. You're going to want your drain pan ready, and have plenty of cardboard down. You may need to pry on the edge of the pan a bit to get the gasket to let loose. Don't bend the lip of the pan or scratch the sealing surface on the transmission.
![Image]()
![Image]()
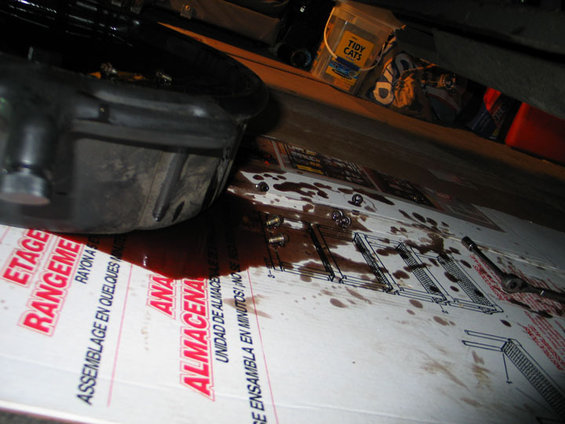
If you're not careful (and a little lucky), this whole process can make a pretty big mess.
![Image]()
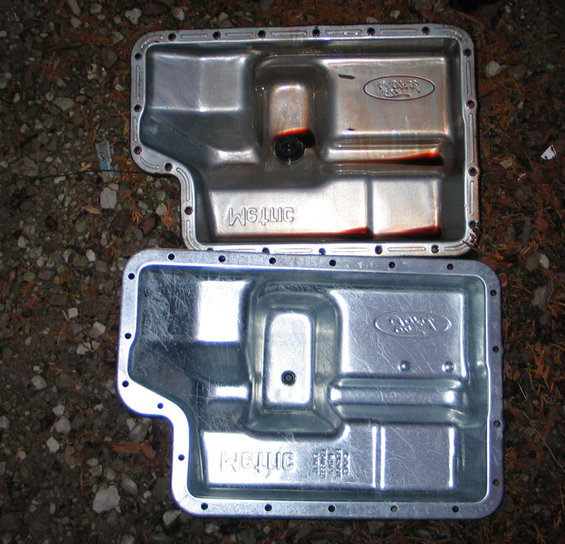
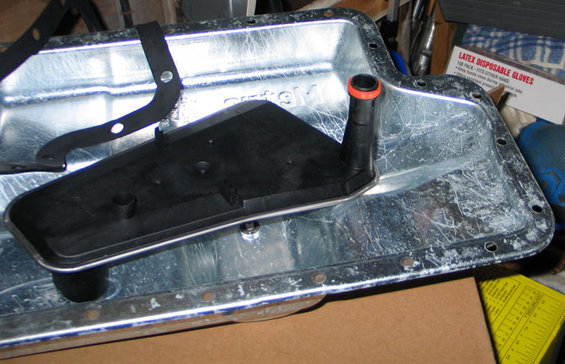
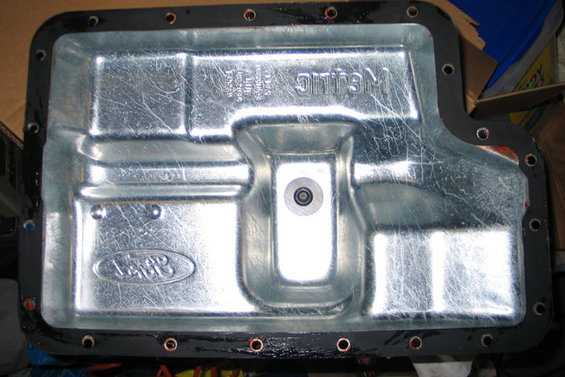
Once you've got the pan off, you can see that there's not much difference between the two. The old pan is on top, and it has a divot where the magnet sits, whereas the new pan has a slightly larger sump area, a drain plug, and a couple of divots over on the right there, that help to hold up the filter. (If you're not replacing the pan, clean it really well with brake cleaner or something similar.)
![Image]()
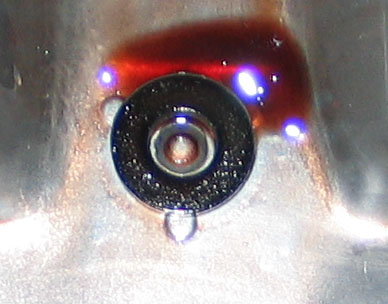
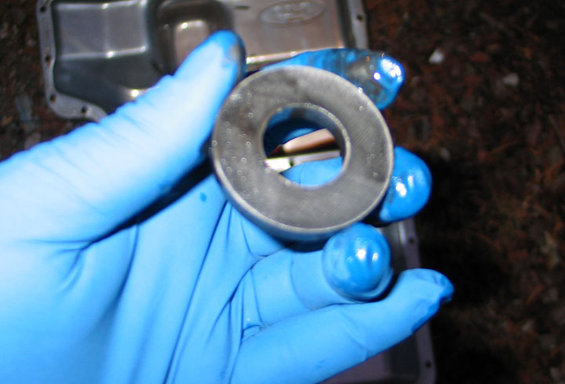
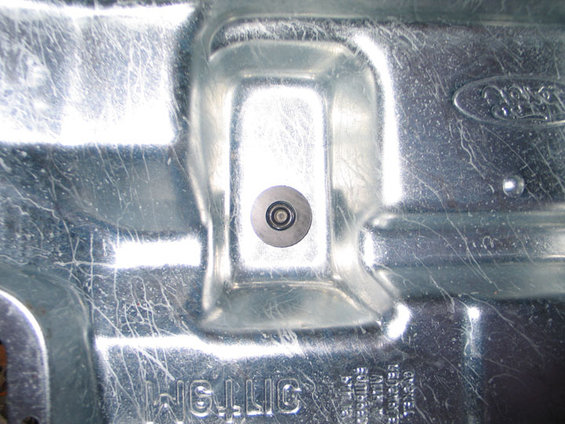
The new pan doesn't come with a magnet, so you'll need to clean up the one in your old pan and move it over to the new one. (Oddly enough, it fits perfectly around the drain plug. Almost as if someone had designed it that way. Weird.)
![Image]()
![Image]()
![Image]()
Getting back to the filter change, here's what you see with the pan off. Make sure you carefully clean the gasket surface on the transmission. Don't nick it, if you have to scrape it (which hopefully you don't), use a plastic tool.
![Image]()
That black plastic tube-ish thing is the filter fluid pickup. The filter is the flat ribbed silver thing above it.
Pull it out. It's just a friction fit.
![Image]()
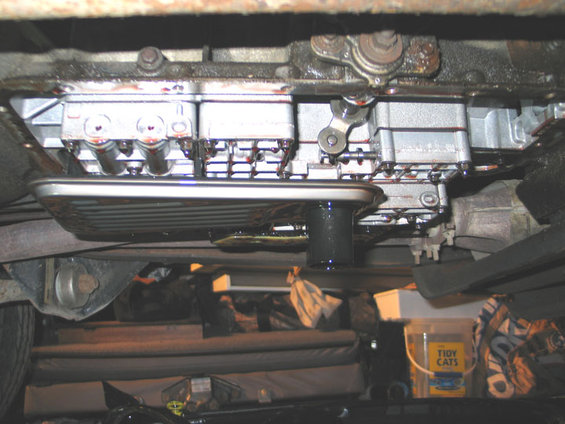
Once it's out, you're looking at the valve body and shift solenoid pack.
![Image]()
Let it drain for a while. It'll drip from all over.
START OF OPTIONAL SECTION. SKIP IF YOU DON'T HAVE AN EXTERNAL TRANNY FILTER.
While it's draining, you can change your external filter (assuming you have installed one. If you haven't, search this site and do it).
You should change the external filter every time you change your oil, and every time you change your internal filter.
First, you need a small drain pan or drip tray. Position it under your remote filter mount.
![Image]()
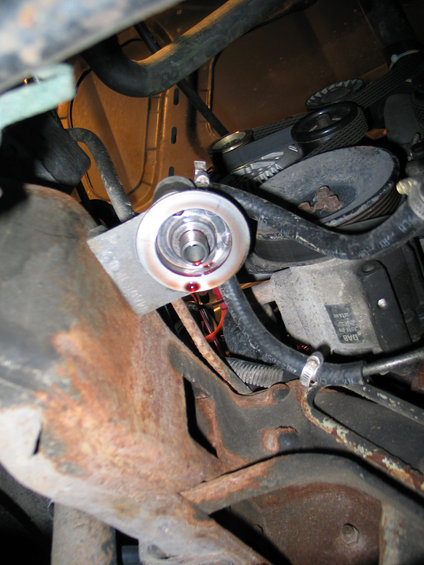
Here's my mount from above:
![Image]()
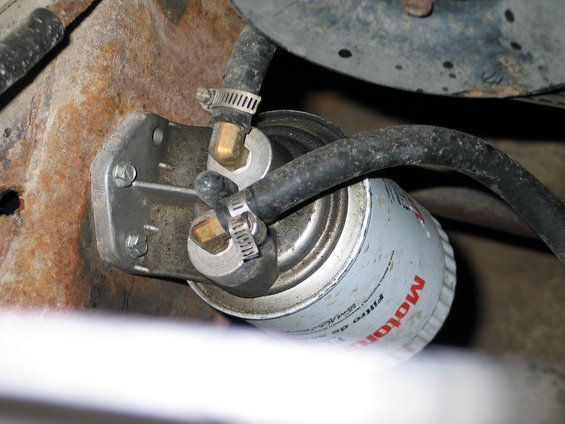
and below:
![Image]()
Once your drip tray is in place, just spin off the old filter. It should come off easily, though you may need to use an oil filter wrench if you put it on too tight last time, or failed to oil the gasket. Keep it upright and it won't even make much of a mess.
![Image]()
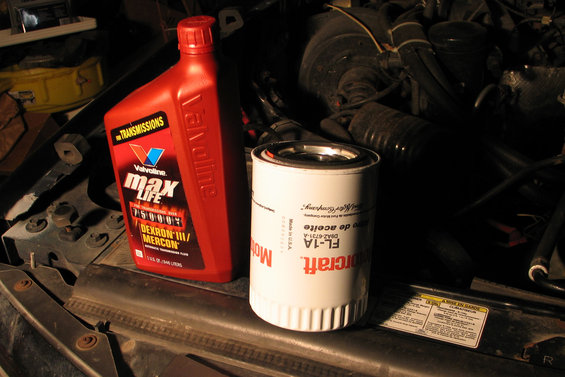
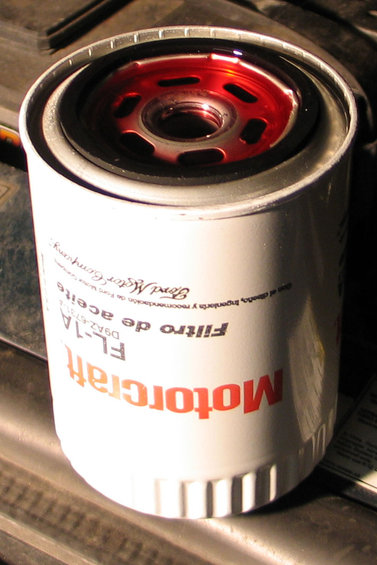
Clean up the mount with a rag, making sure your old gasket isn't stuck to it, then get out your new Motorcraft FL1-A (or whatever filter you happen to be using on your external mount, there are a lot of choices) and a bottle of new transmission fluid.
![Image]()
Fill up the filter with new tranny fluid. It'll take a while to sink down into the filter, so go slow, in several stages. Make sure you coat the entire gasket with new tranny fluid as well.
![Image]()
Take the new filter, and spin it onto the mount. Once the filter gasket contacts the gasket surface on the mount, turn it another half-turn or so, just tight enough that it doesn't leak (just like an oil filter).
Now that the external filter change is done, and you've let the valve body drain for a while, let's get back to the internal filter change.
END OF OPTIONAL SECTION
Check out your new internal filter, make sure it looks like the old one.
![Image]()
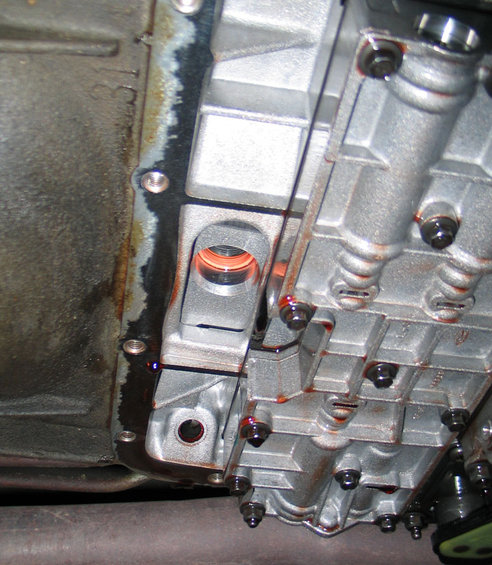
Wait a minute! What's that orange thing? The filter I pulled out didn't have that.
![Image]()
Well, that's your filter seal. It always seems to get left behind in the valve body.
![Image]()
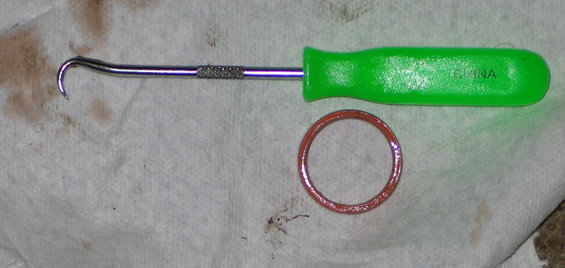
You can carefully remove it with a hooked pick. Be careful not to nick the inside of the hole that it's stuck in.
![Image]()
Once you've removed the old seal, you can lube up the new seal with some fresh tranny fluid, and slide the new filter into place.
![Image]()
![Image]()
Now that it's in place, we can install the filter clip. It's held on with one of the valve body bolts, which I believe are 8mm.
I'm pretty sure that, according to the directions,
![Image]()
it's this one
![Image]()
right here:
![Image]()
Yup, that seemed to work.
![Image]()
Okay, filter's back in place, so now we just need to get the new gasket and pan in place. Use a light coat of heavy grease, like axle or bearing grease, to hold the gasket in place on the pan. It'll make your life a LOT easier.
![Image]()
![Image]()
(There's grease on the top side of the gasket only because I dropped it putting it into place. It behaved a lot like buttered bread.)
Put the pan in place, and screw in the 20 bolts that hold it on. Don't crank them down, they just need to hold the pan in place and not leak. If the rubber seal is squeezing out between the bolt holes, the bolts are way too tight. Tighten them in a pattern, too, in several stages. Don't just crank one down and move on to the one next to it. Haynes says 10-14 ft-lbs (using a torque wrench, not just guessing), and moving in a diagonal pattern (so, one corner, then the opposite, and so on).
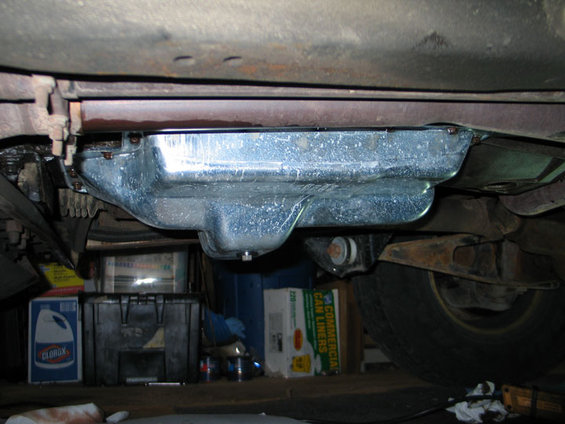
Here it is, in all its glory.
![Image]()
(Yeah, that drain plug is kind of low. I'd rather it was on the side of the sump, but what can you do?)
Now that everything is buttoned up, it's time to refill the transmission. Put a long funnel in the dipstick hole and start dumping in the new fluid. (While the bottles are draining in, you can disconnect the remote starter switch and reconnect the coil wire.)
![Image]()
I usually put in a full case (12 quarts) (assuming I drained the torque converter), then start the engine. Don't rev it up, just let it idle for a minute or two. Check the pan gasket (and the external filter, if you have one) for leaks while it's idling. Then, with your foot on the brake (and the parking brake on and the wheels chocked), shift into each gear for about 20 seconds, and back to neutral. Check the level of the trans fluid (with the engine running, in neutral), and add enough to bring it up to the bottom hole on the dipstick. (edit: The crosshatched area on the dipstick is only 1 pint (1/2 bottle) "high". Don't over-fill.) If you have to add more than a quart, go through the gears again. You'll be able to tell when you are getting enough fluid in there, because you'll be able to feel the transmission actually shift into gear when you move the selector.
After you are getting solid gear engagement, and the level is at least at the lowest hole on the dipstick, drive around gently for about 15 minutes, to get the tranny up to temperature. (Don't forget about your wheel chocks.) If you feel any slippage, stop and add some fluid. Don't add more than half a pint (a quarter of a bottle) at a time. Once it's warmed up, make sure that the fluid level is showing in the crosshatches on the dipstick.
There you go. Easy-peasy, no?
Coming up: Front and rear differentials, transfer case, and lubing your rear slipshaft for fun and profit.
Here we go, then, changing fluid and filter on an E4OD (including the torque converter) (specifically my 1994 5.0L MAF XLT, not that that makes much difference in this case):
First things first, safety safety safety. Set your parking brake, and since I don't trust your parking brake, chock your wheels. Some things that we will do in this writeup will require your transmission to possibly be in gear with not quite enough fluid in it, which means it could roll uncontrollably as though it were in neutral. Set the parking brake and chock the wheels.
Wear gloves. I wear these:
Wear eye protection, goggles or face shield or whatever.
You'll want quite a large drain pan. I use this one:
A goodly amount of cardboard to protect your work floor would be helpful, too.
You'll need a filter replacement kit, preferably one that includes a new gasket. I like the rubber gaskets, myself. Some people prefer the cork. (I have no idea why I didn't take a picture of the filter kit part number.)
Edit:
need4racin gave this filter part number info:
MOTORCRAFT Part # FT113 - 2wd E4OD
MOTORCRAFT Part # FT114 - 4x4 E4OD, 2wd & 4x4 4R100
end of edit
You'll need some Mercon compatible transmission fluid (rather a lot, really). This is what I use:
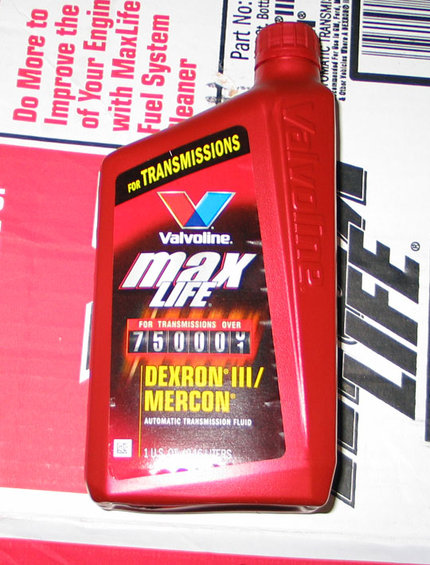
I buy 2 cases of it (24 quarts). Stated capacity of the E4OD is 16.2 US quarts, but with the added external filter and large cooler, I figure it's better to have plenty of extra. Ford specifies Mercon, but I believe that a TSA came out recently that said that Mercon-V is usable in transmissions that formerly required Mercon. I just buy Mercon-compatible and leave it at that. You can do as you like, just don't blame me.
If you haven't already installed a filter clip, get one now and install it during this filter change. The E4OD is known for the filter dropping out of the valve body into the pan, and causing problems. The best-known symptom of this is that the truck stalls whenever you shift into reverse. There's a simple fix, though, and here it is:
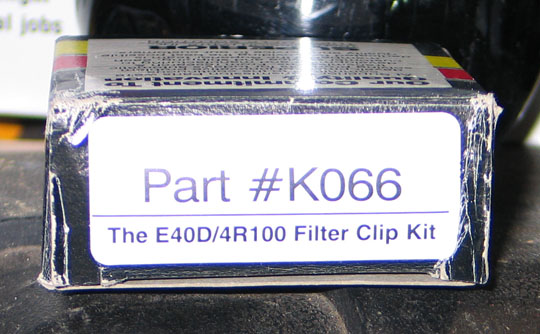
Inside that package you will find a couple of these simple sheetmetal clips, and a single page of instructions.


You only need one clip per transmission. I think I paid $4 for 2, plus shipping.
(That link is http://www.superior-transmission.com.)
(Wait, no, that's the manufacturer and they don't sell retail. Here's where I bought them: PATC Ford Transmissions, C6, AOD, 4R70W, 4R100, 5R110W and others)
My old pan is missing something.

A drain plug. I bought a new pan from Ford for about $45 or so. (You don't have to, and if you don't, just ignore the stuff in here about "new pan/old pan".)

(for searching purposes, that's an E4OD/4R100 4x4 trans pan with drain plug, part # F81Z-7A194-BA )
Looks like this:

Pull out the dipstick, clean it, and set it aside someplace where you won't bend or lose it. My dipstick looks like this:

and fits in here (on the passenger side of the engine):
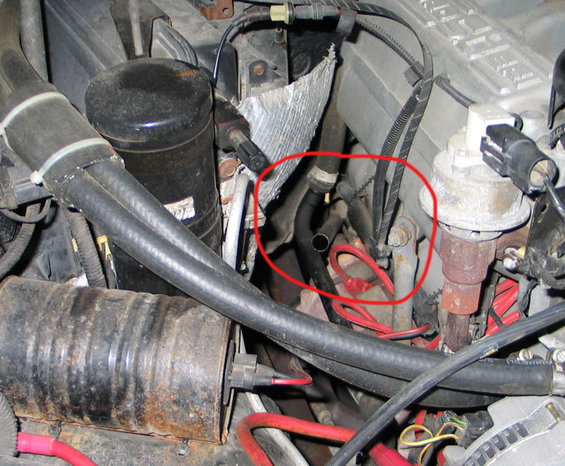
We'll start by draining the torque converter. (You don't have to drain the TC every time you change your fluid, but it's pretty easy.) The TC is bolted to the flexplate on the back of the engine, and spins with the engine. The drain plug is in the "side" of the torque converter, and we'll need to turn the engine over to line the plug up with the access hole. Here's the access hole cover (circled in red) in the bottom of the bell housing:

It's a rubber plug. Use caution removing it, so that you don't push it into the bell housing, and so that all the gunk that has collected above it doesn't cover your face when you get it out. If you do push it into the bell housing, you can remove the dust cover behind the exhaust crossover and get it back out.
I'm lazy, so I use the electric motor that the Ford Motor Company kindly attached to the engine to turn it. (You could also put a wrench on the balancer bolt on the front of the crankshaft, but for me this is easier.) See ignition upgrade and timing bump (no 56K) for instructions on how to hook up your remote ignition switch (and disconnect the coil wire, just to be sure), then dangle the switch down where you can reach it under the truck and it won't get caught in any belts or anything.
You need to bump the engine around until the drain plug shows up in the access hole.
Position your drain pan, and unscrew that bolt just like any other drain plug. I think it's a 10mm head on mine.

Let it drain out for a while.
After it's pretty much drained out, put the plug back in (don't crank on it, just put it in so it doesn't leak), and put the access hole cover back in place. (If the access hole cover won't stay in place, use a little RTV on it.)
Now we can start on the transmission pan itself. It's got 20 10mm bolts all around the perimeter. Loosen all of them a half-turn or so. Pick a corner, and remove the bolts nearest that corner. Then loosen each bolt moving away from the corner, so that the whole pan tilts towards that corner. You're going to want your drain pan ready, and have plenty of cardboard down. You may need to pry on the edge of the pan a bit to get the gasket to let loose. Don't bend the lip of the pan or scratch the sealing surface on the transmission.


If you're not careful (and a little lucky), this whole process can make a pretty big mess.
Once you've got the pan off, you can see that there's not much difference between the two. The old pan is on top, and it has a divot where the magnet sits, whereas the new pan has a slightly larger sump area, a drain plug, and a couple of divots over on the right there, that help to hold up the filter. (If you're not replacing the pan, clean it really well with brake cleaner or something similar.)
The new pan doesn't come with a magnet, so you'll need to clean up the one in your old pan and move it over to the new one. (Oddly enough, it fits perfectly around the drain plug. Almost as if someone had designed it that way. Weird.)
Getting back to the filter change, here's what you see with the pan off. Make sure you carefully clean the gasket surface on the transmission. Don't nick it, if you have to scrape it (which hopefully you don't), use a plastic tool.
That black plastic tube-ish thing is the filter fluid pickup. The filter is the flat ribbed silver thing above it.
Pull it out. It's just a friction fit.

Once it's out, you're looking at the valve body and shift solenoid pack.

Let it drain for a while. It'll drip from all over.
START OF OPTIONAL SECTION. SKIP IF YOU DON'T HAVE AN EXTERNAL TRANNY FILTER.
While it's draining, you can change your external filter (assuming you have installed one. If you haven't, search this site and do it).
You should change the external filter every time you change your oil, and every time you change your internal filter.
First, you need a small drain pan or drip tray. Position it under your remote filter mount.

Here's my mount from above:
and below:

Once your drip tray is in place, just spin off the old filter. It should come off easily, though you may need to use an oil filter wrench if you put it on too tight last time, or failed to oil the gasket. Keep it upright and it won't even make much of a mess.
Clean up the mount with a rag, making sure your old gasket isn't stuck to it, then get out your new Motorcraft FL1-A (or whatever filter you happen to be using on your external mount, there are a lot of choices) and a bottle of new transmission fluid.
Fill up the filter with new tranny fluid. It'll take a while to sink down into the filter, so go slow, in several stages. Make sure you coat the entire gasket with new tranny fluid as well.
Take the new filter, and spin it onto the mount. Once the filter gasket contacts the gasket surface on the mount, turn it another half-turn or so, just tight enough that it doesn't leak (just like an oil filter).
Now that the external filter change is done, and you've let the valve body drain for a while, let's get back to the internal filter change.
END OF OPTIONAL SECTION
Check out your new internal filter, make sure it looks like the old one.
Wait a minute! What's that orange thing? The filter I pulled out didn't have that.

Well, that's your filter seal. It always seems to get left behind in the valve body.
You can carefully remove it with a hooked pick. Be careful not to nick the inside of the hole that it's stuck in.
Once you've removed the old seal, you can lube up the new seal with some fresh tranny fluid, and slide the new filter into place.


Now that it's in place, we can install the filter clip. It's held on with one of the valve body bolts, which I believe are 8mm.
I'm pretty sure that, according to the directions,

it's this one

right here:

Yup, that seemed to work.

Okay, filter's back in place, so now we just need to get the new gasket and pan in place. Use a light coat of heavy grease, like axle or bearing grease, to hold the gasket in place on the pan. It'll make your life a LOT easier.
(There's grease on the top side of the gasket only because I dropped it putting it into place. It behaved a lot like buttered bread.)
Put the pan in place, and screw in the 20 bolts that hold it on. Don't crank them down, they just need to hold the pan in place and not leak. If the rubber seal is squeezing out between the bolt holes, the bolts are way too tight. Tighten them in a pattern, too, in several stages. Don't just crank one down and move on to the one next to it. Haynes says 10-14 ft-lbs (using a torque wrench, not just guessing), and moving in a diagonal pattern (so, one corner, then the opposite, and so on).
Here it is, in all its glory.
(Yeah, that drain plug is kind of low. I'd rather it was on the side of the sump, but what can you do?)
Now that everything is buttoned up, it's time to refill the transmission. Put a long funnel in the dipstick hole and start dumping in the new fluid. (While the bottles are draining in, you can disconnect the remote starter switch and reconnect the coil wire.)
I usually put in a full case (12 quarts) (assuming I drained the torque converter), then start the engine. Don't rev it up, just let it idle for a minute or two. Check the pan gasket (and the external filter, if you have one) for leaks while it's idling. Then, with your foot on the brake (and the parking brake on and the wheels chocked), shift into each gear for about 20 seconds, and back to neutral. Check the level of the trans fluid (with the engine running, in neutral), and add enough to bring it up to the bottom hole on the dipstick. (edit: The crosshatched area on the dipstick is only 1 pint (1/2 bottle) "high". Don't over-fill.) If you have to add more than a quart, go through the gears again. You'll be able to tell when you are getting enough fluid in there, because you'll be able to feel the transmission actually shift into gear when you move the selector.
After you are getting solid gear engagement, and the level is at least at the lowest hole on the dipstick, drive around gently for about 15 minutes, to get the tranny up to temperature. (Don't forget about your wheel chocks.) If you feel any slippage, stop and add some fluid. Don't add more than half a pint (a quarter of a bottle) at a time. Once it's warmed up, make sure that the fluid level is showing in the crosshatches on the dipstick.
There you go. Easy-peasy, no?
Coming up: Front and rear differentials, transfer case, and lubing your rear slipshaft for fun and profit.


