1. Chock the wheels, jack up the front, remove the tires and support it with SAFE jackstands.
2. Remove the calipers (C-clamp to compress the pistons in the caliper, use a hammer and screwdriver to tap out the clips that hold the caliper in place.)
NOTE: if you’re already lost, stop here. Put it all back together and take it to a competent shop.
3. Remove the hubs. My hub write up.
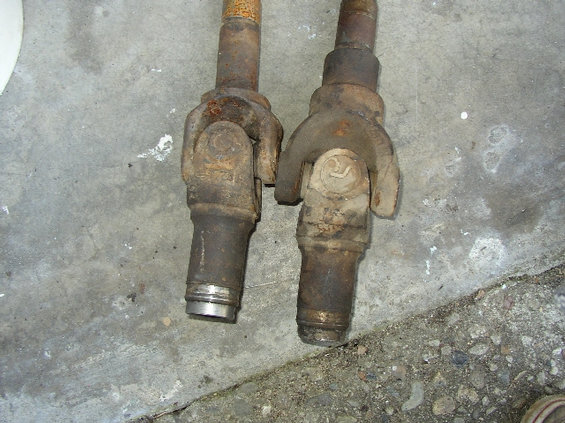
4. Remove the spindle nut. Instructions can be found in Big Mikes wheel bearing write up. (The spindles on my 89 use a single combination spindle nut/bearing adjuster. SEE PICS BELOW:
![Image]()
![Image]()
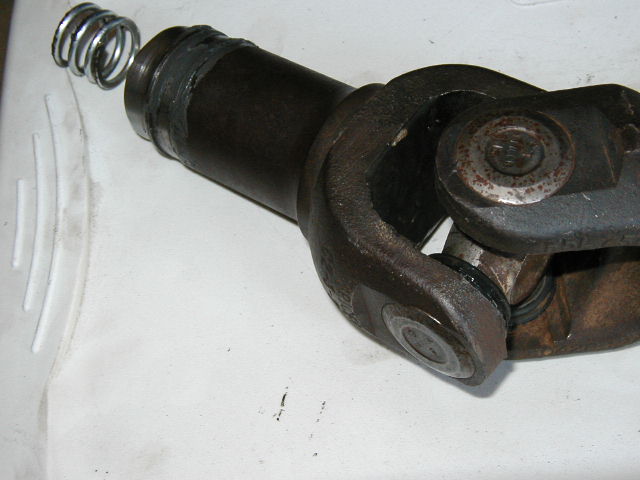
*The 4 prong spanner socket for the spindle nut:
![Image]()
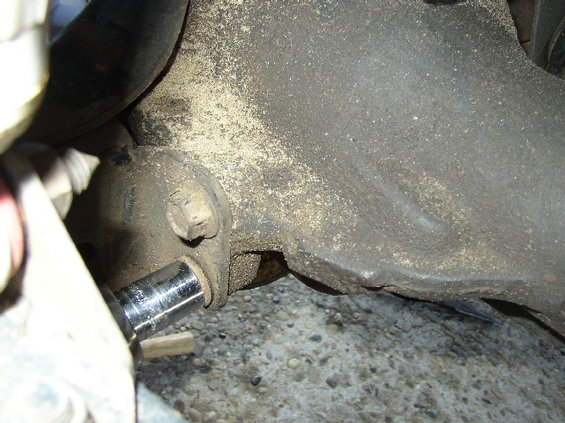
5. With the rotor and wheel bearings removed, the next step is to remove the spindle. Remove the 5 or 6 bolts holding on the spindle, and pull it off. (It may need some gentle tapping to break it free.)
![Image]()
6. With the spindles off the axle shafts slide right out. On the passenger side, you will need to undo the clamps holding the slip-shaft dust cover on; if you don’t you will have a very hard time pulling the shaft out.
![Image]()
7. Now that the axle shafts are out, undo the bolts holding the drive shaft onto the pinion yoke. Also, pull the front diff breather off.
8. At this point, all that is holding on the 3rd member is the front cover bolts and the 2 bolts that attach from the side. Undo the bolts on the side first:
![Image]()
9. Now start removing the front cover bolts, starting with the bottom ones. Leaving the top 2 attached but loose will allow you to drain the housing before taking it off.
10. Once it’s drained, remove the last bolts holding it on. Careful, its pretty heavy. I just let mine drop since I will never be using it again, but you may want to place some rug or similar soft item underneath it to break the impact.
11. Scrape off all the old silicone gasket and use silicone gasket maker to form a new gasket.
12. You are all ready to attach this:
![Image]()
13. Installation is basically the reverse of removal. One way to make the install of the 3rd member go easier is to get 2 studs that thread into the cover bolt holes on the 3rd member itself; these will act as a guide and make it much easier to install the bolts. I torqued the cover bolts and side bolts to 60ft/lbs.
If you're doing the c-clip elimination trick or the Dana 50 stub shaft, read the next post.
14. Reinstall the axle shafts, make sure you put the dust cover back over the slip shaft.
15. If your bearings need it, replace or repack them.
16. Torque the spindle bolts to 60ft/lbs
17. Reinstall the rotors, wheel bearings, and spindle nut/bearing adjuster. Torque the spindle nut to 50ft/lbs while spinning the hubs around to seat the bearings. Then back the nut off 90 degrees and retorque to 15-20ft/lbs.
18. Reinstall the hubs, calipers, and tires.
19. Fill the front diff with fluid, should take about 2 quarts. (i used valvoline 80w90)
20. DONE.
2. Remove the calipers (C-clamp to compress the pistons in the caliper, use a hammer and screwdriver to tap out the clips that hold the caliper in place.)
NOTE: if you’re already lost, stop here. Put it all back together and take it to a competent shop.
3. Remove the hubs. My hub write up.
4. Remove the spindle nut. Instructions can be found in Big Mikes wheel bearing write up. (The spindles on my 89 use a single combination spindle nut/bearing adjuster. SEE PICS BELOW:


*The 4 prong spanner socket for the spindle nut:

5. With the rotor and wheel bearings removed, the next step is to remove the spindle. Remove the 5 or 6 bolts holding on the spindle, and pull it off. (It may need some gentle tapping to break it free.)

6. With the spindles off the axle shafts slide right out. On the passenger side, you will need to undo the clamps holding the slip-shaft dust cover on; if you don’t you will have a very hard time pulling the shaft out.

7. Now that the axle shafts are out, undo the bolts holding the drive shaft onto the pinion yoke. Also, pull the front diff breather off.
8. At this point, all that is holding on the 3rd member is the front cover bolts and the 2 bolts that attach from the side. Undo the bolts on the side first:
9. Now start removing the front cover bolts, starting with the bottom ones. Leaving the top 2 attached but loose will allow you to drain the housing before taking it off.
10. Once it’s drained, remove the last bolts holding it on. Careful, its pretty heavy. I just let mine drop since I will never be using it again, but you may want to place some rug or similar soft item underneath it to break the impact.
11. Scrape off all the old silicone gasket and use silicone gasket maker to form a new gasket.
12. You are all ready to attach this:

13. Installation is basically the reverse of removal. One way to make the install of the 3rd member go easier is to get 2 studs that thread into the cover bolt holes on the 3rd member itself; these will act as a guide and make it much easier to install the bolts. I torqued the cover bolts and side bolts to 60ft/lbs.
If you're doing the c-clip elimination trick or the Dana 50 stub shaft, read the next post.
14. Reinstall the axle shafts, make sure you put the dust cover back over the slip shaft.
15. If your bearings need it, replace or repack them.
16. Torque the spindle bolts to 60ft/lbs
17. Reinstall the rotors, wheel bearings, and spindle nut/bearing adjuster. Torque the spindle nut to 50ft/lbs while spinning the hubs around to seat the bearings. Then back the nut off 90 degrees and retorque to 15-20ft/lbs.
18. Reinstall the hubs, calipers, and tires.
19. Fill the front diff with fluid, should take about 2 quarts. (i used valvoline 80w90)
20. DONE.