

http://www.4x4preservation.com/forums/showthread.php?p=1889#post1889
NOTE this is only for the 5 Bolt hubs, not the 3 bolts found in 92-96?
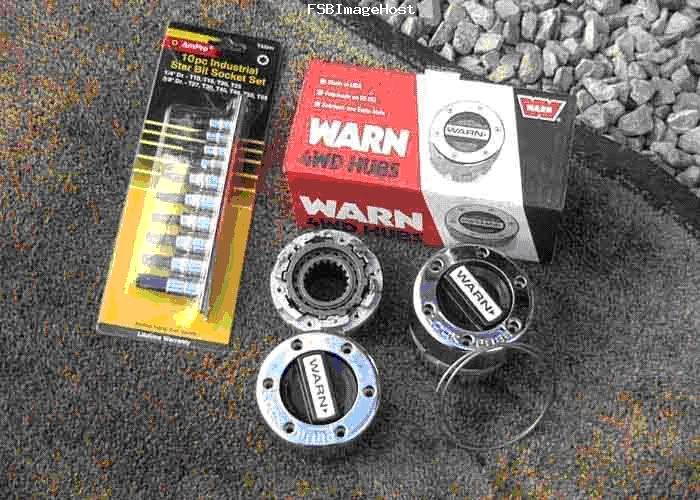
Install Warn manual hubs
Introduction
The problem started when I found my "new" full size 1989 Bronco's four wheel drive
was only 2 wheel drive! No power was being delivered to the front wheels. It was mentioned
at fullsizebronco.com that if one of the auto hubs was bad and there was an open diff
in the front, which 99% of the time its open from the factory, then one wheel (most likely
the one with the bad hub) will have the axle shaft free spin inside of the hub
Tools List
Torx bits - Allen wrenches - #2 flat blade screw driver - claw hammer - Crow Bar
Black rubber tie-down strap with hooks - Needle nose pliers
![Image]()
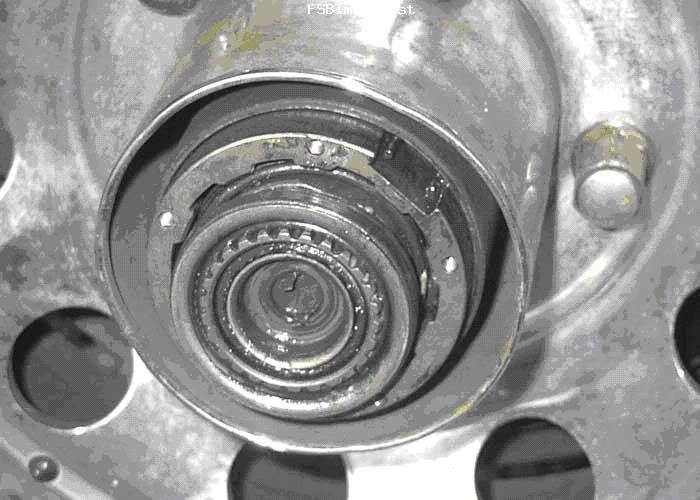
Auto hub cover removed
![Image]()
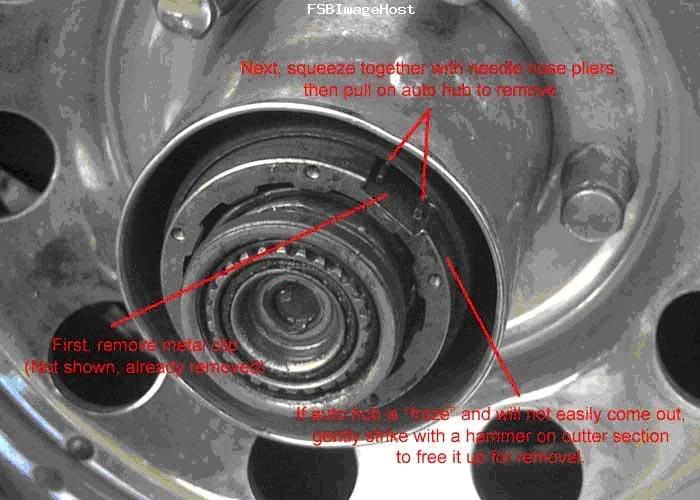
First, removed the metal clip (not pictured, already removed) and with needle nose
pliers, squeeze the tabs of the locking ring together. Gently pull and the auto hub
assembly will easily come out. If the lockout is "froze"in the drum, gently tap
around the outside to free it up. It may also be helpful to re-insert some of the
cap screws to pull the assembly out with.
![Image]()
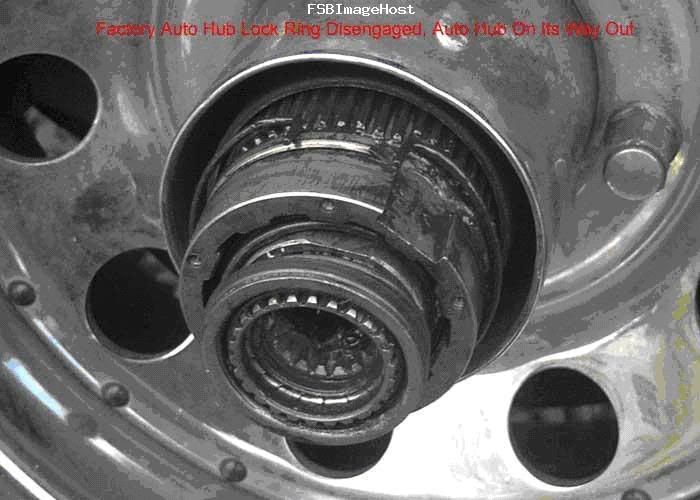
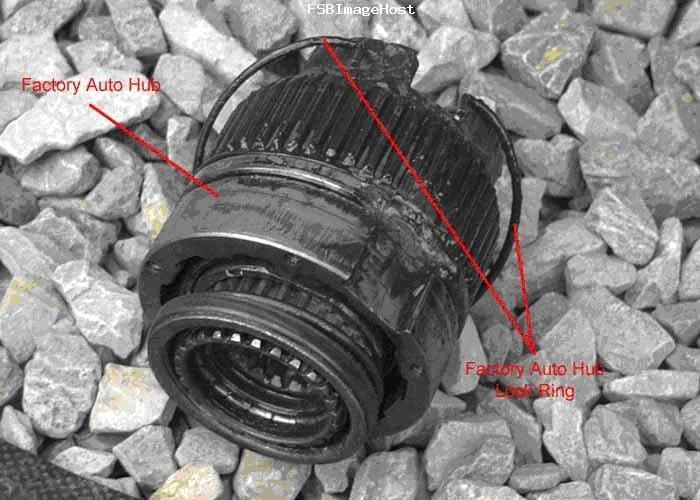
Factory auto hub on its way out
![Image]()
Factory auto locking hub assembly removed
![Image]()
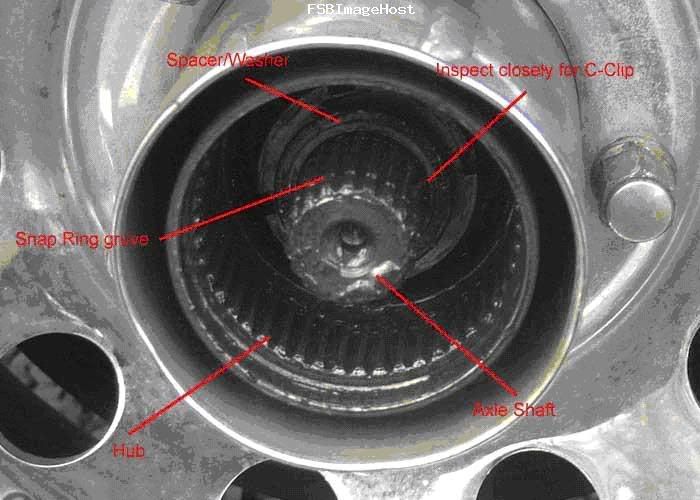
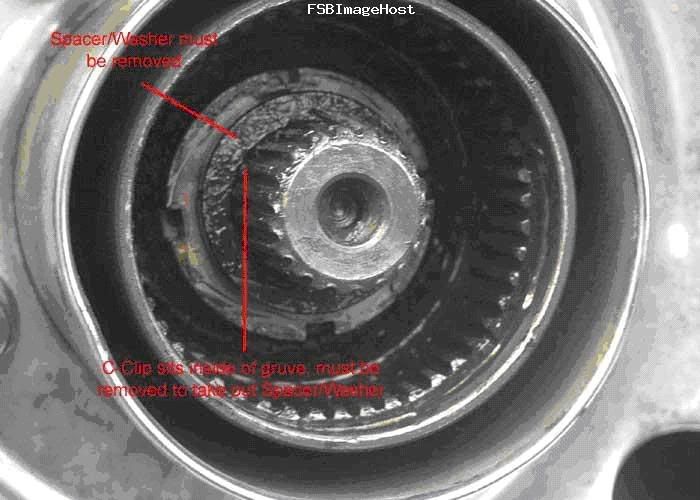
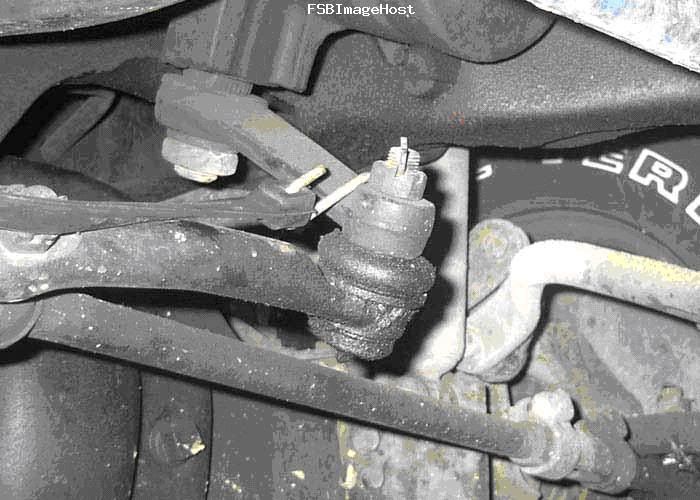
With the auto locking assembly removed, inspect for a gruve that holds a C-Clip
in place. Remove the C-Clip and then the spacer/washer.
![Image]()
![Image]()
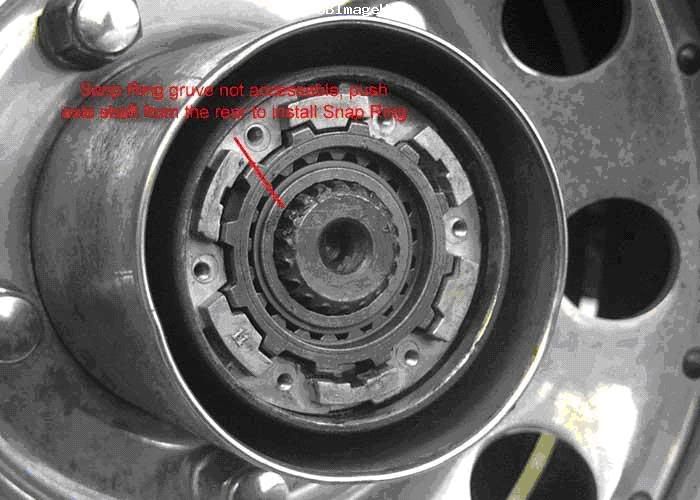
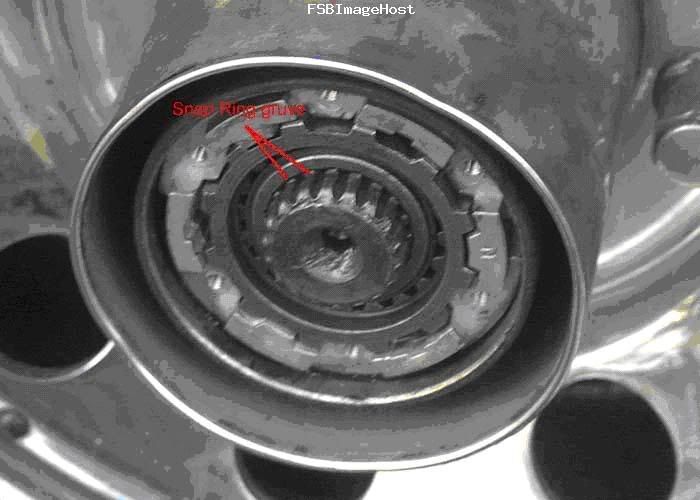
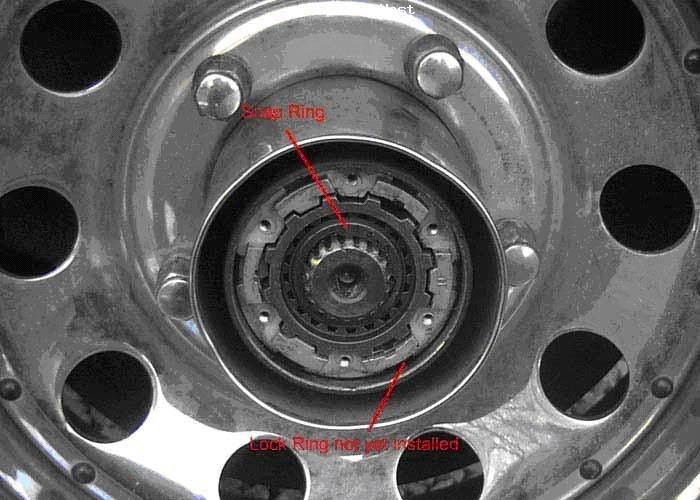
Next, your ready to install the manual hub. As you can see in this picture, the
snap ring gruve is not visible, and thus cannot be accessed. The snap ring must be installed.
![Image]()
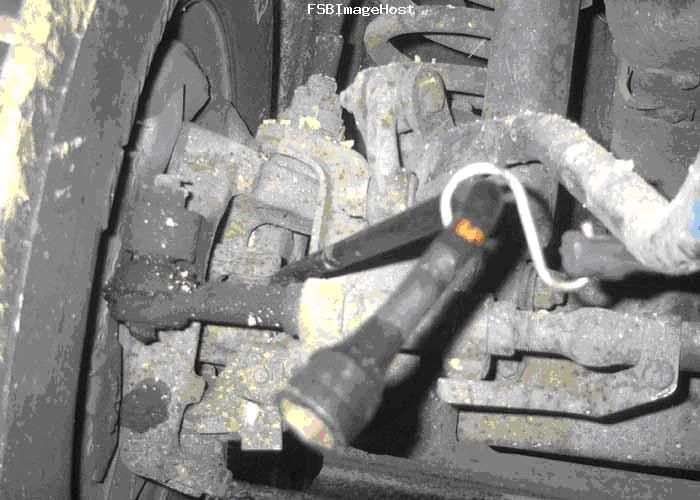
As I was doing this project "Lone Ranger" style, I needed to apply outward pressure
on the axle shaft u-joint. The only way I could quickly resolve this was to place a
standard crow bar behind the u-joint and using a black rubber tie-down strap to
pull tension on the crow bar. I simply hooked the other end to the Pittman arm
![Image]()
![Image]()
very easy to fit in place.
![Image]()
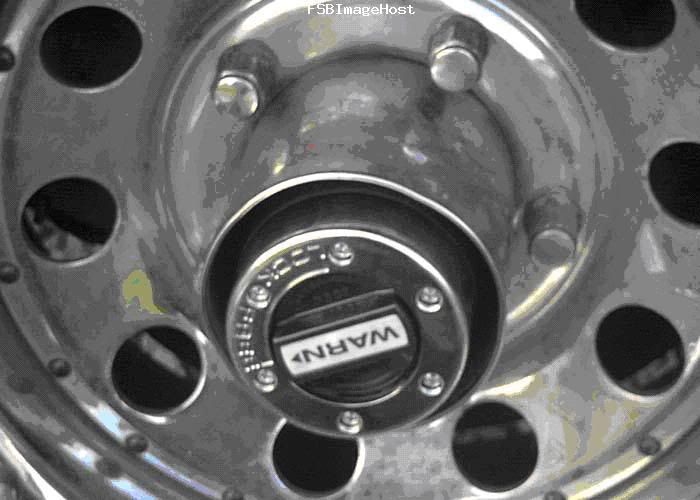
Install the cap and tighten down the 6 Warn provided cap screws with your Allen wrench. Finished, move to the next wheel!
![Image]()
![Image]()
Time for the road test! Although, you don’t actually want to do a road test on
the road! Running 4X4 on dry pavement has a nasty habit of creating drive line
windup, which results in excessive tension place on all drive line components.
The only way for this stress to relieve its self is to break the weakest part. Most
likely, your new hubs or a U-Joint will pop leaving you a bad feeling in the tummy.
Keep your vehicle in 2X4, put your truck in the mud and hammer down. Observe only the
rear tires spin. Lock in your hubs and switch to 4X4. You should notice a great difference.
Given the right circumstances (Slick enough mud, hard enough gas) you should be able
to visually observe a front tire spin such as I did. Proof positive, your front tires are engaged!
NOTE this is only for the 5 Bolt hubs, not the 3 bolts found in 92-96?
Install Warn manual hubs
Introduction
The problem started when I found my "new" full size 1989 Bronco's four wheel drive
was only 2 wheel drive! No power was being delivered to the front wheels. It was mentioned
at fullsizebronco.com that if one of the auto hubs was bad and there was an open diff
in the front, which 99% of the time its open from the factory, then one wheel (most likely
the one with the bad hub) will have the axle shaft free spin inside of the hub
Tools List
Torx bits - Allen wrenches - #2 flat blade screw driver - claw hammer - Crow Bar
Black rubber tie-down strap with hooks - Needle nose pliers
Auto hub cover removed
First, removed the metal clip (not pictured, already removed) and with needle nose
pliers, squeeze the tabs of the locking ring together. Gently pull and the auto hub
assembly will easily come out. If the lockout is "froze"in the drum, gently tap
around the outside to free it up. It may also be helpful to re-insert some of the
cap screws to pull the assembly out with.
Factory auto hub on its way out
Factory auto locking hub assembly removed
With the auto locking assembly removed, inspect for a gruve that holds a C-Clip
in place. Remove the C-Clip and then the spacer/washer.
Next, your ready to install the manual hub. As you can see in this picture, the
snap ring gruve is not visible, and thus cannot be accessed. The snap ring must be installed.
As I was doing this project "Lone Ranger" style, I needed to apply outward pressure
on the axle shaft u-joint. The only way I could quickly resolve this was to place a
standard crow bar behind the u-joint and using a black rubber tie-down strap to
pull tension on the crow bar. I simply hooked the other end to the Pittman arm
very easy to fit in place.
Install the cap and tighten down the 6 Warn provided cap screws with your Allen wrench. Finished, move to the next wheel!
Time for the road test! Although, you don’t actually want to do a road test on
the road! Running 4X4 on dry pavement has a nasty habit of creating drive line
windup, which results in excessive tension place on all drive line components.
The only way for this stress to relieve its self is to break the weakest part. Most
likely, your new hubs or a U-Joint will pop leaving you a bad feeling in the tummy.
Keep your vehicle in 2X4, put your truck in the mud and hammer down. Observe only the
rear tires spin. Lock in your hubs and switch to 4X4. You should notice a great difference.
Given the right circumstances (Slick enough mud, hard enough gas) you should be able
to visually observe a front tire spin such as I did. Proof positive, your front tires are engaged!


