Bronco Forum - Full Size Ford Bronco Forum banner

94 Eddie Bauer

9.1K views 33 replies 12 participants last post by  HaOsLsE  
#1 ·
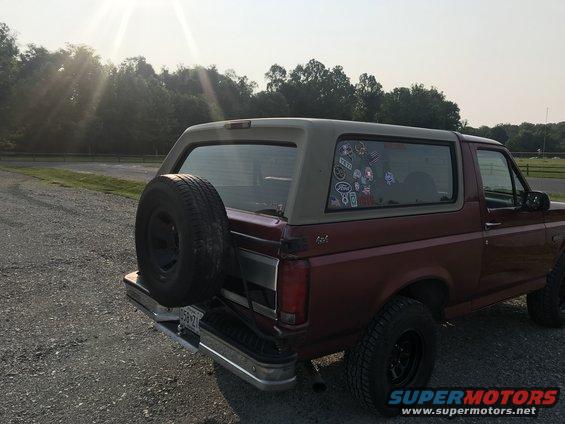
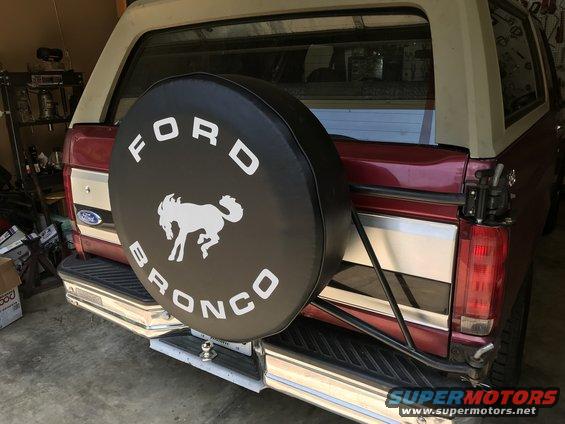
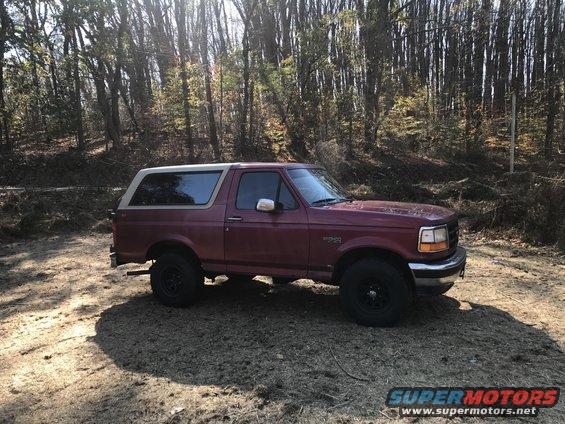
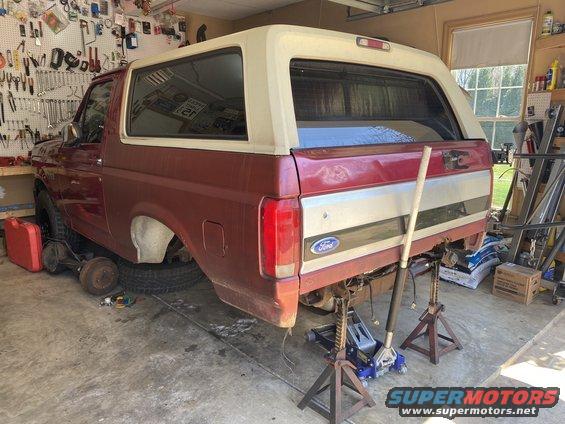
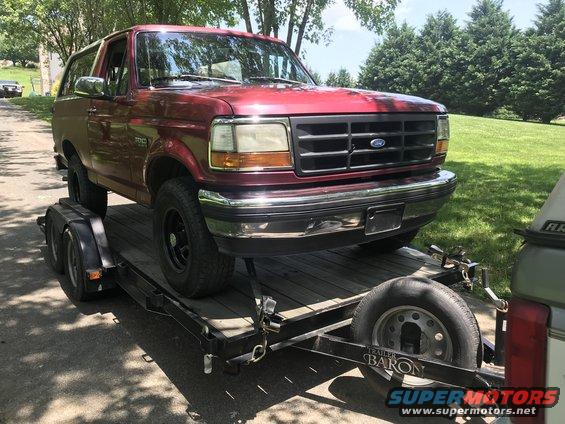
So I bought a another bronco this morning. Wasn’t particularly shopping for another one, but I’m always looking and couldn’t resist. Been watching it on Craigslist for weeks. But I picked it up today for $1900. Most money I’ve ever spent on the initial purchase of a bronco, but I’m satisfied with my decision. After dragging it home..
Image

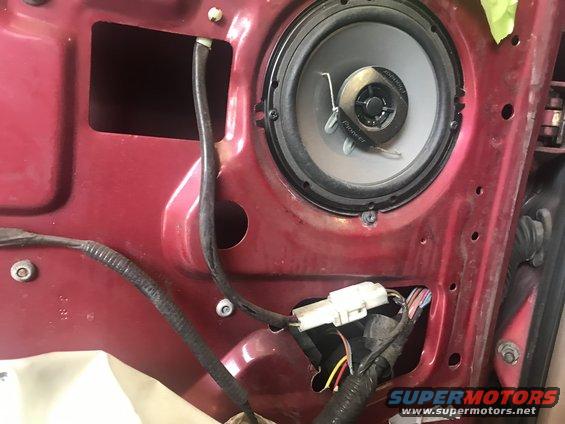
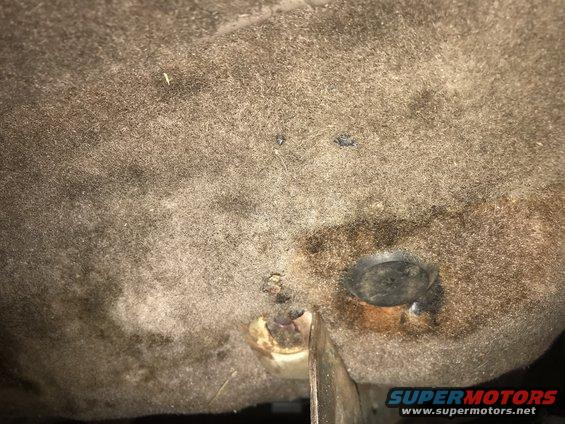
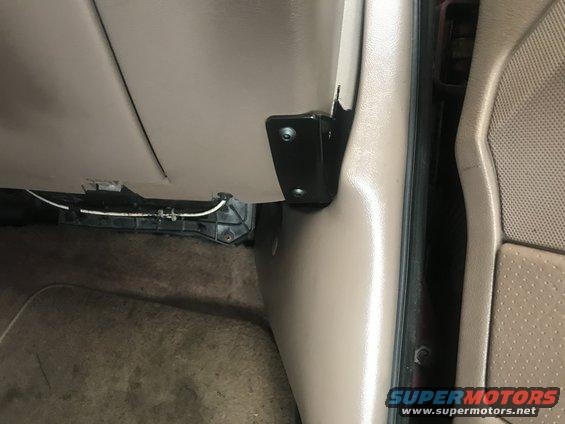
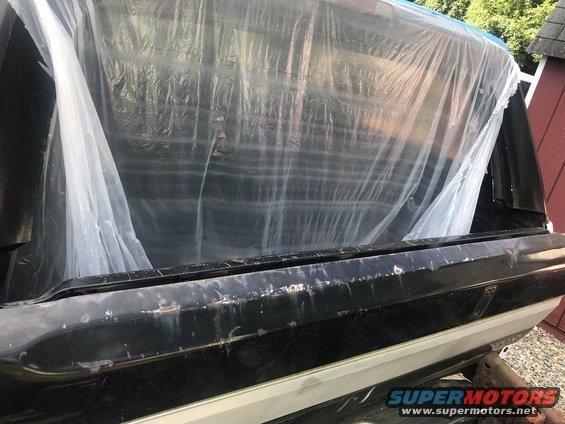
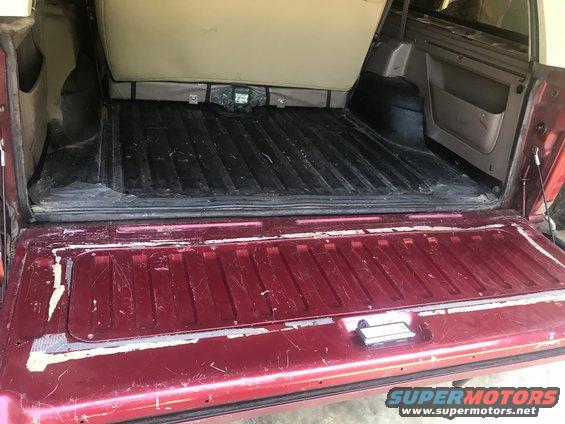
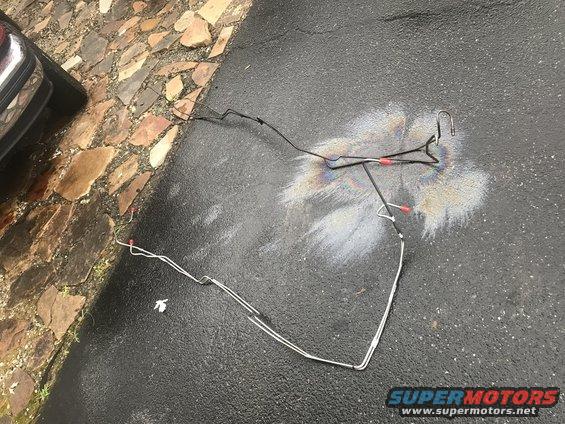
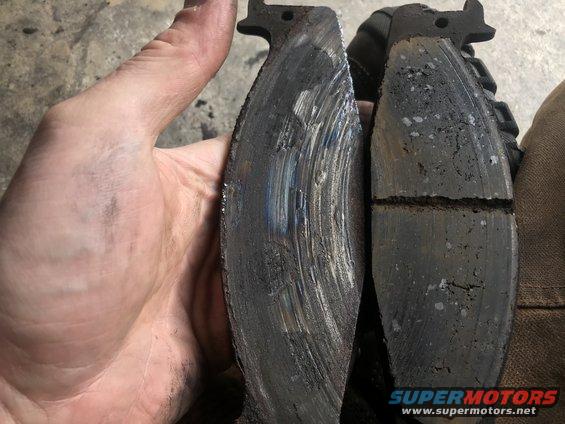
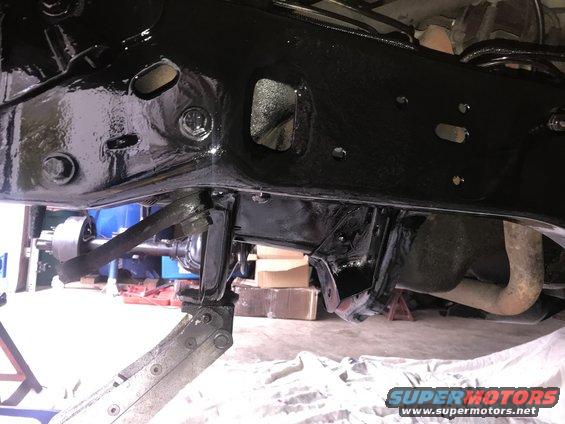
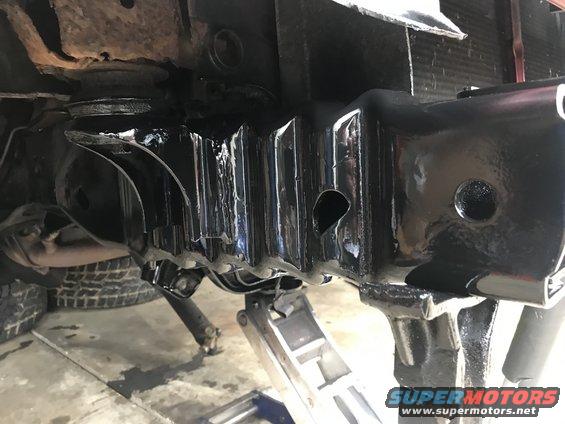
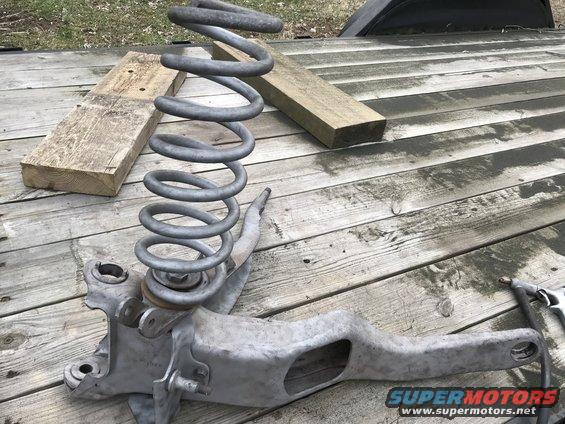
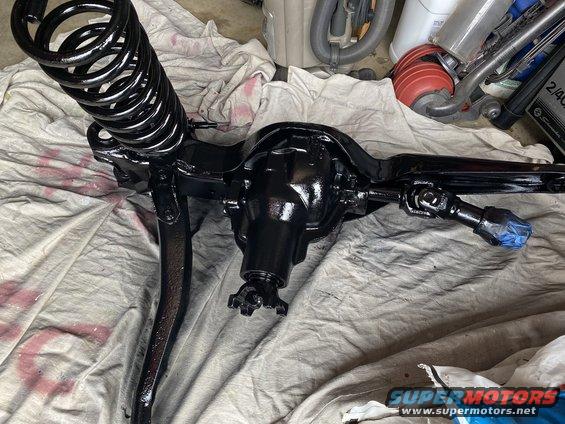
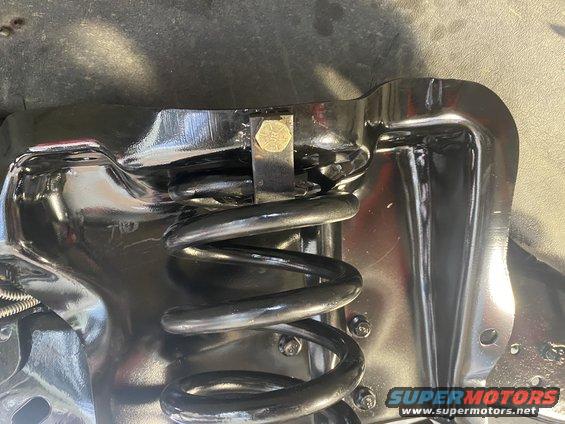
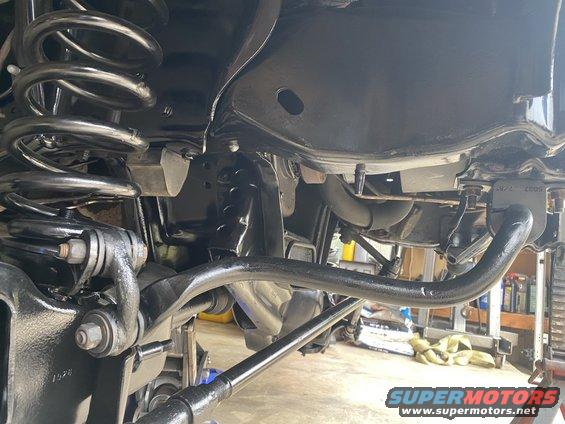
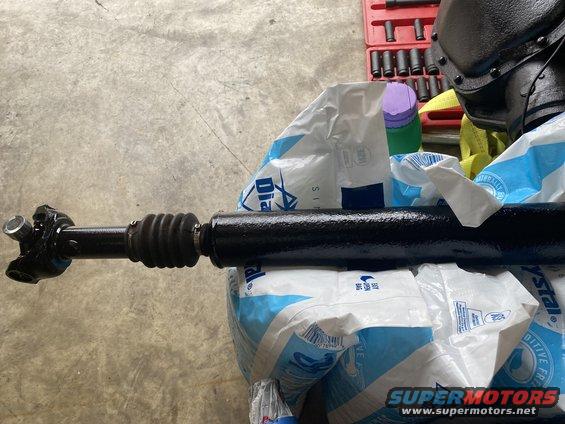
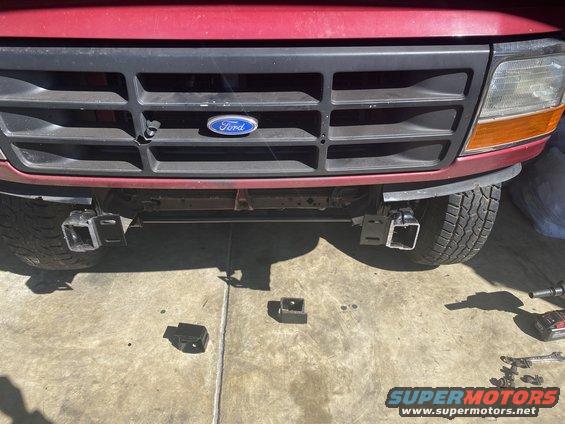
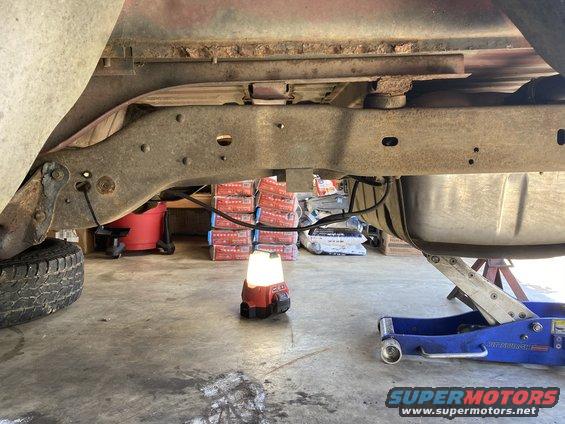
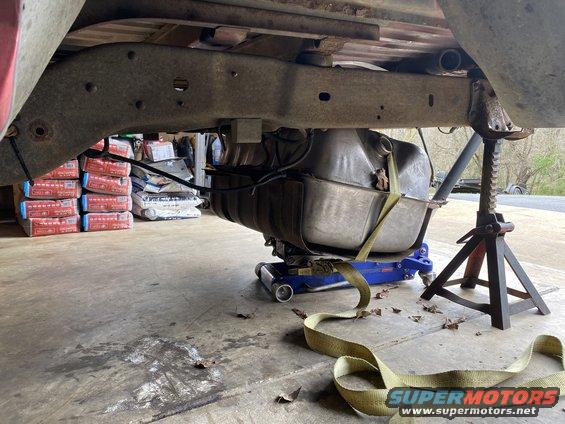
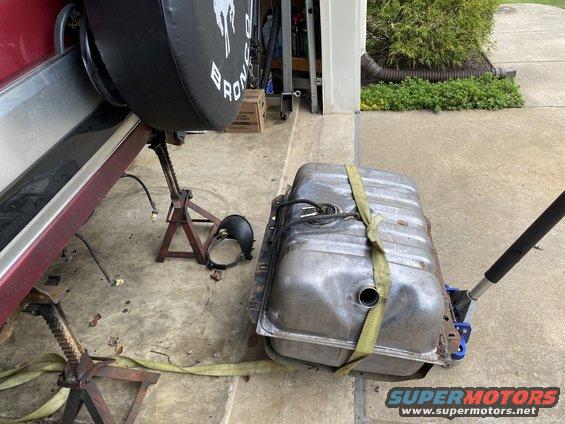
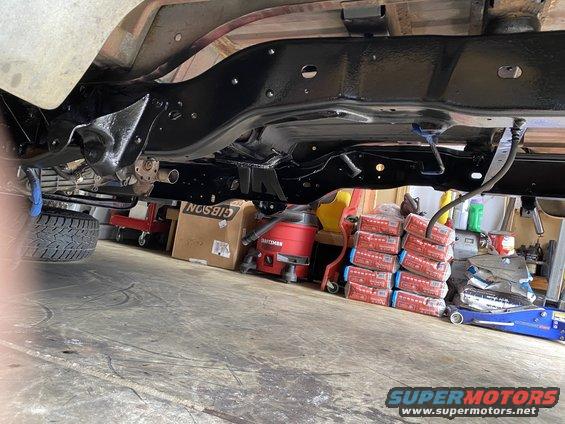
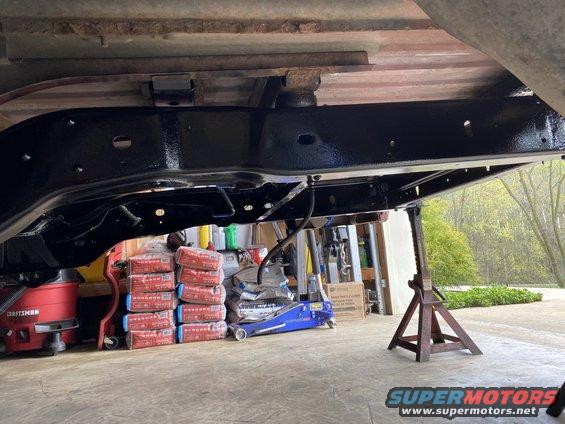
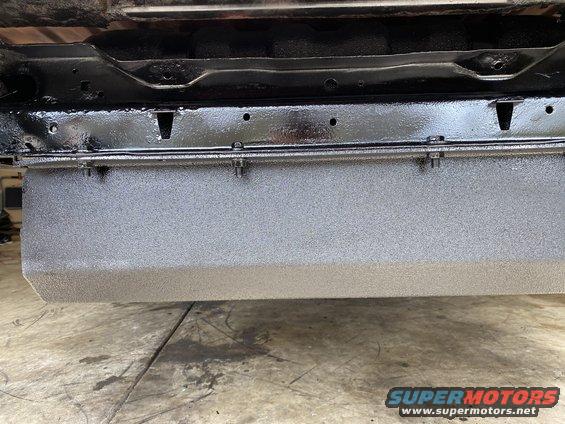
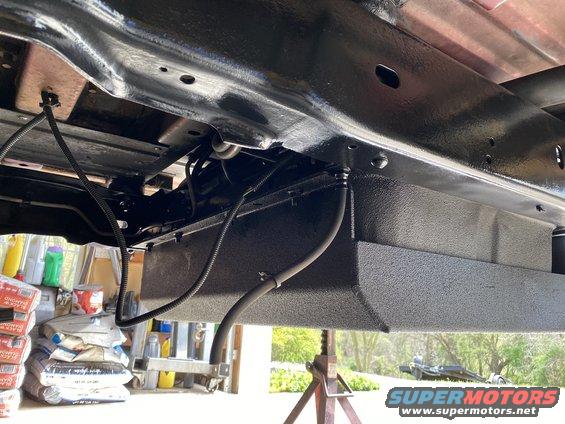
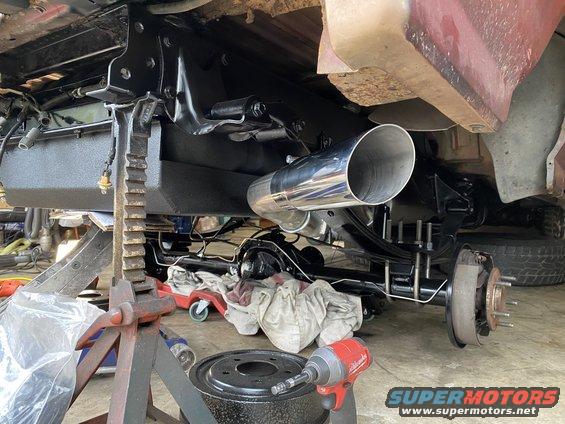
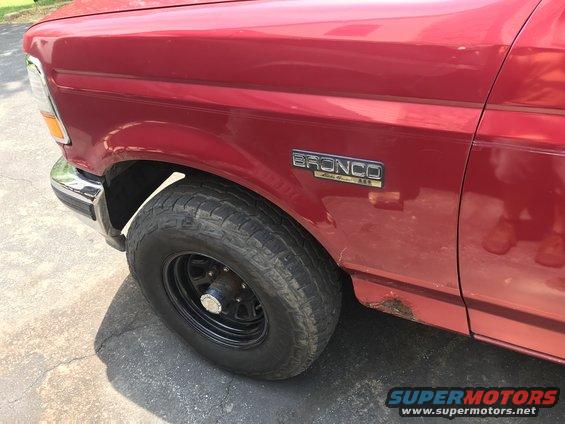
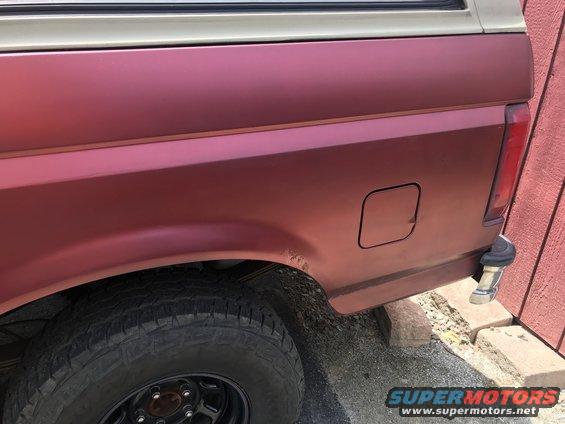
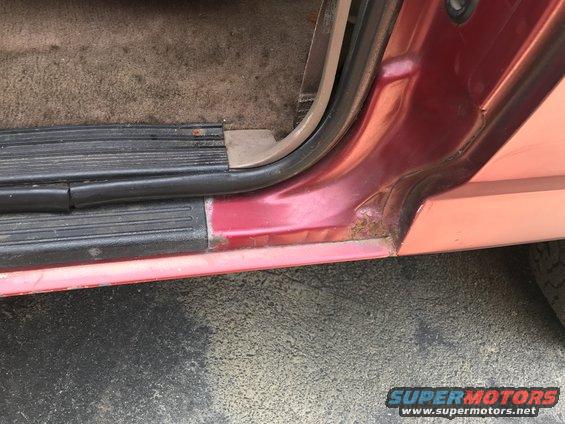
Someone repaired the rust on the rear fenders years ago. They did an ok job but one of the fenders is starting to bubble again. Also both front fenders have rust at the bottom. A small amount in both rocker panels, and also the rear corners of the bed floor. Overall it’s not very rusty underneath though.
Image

Image

Image

Image

Image

Image

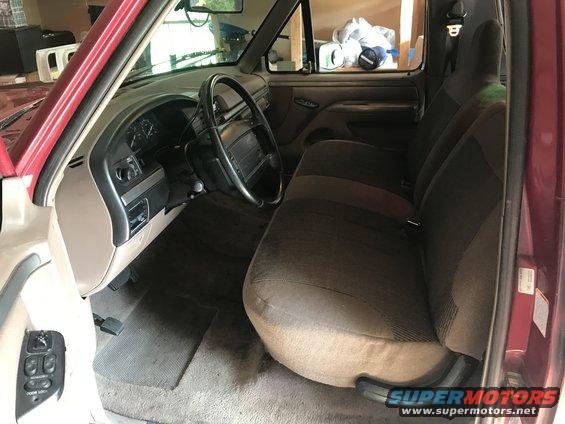
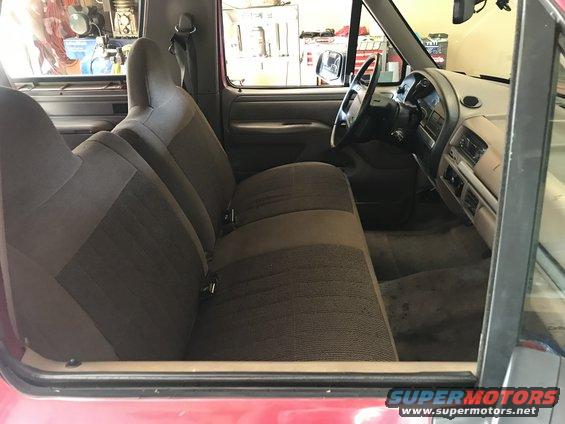
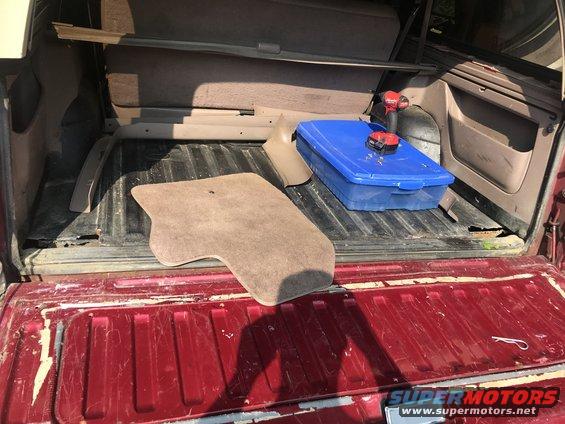
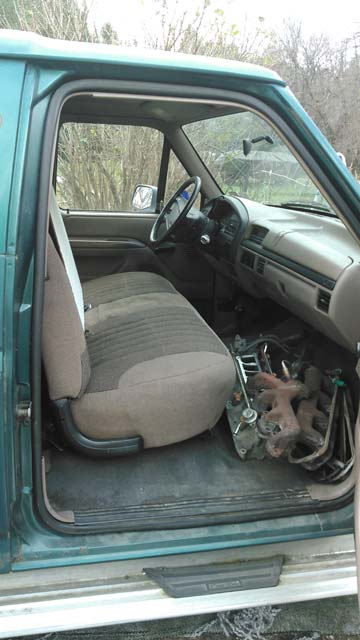
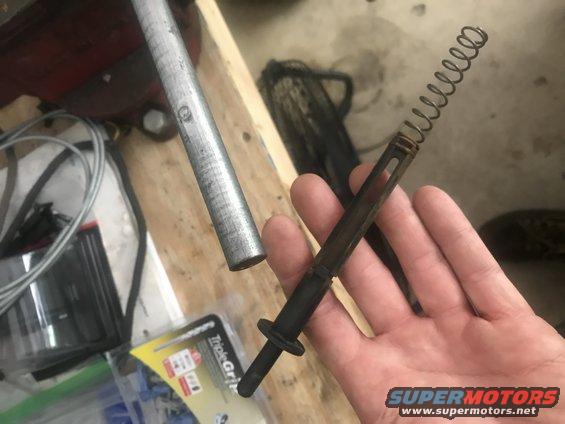
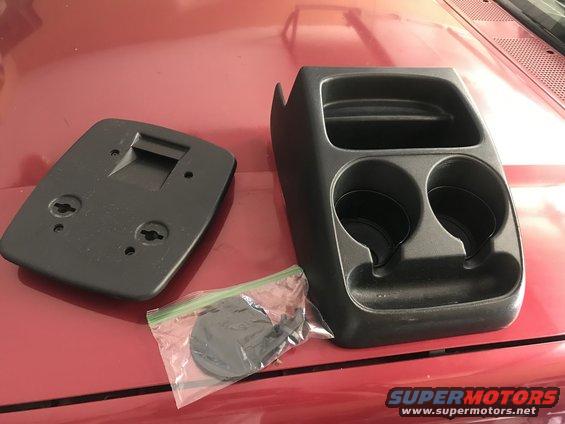
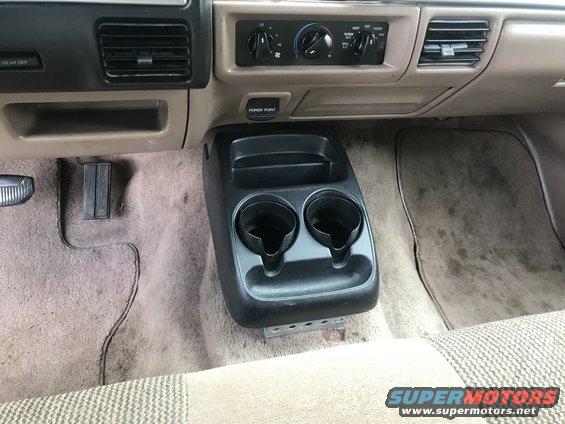
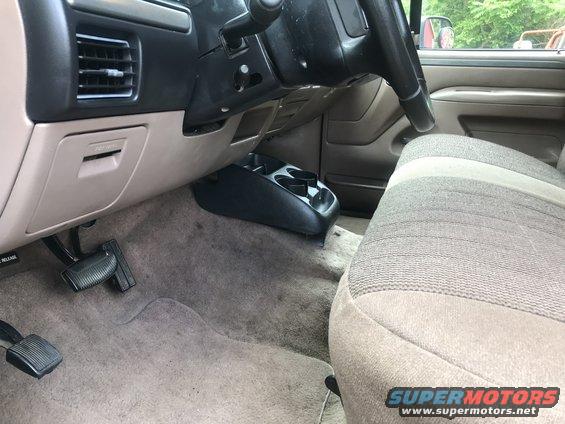
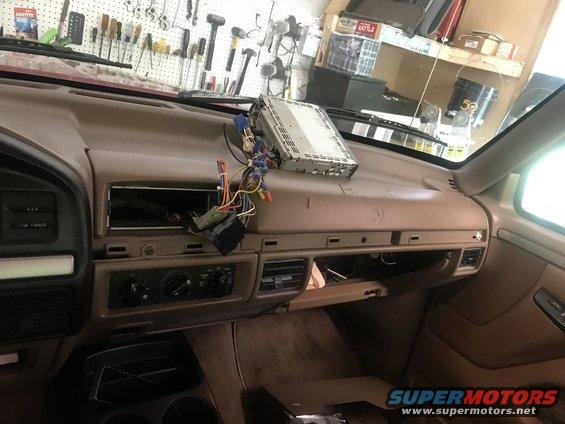
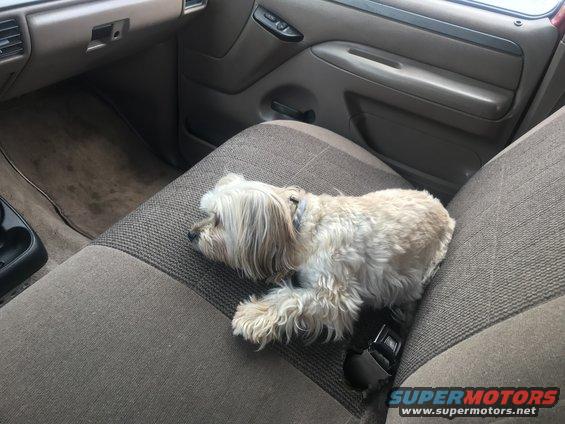
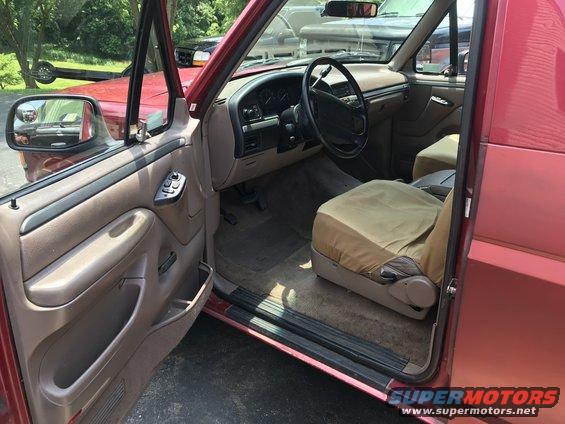
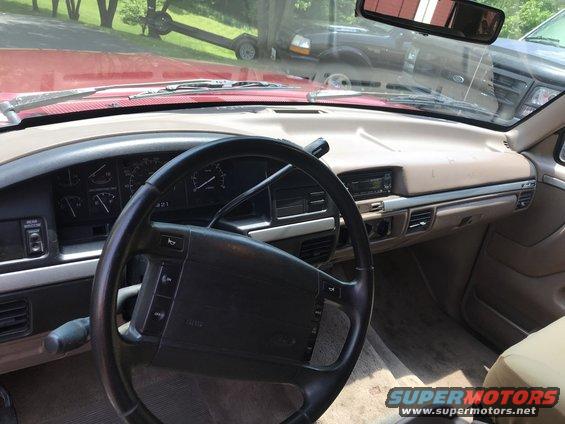
Interior needs a little tidying up..
Image

Image

Image

Image

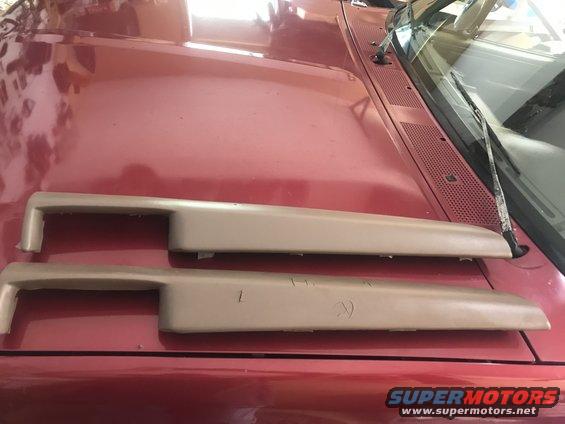
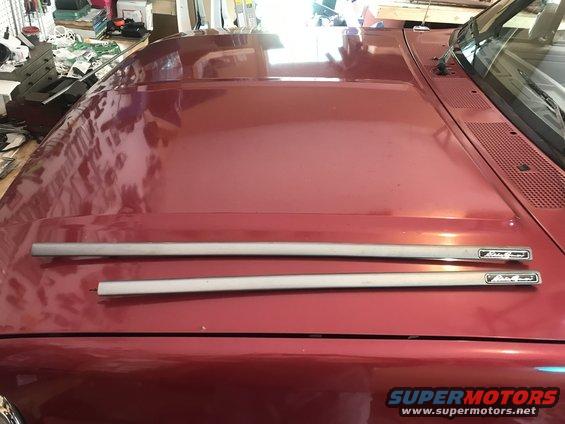
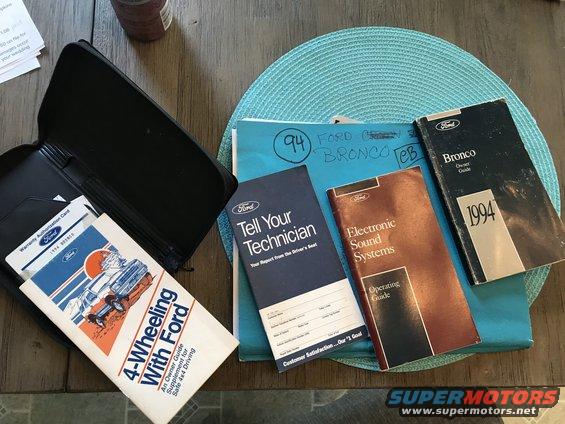
Some cool original stuff..
Image

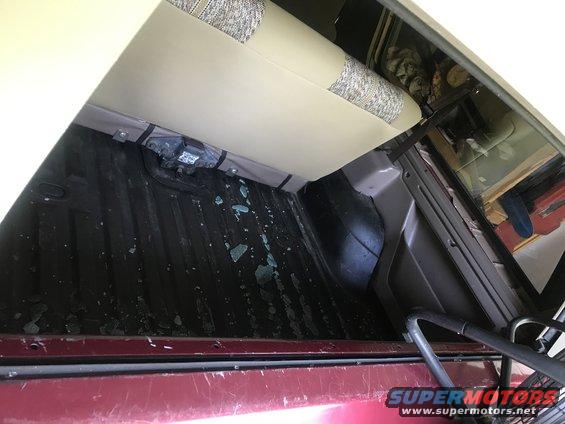
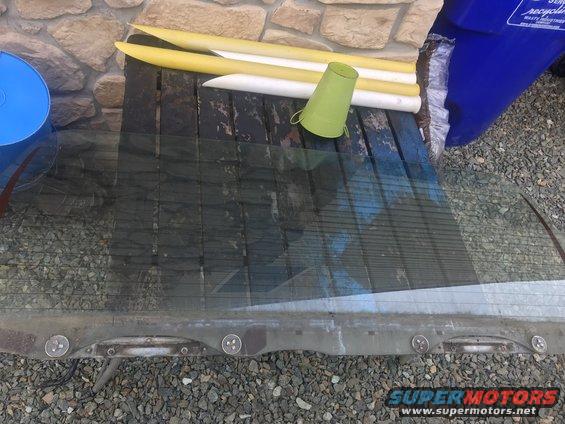
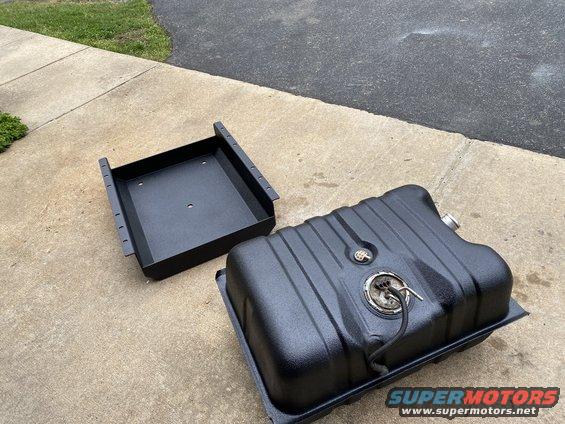
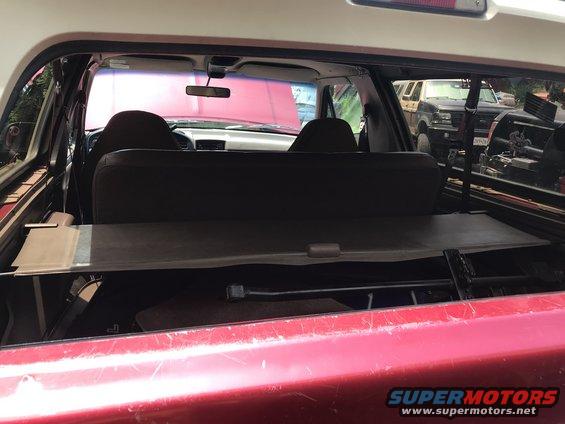
The elusive rear cargo cover.. I’ve never been able to find one until now. It’s not perfect but it’s there and functions.
Image

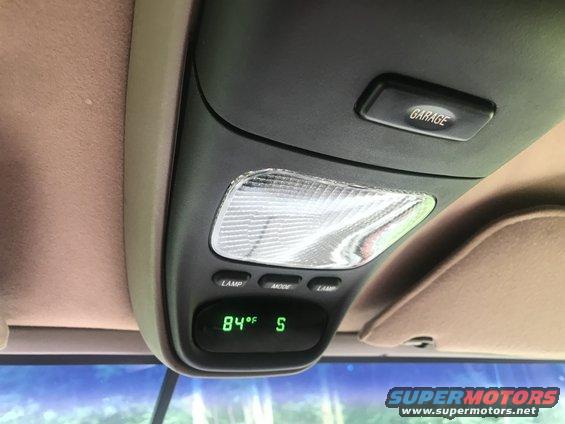
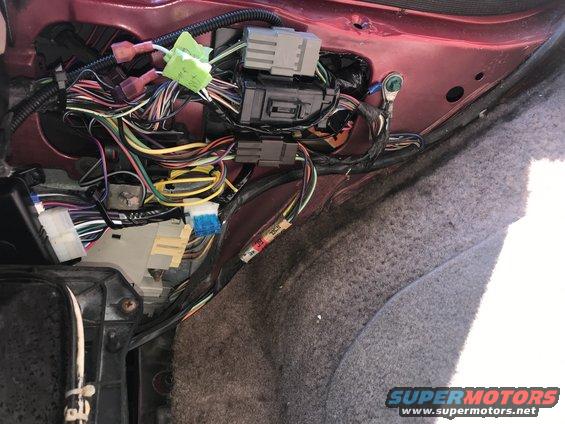
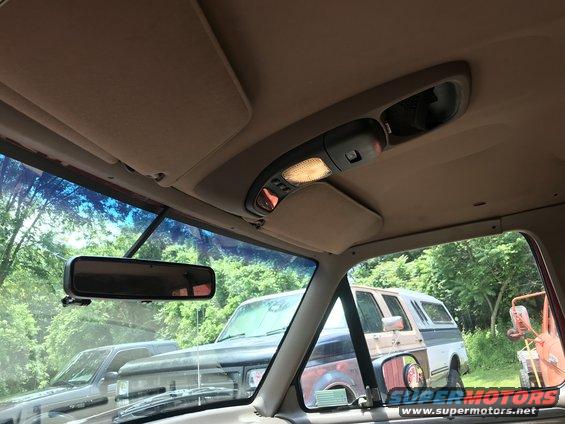
Anyone know why the display in the overhead console wouldn’t be working?
Image

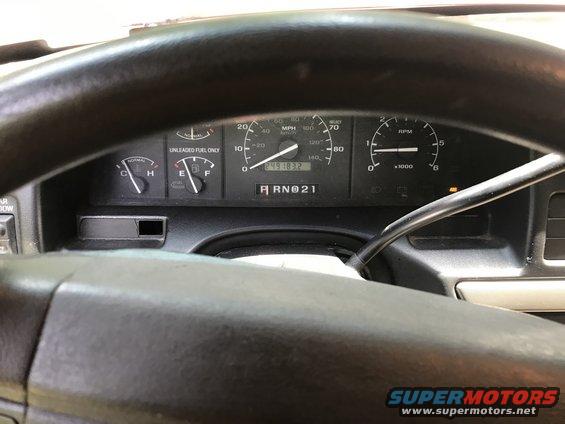
Also, I need to figure out why the abs light is on in the dash. Along with figuring out what that light is where there’s a hole towards the left of the dash? Security or something? It randomly blinks..
Image

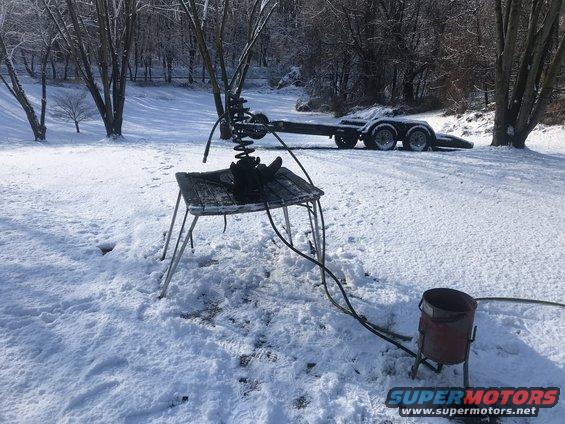
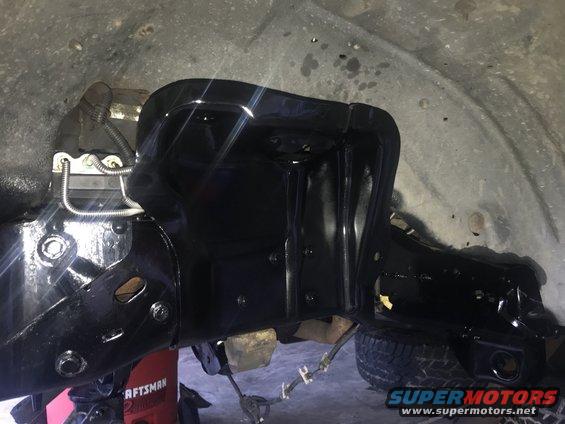
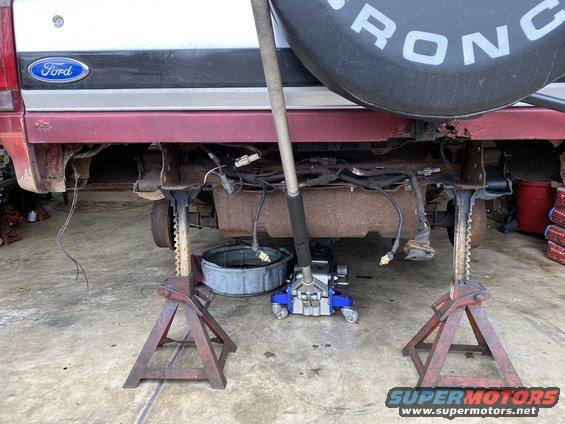
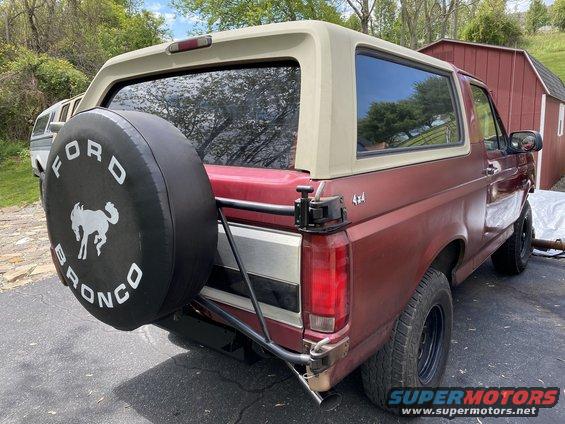
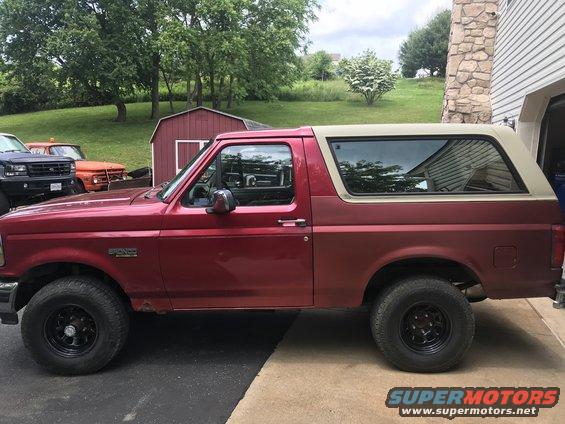
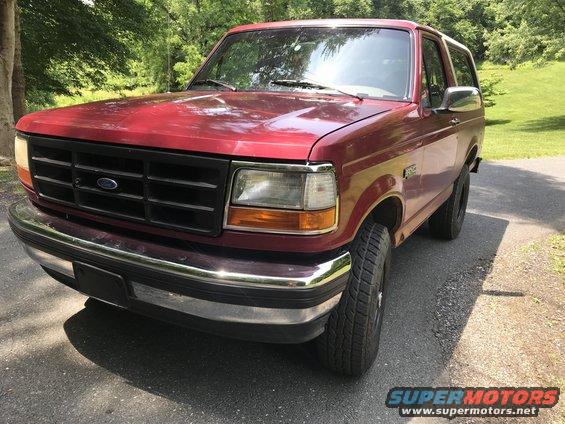
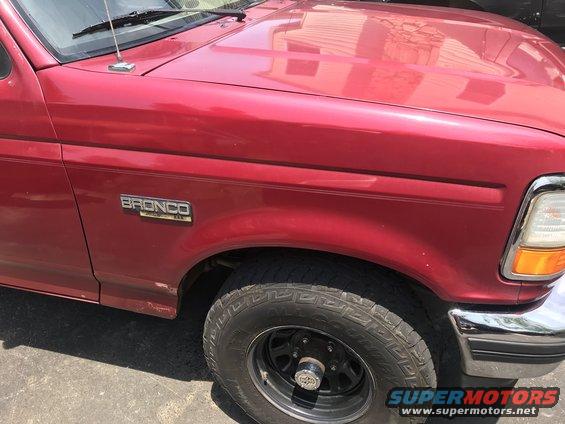
But overall for 249,000 this thing runs and drives great on the original engine and transmission. One of the previous owners was a mechanic that kept logs of lots of repairs. Other owners also recorded repairs. All 3-4 previous owners knew each other, overall it was well taken care of and a lot of maintenance has been done. Going to tag it later today. Plans for this one mainly include driving it and fixing things with only small upgrades. Most everything already works. I have other broncos I’m going overboard building. I’ll document soon as I start working on it like fixing the drivers window.
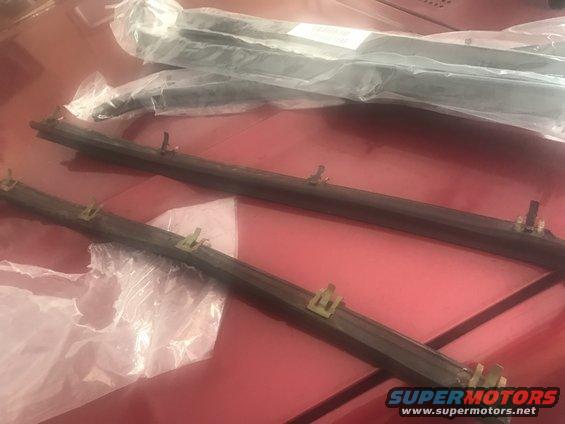
 
#2 ·
Yo Erik,
Congrats!
Amber ABS warning light will come on for numerous reasons. It warns the driver that the ABS has been disabled. Normal power-assisted braking remains but the wheels can lock during a panic stop while the indicator is on. Certain procedures must be followed to find the concern in this situation.
Here's the 4WABS Pin-Point Testing in 93-96 Bronco; This is same as in Ford EVTM/PCED/Workshop Manual
Source: by Ford via me at https://www.fullsizebronco.com/forum/18-introductions/496974-1994-ford-bronco-eb.html#post7116308

See attached Cluster Warning Lights Overview.

Find out if speed control, if equipped, recall work completed by dealership. Call local dealer or register and view status @ https://owner.ford.com; or @ https://vinrcl.safercar.gov/vin/ ... have VIN ready.
"Summary: ON CERTAIN PICKUP TRUCKS, PASSENGER VEHICLES, SPORT UTILITY VEHICLES, AND MOTOR HOMES CHASSIS, THE SPEED CONTROL DEACTIVATION SWITCH MAY, UNDER CERTAIN CONDITIONS, LEAK INTERNALLY AND THEN OVERHEAT, SMOKE, OR BURN. THIS COULD RESULT IN AN UNDERHOOD FIRE."
To confirm current status, use this guide by jowens1126 @ https://www.fullsizebronco.com/foru...hnical-write-ups/457065-93-94-96-cruise-control-recalls-repair.html#post6530073
note that the 93 recall is different than 94-96

1994 Bronco Brochure, Partial; Cover & Page 3; plus pics of EDDIE BAUER model accessories.
by BigRob at 1994 Ford Bronco Bronco Accessories pictures, videos, and sounds | SuperMotors.net

Free registration for some wiring diagrams (86 through 96) and Technical Service Bulletins, (80 through 96), same as by Ford @ BBB Industries- Premium Alternators, Starters, Power Steering Products | TSB's & Wiring Diagrams

➡ Please VOTE in our Full-Size of the Month (F.O.T.M.) & Full-Size of the Year (F.O.T.Y.) Contests @ https://www.fullsizebronco.com/forum/27-f-o-t-m-voting/
Contests will be held in JANUARY, MARCH, MAY, JULY & SEPTEMBER. Each month in-between will be used for nominating contestants to run in the following Month.
You will get ideas by those competing. Also see the prizes! They are awesome as compared to other sites' "contests"!
Then get ready for the Full-Size of the Year (F.O.T.Y.) Contest⚠
This months Poll ends early on 1 June.
 

Attachments

#7 ·
#4 ·
Mainly just been driving it but I’ve gotten a little done.
Pulled off the drivers door panel and replaced the window motor. Now that one works.. But I also discovered some decent pioneer speakers hidden in there.
Image

So after I removed the center console and bucket seats I wanted to mount my clean 96 bronco bench in here. I was saving it for the 92 but I think it fits this project better.
The bench has mounting holes slightly inward of the outmost bucket mounting holes. But the holes were still there. Pulled the rubber plugs and put them in the bucket seat holes. All lined up but the passenger rear bolt. Had to drill through for a bolt with that one. But here’s where the front bench seat bolts compare to the outer bucket seat bolts.
Image

The bench not only cleaned up the look but it’s way more comfortable..
Image

Image

I already bought a cleaner dash pad and Eddie Bauer dash trim, just need to install it..
Got the spare mount back on the truck. Previous owners used hitch pins so I went with it (I don’t plan to keep the stock carrier long term, it makes the passenger side bedside flex in and out as it swings).
Image

You can see 2 of the floor rust holes here (in the corners). Only other rust holes are near the front seat belt base mounts.
Image

And just a few shots with the spare hanging off now..
Image

But you can see the bad repaint in the rear here. Long term id like to get the body rust fixed and have it repainted to factory colors.
Image
 
#10 ·
So some ongoing small projects..
I removed the cargo cover for repairs. The part/end responsible for retracting works fine. The vinyl also looks good. But the end where it pulls out with the handle has some issues. The metal bar was bent and the pin that locates it in the panel on one side was broken. The pin on the other side is still intact but starting to bend. I removed the 2 screws holding the handle in and then the whole metal bar slid out of the vinyl. I straightened the bar but still plan to slide some solid bar inside to beef it up.
Here’s a poor picture of the bar clamped in the vice.
Image

Here’s the pin on one side (obviously the non broken side).
Image

If you look closely in this picture you can see one rivet I removed already which is responsible for locating the pin and allowing it to slide. You can also see the rivet that is still in place which is what the spring pushes against.
Image

And here is the non broken pin removed with its spring still attached in its groove.
Image

I gave that pin to a friend yesterday. He’s going to machine me 2 new ones out of aluminum (or stainless), whichever he can find at work. He’s doing it for free at his busy job so I may not see them for a bit..

Also, since I installed the bench seat I no longer have front cup holders. That just won’t do because I’m always thirsty. My 2000 ranger has a floor console that I like a lot. So I found one at a junkyard for $25 in excellent shape (junkyards around here are usually useless since all my vehicles are old).
Image

It’s nice because it’s easily removable with its own mounting bracket. But the broncos floor is much more slanted than the ranger floor. I cut a piece off of my street sign pole to raise the front to a perfect height. Just need to cover that piece and the gap up front (I’m thinking a black piece of plastic or something).
Image

Image

Should have some more updates soon.. :thumbup
 
#11 ·
So I tried the overhead console fix in the above referenced thread. Capacitor did leak out and I put in the new one from Digi key. First time powering it up the display lit for the first time. A few seconds later it shut off. Only came back on the 4th time attempting to start it. Won’t come on at all anymore, guess my circuit board must be done. Now looking into finding the explorer overhead console parts..
Then I pulled apart enough of the dash to access the dash pad hardware.
Image

First off let me say that rats nest of loose electrical connections and wire nuts bugged the hell out of my ocd.
Image

My dash pad had a lot of cracks in it. The one I found only has one crack on the front and an abrasion on the side.
Image

My broken Eddie Bauer dash trim vs better condition one.
Image

Much better..
Image

And the mini copilot loves the new digs.
Image
 
#12 ·
So progress has been slow on everything. A week and 1/2 ago I fell through a rotten board, tearing open my shin and spraining my ankle. Ended up with an infection and a few days in the hospital but im walking now mostly.
Big bronco axle is still progressing and hopefully I can bump that thread soon.
I didn’t get any pics of the process but the overhead console is now working with the explorer parts (and I actually have another overhead console to fix similarly).
Image

I noticed this bracket broken just after buying the bronco. You could lift and move the whole dash on this side.. Here the broken bracket is visible with the kick panel removed.
Image

Had to cut out part of the broken stock bracket then used the reinforcement one from desolate motorsports.
Image

Made a huge difference but I still need to install the bolt that holds through the side of the dash. Just didn’t have the energy to remove the door which looks like the only way.
 
#13 ·
Still daily driving this one, and taking care of some small details.
The window sweeps were in very poor shape. Here’s the ones from the drivers side. Not only are they cracking but they’re bent like someone had them out before.
Image

Good as new..
Image

So maybe a couple weeks ago I was driving home in a bad storm. Hit a bad series of potholes at speed and my rear window basically exploded. Here I’m drying it out from all the rain.
Image

Not sure how it broke but my best bet is that the tailgate unlatched on the drivers side allowing the tailgate to move, and the force put the corner of the window right into the hard top..

But it’s a good thing the 92 is sitting there in pieces right now. Stole the glass out of it..
Image

This 92 bronco keeps paying for itself.
Image

Another issue is the tailgate glass moved a lot with the deteriorated weather stripping. Just an example of how bad it was.
Image

Now fits snugly.
Image

Saw someone’s thread about the tire carrier bushings so I figured why not. Mine had a lot of play.
Image

I had to drive the new ones in because they are a tighter fit.
Image

And I got this little bracket that pins the carrier open in a few different spots.
Image

Don’t think I’ve posted a picture with the spare cover before.
Image

So since I bought this bronco the tailgate latches have been finicky and the handle didn’t work. Couldn’t figure out the handle til I noticed the bracket that the rod from it inserts into was bent. Opted for a new one since the metal seemed a little fatigued.
Image

Just a rewarding picture because it’s the first time I’ve been able to put the tailgate access panel back on.
Image
 
#14 ·
So far I’ve put about 5000 miles on this bronco and it’s been almost flawless. Had to park it for a about a week to make a couple repairs though. Noticed the radiator was leaking trans fluid from the cooler portion. I didn’t just want to bypass that portion on this bronco so new radiator it was..
Image

And of course the rust wasn’t going to make things easy. Both trans cooler lines broke near the radiator when trying to remove them.
New stainless trans lines.
Image

With a stock exhaust in the way it’s so difficult to get to where the trans lines meet the trans so I had to pull the carpet and transmission tunnel.
The floor at the front of this bronco is so clean. Both of my other FSBs had lots of rust holes in these areas.
Image

All installed..
Image

Not without incident as usual. Chewed a hole in the upper radiator hose with the fan.
Image

Just a picture of part of the fleet after getting it back on the road..
Image

Ditched the auto hubs because, well.. I don’t like them.
Image

Mine still worked and we’re clean though, which I guess is rare. So I’ll probably try to sell them for a few bucks.
Ive put warn premiums on 3 trucks now but decided to try the milemarkers for a change since their cheaper and this is just a driver.
Image

I’ve been collecting parts to do a bunch of refreshing in this bronco. I just have to wait til I can take it down for a few days and drive something else.
 
#19 ·
So I've still been mostly daily driving this one but I've managed to get a few things done. A/C started blowing warm a month or so ago. New compressor, evaporator core and a recharge with dye did the trick.
A minor detail but now theres a center seatbelt up front (still need to find trim rings for the seatbelt openings).
Image

Cruise control recall so it won't burn to the ground.
Image

Finally had someone come out to replace my cracked windshield. Happy to find no rust in the windshield channel.
Image

Image

New windshield and window sweeps were in preparation for finally getting tint. 5% on all back windows and 35% on front windows with a windshield visor.
Image

Image

Then I found someone that makes a keyless entry "kit" since mine didn't come with it from the factory. The main connection for the system tees into the door locks for the passenger side behind the kick panel. The plug needed is behind some stuff.
Image

Once the main harness is connected theres a few more connections to be made..
Image

Horn wire under the steering column.
Image

Everything in place other than extending the parking light wire to the headlight switch (pickups have cab light plugs in the kick panel, broncos do not).
Image

And this is the remote I end up with.
Image

Has lock, unlock, panic like the factory. With horn, dome lights and parking lights involved. I've seen online where people wire the trunk button to be one touch rear window roll down and I'd still like to figure out how to wire that up eventually. But with this keyless setup theres no permanent connections so it can be removed or switched to another vehicle.
 
#20 ·
So I guess it’s time for an update. Been at it a few weeks on and off. So as I mentioned I’ve been collecting parts for a front end rebuild. Been putting it off for months until I developed a very loud grinding noise from the drivers side front (brakes). So I backed it into the garage and started tear down..
Image

Just thought this was funny. Normally my large impact loosens everything. Not here, and there wasn’t enough room under the bronco for the giant breaker bar.. So I improvised.
Image

Around the brake calipers and pads there were chunks of rust and whatnot against the rotor. Mostly from the brake shield I’d guess. Pads didn’t look happy though.
Image

Rotors were a little pitted.
Image

And everything was very rusty. This is the rustiest frame on a truck I own, other than parts trucks.
Image

Image

Nothing would come apart easily.
Image

Image

Only way to get some of the nuts off..
Image

Didn’t like the way the radius arm mounts were starting to deteriorate (Looks like they’ve been replaced before).
Image

Coil buckets were starting to rust thin in a few spots (broke the shock mount out of one too).
Image

Looking better..
Image

Sling a bunch of paint.
Image

Image

The front brake lines to the calipers broke when disassembling so I replaced them all with stainless (going to do the 2 over the rear axle when I do the rear end rebuild).
Image

Image

Spindles did not want to come off at all..
Image

Pivot beam bushings didn’t look great either. Air chisel popped it out in seconds.
Image

Sandblasting in the snow. The after picture looked much dirtier..
Image

Installed new coil buckets and radius arm mounts.
Image

To be continued. Apparently there’s a max image limit now..
 
#21 ·
Image

I didn’t remove the radius arms or coils from the beams because this has taken long enough already.. But one side clean.
Image

And sling some more paint.
Image

And one side in. Used poly pivot beam bushings and they were horrible to install. Not to mention wrestling it back into place by myself. Other side should be fun. Now I remember why I like solid axles..
Image

That’s where this slow project currently sits.
 
#23 ·
Other side all clean..
Image

Image

After replacing inner axle seals, u joint and reinstalling the diff it was time for more paint..
Image

This is always a bear by myself but after using a couple jacks, ratchet straps, my arms and legs, etc. I finally managed to wrestle it into place.
Image

But of course nothing ever goes as planned. Bolt for the upper coil spring retainer snapped. After finally extracting the broken bolt I found a random nut and bolt in my bin and just drilled the holes larger.
Image

Hopefully things will go faster now with those parts done..
 
#24 ·
Still been busy with working on golf carts and other stuff but some progress is better than none..
Image

Had to get the longer studs for the spindles since the shorter abs ones are hard to find and expensive. I just cut them off shorter afterwards.
Here’s one of the axle shafts after sandblasting and a new u joint, but before paint.
Image

After installing axle shafts, spindles, steering, etc..
Image

Painted sway bar back in with new poly bushings (the old bushings were almost non-existent with the inner metal sleeves rusted to the bolts.
Image

I went with polyurethane bushings wherever I could. I know people say they ride rougher but I daily drive a F350 and drive my vehicles hard so poly bushings will hold up better for me.
 
#25 ·
Cleaned, painted driveshaft with new u joints.
Image

Finished pic before I dropped down the suspension to bolt in the shocks.
Image

Image

Trimmed the frame rails for the. 08-10 bumper.
Image

Decent fit (Still want to bedline it and build a crossmember for inside the bumper with hitch and recovery points).
Image

Finally driving and out of the garage..
 
#26 ·
Started into the rear end a couple weeks ago.
Image

Muffler was rusted out but I already knew that..
Image

Image

Rusty but not as bad as the front end.
Image

Safest way I’ve ever dropped a full tank.
Image

Image

So a previous owner swapped on a new shackle and hanger to one side but the other side was starting to rust through so out comes the air chisel again.
Image

Lots of cleaning and paint later..
Image

Image

So I’m swapping a new skid plate in from Desolate Motorsports and since the tank and pump were newer from a previous owner I just cleaned it up lightly.
Image

After some acid etch primer and adhesion promoter.
Image

And then Raptor liner..
Image

An example of the smoother finish when spraying at a higher psi.
Image

Installed..
Image

Image

Rear axle..
A previous owner already swapped bearings, seals, etc. so I’m leaving those alone for now. Also the brakes have about half life left so less work for me for now..
Image

First axle I’ve ever gotten with factory limited slip. Seems to function fine also.
Image

And more sandblasting.
Image

Hopefully I can be driving in a week or so. Daily F350 is having issues so I need to hurry along more now..
 
#27 ·
Ready for some paint.
Image

Image

Rear driveshaft was crusty and hard to get apart.
Image

Image

This is the transfer case skid plate from my 89, need to clean and paint it.
Image

Cat back exhaust to replace the rusted through muffler.
Image

Need to get the rear sway bar back on.
Image

Finally driving. Just need to get bumpers, hitch and sway bar done.
Image
 
#28 ·
So I got some more of the front bumper work done. Ended up trimming a lot from the bottom of the bumper. Forgot to get a before shot but if you’ve seen the underside of the superduty bumpers you’d understand. The tires barely rubbed, I more trimmed because I didn’t want the plastic piece that hangs underneath or any of the associated bracketry.
Image

Clean..
Image

After raptor liner.
Image

I also sprayed and installed the grill from the 92 since this one was all cracked up. I’ll spray headlight bezels when I get new headlights.
Image

Image

Image

Image
 
#30 ·
Next up, rear bumper.. Bought one from desolate motorsports along with the skid plate and hitch. Needed to make a few additions though. Was going to ask about ordering it in bare steel but completely forgot. Always hard to cut up a fancy new product.
Image

Rough cut out (squares and rectangles suck)
Image

Smooth enough..
Image

After adding holes for the trailer plug, tag lights and reverse lights.
Image

And I also raptor lined it..of course.
Image

Anyone else use these water resistant plugs from electrical hub? They’re awesome, been using them on lights and stuff for years.
Image

Image

Image

Image

And just a decent picture..
Image