So I finally decided to commit and do the swap. This is my story.
Updated: 20230206
Updated: 20230206
Wot 'n tarnation?
Yes it's long, no one likes scrolling through walls of text, and I'm sorry. But hear me out-
I want to make all my build information as transparent, organized, and centralized as possible. It was way too damn hard to find what I've put together from research in the many corners of the internet, phone calls to vendors, and visits to fabrication shops for how many times this kind of swap has been done. So I'm trying to frontload the pain and make it as easy as possible for anyone in the future that may want to do this swap, and may be coming from a small knowledgebase like me.
I enlisted the help of a local fabrication shop who specializes in high-end, hotrod, project, and restoration builds.
Build Goals:
- Must be daily driveable.
- Must be reliable.
- Must have the same or better power as the 351w.
- Improved MPG if possible.
Complete the job with a $15k budget.- I don't want to have to do anything but regular maintenance for several years, so the budget was loose to ensure quality parts and work.
Minimal downtime - it's my daily after all.- Despite all the planning and research, this swap took a year, because nothing goes to plan.
- Sate my desire for a new truck.
- Stick with bolt ons as much as possible.
- I'm not a welder, fabricator, or machinist. I'd like to be able to work on it myself going forward.
The Plan:
The technical stuff, the research, and all the stuff I intend to touch, modify, replace, or need to check for in the course of this build. Being that I want this to be a new upgrade rather than patching and fixing something existing, I'm okay with a larger budget on this.
Engine:
Transmission:
Cooling:
Electrical:
Interior:
I knew I wanted a 4bt that was going to be able to produce around 200hp since the 351w is supposed to put out around 210hp @ 3,600 and 325lb-ft @ 2,600 rpm [link]. I was a lot less concerned about the correlating torque numbers on the 4bt since diesels in general produce a lot more torque at lower rpms.
I contacted the Big Bear Engine Company in Colorado [link] quite a bit for information on 4bt's. Turns out there are a ton of them out there, mostly for machinery like woodchippers or generators, but sometimes for bread trucks, and they all vary quite a bit in power output depending on the application. The best way to eyeball a 4bt for what kind of power it will produce is by the Critical Parts List (CPL) number. Also, if you are able to get the engine's serial number, call your local Cummins shop and they should be able to decode it for you and provide a configuration sheet. This will give you an idea of exactly what your 4bt is composed of including the fuel pump and turbo type.
It looks like a vast majority of 4bt's out there are in the 105-130hp range. More research told me that is largely dependent on the kind of cooling, aspiration (turbo or non-turbo), and fuel pump in use. There are some running a little hotter, but they're really hard to find, moreso than the one I got, and more expensive. I was looking to spend $4k max on a low mileage 4bt. And I found it... on Craigslist. It was super shady but worked out in the end.
In order to make 200hp, which I figure should get me around 500lb-ft tq, I'd need to upgrade and tweak certain parts. Research told me the best fuel pump for upgrade-ability was a ppump; more specifically, a P7100 pump (made by Bosch), rather than a VE rotary pump, which is more limited in how much fuel can be pushed through it. Extremely few 4bt's received a ppump, I found. I'd also want a 4bt with an HX30 (made by Borg Warner), an HE221, or TD04HL-19T turbo. I watched a couple of videos of people having trouble getting an HX35, which came on the 6 cylinder 12 valve 6bt's, to spool up with bolt ons, so I wasn't going that route. Finally, to make the power I wanted (which is well within this configuration's abilities) I'd have to make a few mostly bolt-on upgrades according to the 4btswaps forum [link]. Those are:
- HX30 turbo
- Wastegate set to ~22psi
- Intercooler installed
- A PPump flowing 130cc, or 1000 shots
- 3200+rpm governer spring
I used some CPL decoders and none seemed to give any meaningful information on CPL's unless they were in the 0-1000 range, and the engines in that range didn't come with the turbo or fuel pump I wanted. After searching online in a lot of places and correlating tidbits of information, I found out that a 4bt CPL#1839 came with an HX30 turbo, a P7100 pump, and produced 130hp stock. That's the one I looked for. It took me a couple of months, but eventually one popped up a couple of states away. I made an offer and picked it up that same weekend for $3,500. Ran when pulled and has ~37k miles.
Code:
-----------------------------------------------------------------------------------------------
| ReCon Engine Information |
-----------------------------------------------------------------------------------------------
|Part Number - DR1683RX |Build Date - 01-NOV-2004 |
|Description - ENG 4BTA 3.9 B 130@2300 P7100 |Fuel Pump Type - P7100 |
|Family - 4b |Fuel Type - DIESEL |
|Liters - 3.9l |Fuel Solenoid Voltage - 12V |
|Application - AUTOMOTIVE |Fuel Pump Governer Type - RQVK |
|CPL - 1839 |Turbo Location - LMRO |
|Aspiration - JACKET WATER AFTER C |Oil Pan - REAR |
|Configuration - D383022BX02 |Air Compressor - N/A |
|Rated HP@RPM - 130@2300 RPM |Vibration Damper - N/A |
|Peak Torque - 327@1700 |PTO Location - N/A |
|Torque Rise - 35.29% |Paint Color - BEIGE |
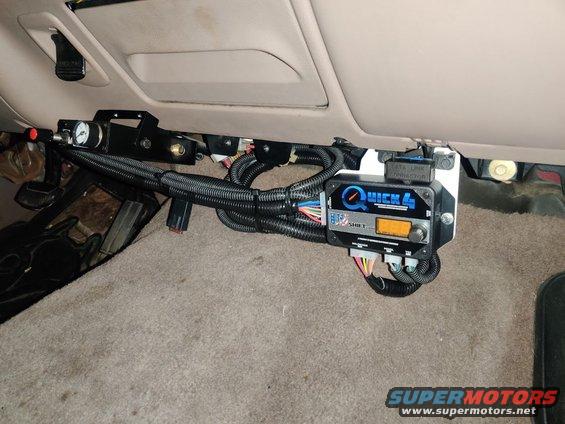
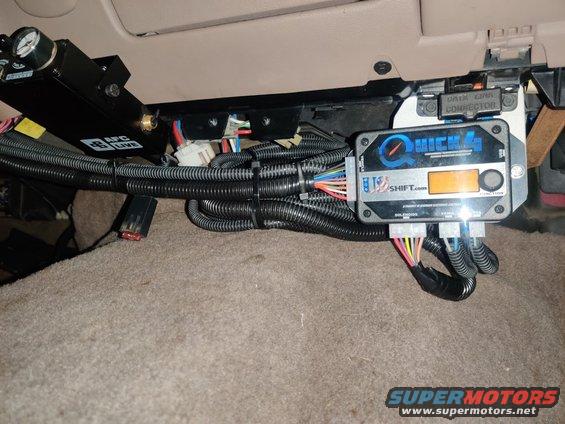
-----------------------------------------------------------------------------------------------I decided to stick with my E4OD and upgrade it with 4R100 steel internals to handle the increase in power. This will also require an aftermarket transmission controller. DCS has used and recommends the [US Shift Quick 4 Transmission Control System].
From all of the reading I've done, if you don't plan to increase the power of a 4bt, you can get away with using the stock e4od transmission in this bronco. It is good for an absolute max of around 500lb-ft of torque [link] [link]. Mine has 250k miles on it without a rebuild and, though I haven't abused it, I am trying to increase the power on the 4bt from 130hp to 200hp (~500lb-ft). So, because it's probably tired and needs a little love, I researched if I should get a new transmission or stick with mine and rebuild it.
The ZF5 would have been nice and I seriously thought about it. That is the manual transmission offered for the 92-98 manual ford trucks. I love manual vehicles and the idea of having a vehicle that can run mechanically without electronics is very attractive to me. However, I live in the DC, Maryland, Virginia (DMV) area and traffic is a bitch. I have a motorcycle and a manual car, and I don't like feeling like my leg is going to fall off. So I decided to stick with an auto (because daily). But is there an automatic transmission that's mechanical?
The E4OD transmission is allegedly mechanically controlled from the 1-3rd gears, and overdrive is electronically controlled [link]. That was a pretty big selling point for me, and since I already have an E4OD, I may as well stick with it. A common upgrade to the E4OD's is to have the aluminum internals replaced with the 4R100's steel internals. That upgrade will make the torque tolerance a lot better at around 1,000lb-ft and is a simple upgrade in that the two transmissions are virtually the same [link]. The E4OD was offered in the 92-98 automatic Ford trucks, and the 4R100 was offered in the 99-2003 ford diesel trucks. I will need an aftermarket Transmission Control Module (TCM), though, as the factory one can't be re-flashed or modified to accommodate the swap reliably or simply [link].
Some additional very useful information in my calculations were these [E4OD Transmission Specs] and these [E4OD Torque Specs].
The gentleman working to upgrade the E4OD let me know it'd be a good idea to grab a [Mag-Hytec] pan for a little better cooling and increased fluid capacity in addition to still running my factory transmission cooler. I figure more cooling is better, so I'll go that route. It'll increase the fluid capacity from the factory 17-18qts to ~22-24qts. Bonus, this also adds a better place to put the transmission temperature sensor. Since the E4OD didn't come with a temp sensor from the factory, a common place to put one is in the pressure test port on these transmissions. With the Mag-Hytec pan, it comes with a port tapped into it already. He also used a Transgo kit to do the rebuild and left the following notes of what was done on the invoice:
REBUILD TRANSMISSION. UPGRADES INCLUDE, STEEL OD PLANET, 6 PINION STEEL FRONT AND REAR PLANETS, TRANSGO TUGGER SHIFT KIT, LOW REVERSE CLUTCHES, STEELS, LOW HOUSING AND COMPLETE SPRAG, 1 PIECE CASE BUSHING, STEEL ACCUMULATOR VALVES AND DUAL CLUTCH TORQUE CONVERTER. ALL CLUTCHES, STEELS BEARINGS BUSHINGS, SPRAGS, SEALS ARE REPLACED ALSO.
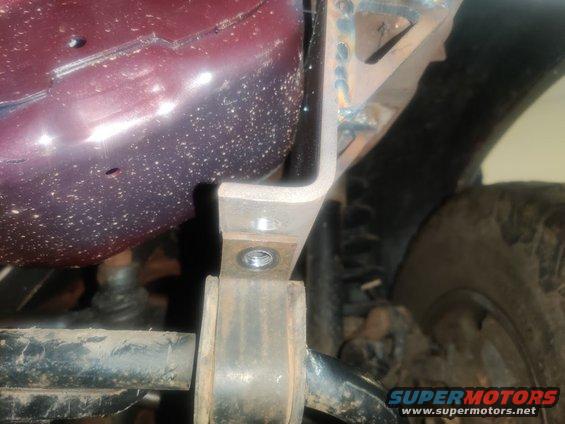
Driveshaft, Axles, Suspension:I will be using the stock axles, driveshaft, and suspension.
I used [The Grimm Jeeper] to get an idea of how hard the 4bt will be working to move the Bronco. If I plug in the numbers (Ford E4OD transmission, Borg Warner 1356 transfer case, 3.55 axle gear ratio, and 32" tires) it tells me my RPMs will be 1853@70mph, which is a good cruising speed to me. Based on this, I decided not to do any re-gearing just yet. That'll be another later build along with suspension. Based on the power output of the 351w, I don't think the gearing or driveshafts will need upgrading just yet.
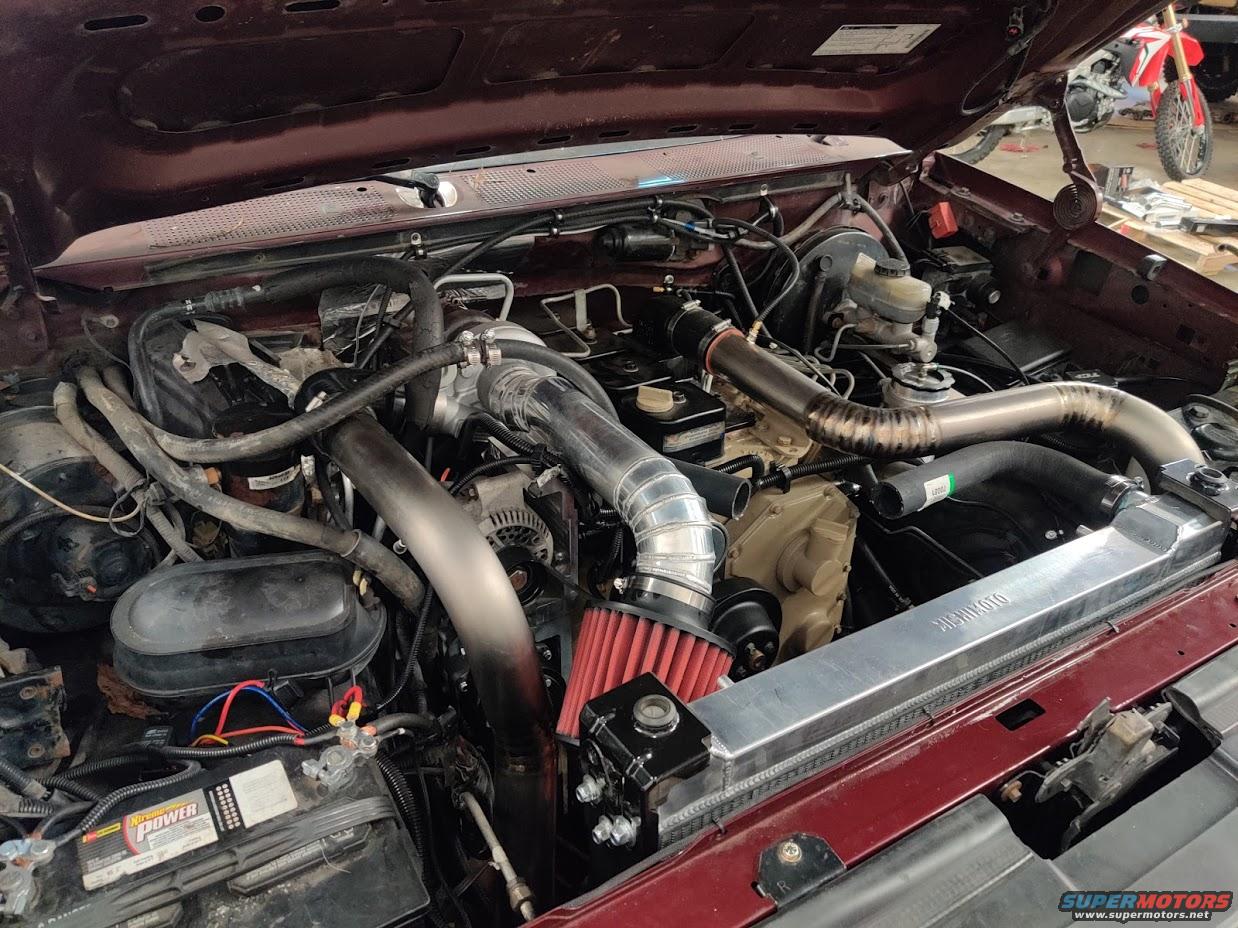
Intake System:Intake is one of the systems I figured would need a lot of customization. The shop and I agreed to try out some titanium (because why not?) charge pipes to and from the banks intercooler and aluminum for the intake. The intercooler is specifically for the 96 7.3l Powerstroke since I have the core support and radiator for the same.
I used a universal filter that fit on the end of the 2.5" intake piping and angled it to be right behind the radiator.
Fuel System:In the interest of longevity, and since the tank would have to be dropped anyhow to get the fuel pump out at the very least, I decided to go with a replacement plastic tank from Bronco Graveyard. They gave me contact info for the manufacturer and I verified with them that the tank would be good for diesel fuel. They confirmed it would be as it's the same plastic they use in their diesel applications. I know this tank won't be as rigid, but it also won't rust. And to help with the rigidity factor, I contacted Desolate Motorsports for their aluminum skid plate. It has a little bit better coverage and also won't rust.
The sending unit I hadn't planned to replace, but it was misplaced so I got one anyhow. Fortunately those can be acquired from Bronco Graveyard without fuel pumps attached. The shop will add the in-tank pickup lines and a fuel sock to complete the application.
I did not upgrade the mechanical lift pump since I'm not drastically improving fuel flow. I decided against larger injectors, but did upgrade the fuel delivery valves in the interest of a little bit more power without sacrificing my fuel economy. I'm also leaning towards keeping things more mechanical than having a bunch of electrical systems.
I'm also went with an AFC live tuning system from Power Driven Diesel since I commute a lot and go from sea level to higher elevation semi-frequently. This allows me to adjust fuel/air on the fly from in the cab and adjust smoke output to a degree as well.
Someone mentioned I might consider a fuel/air separator. I figure this can be a future upgrade, but the engine didn't previously run with it and I don't think it would need it now. This build is emptying my pocketbook quickly, so it'll be a future me problem. If I do, I was looking at something like [this] Airdog 150 separator.
Gauges and Dash Cluster:I want to be able to utilize my factory dash cluster as much as possible. To monitor some of the important things, I'll also need to add some in a clean fashion. I'm not big on electronic displays that require a toggle to see different sensors and their measurements, and being that it's an older truck I want to keep it sort of era-correct.
I used the factory sending unit so the fuel senses correctly. To keep my tachometer working, I used the tachometer kit that Diesel Conversion Specialists offers for the 4bt. The engine will only rev to 3k as I had a 3k governor spring assembly installed. Because of this and the alleged modularity of the OBS dash cluster, I played around with the idea of getting the OBS Powerstroke tachometer, but it was going to require more work than plug and play, so I'll just stick with the Bronco's. I'll continue to use the dummy gauge in the factory gauge cluster for engine temperature as well. I did get the plastic cover over the fuel gauge from a Powerstroke of the same era and put it on my Bronco cluster so it says "Diesel Only".
I initially got the medium mocha 3 gauge pod from GlowShift, then decided I wanted one more gauge, returned it, and got the 4 gauge pod. They only offer the 4 gauge in black. After some research, I found someone [here] talking about SEM's Medium Prairie Tan matching up pretty closely. Using some vinyl adhesion promoter and that paint, the pod looks almost identical to my interior. I'm sure the variation is just due to age and UV exposure over time. The gauges going in this pod are oil pressure, boost, transmission temperature, and exhaust gas temperature (EGT). The gauges I got from GlowShift are black and backlit green to try to match the factory dash lighting.
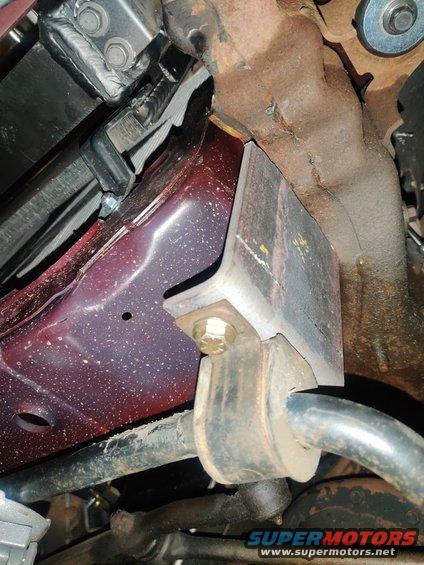
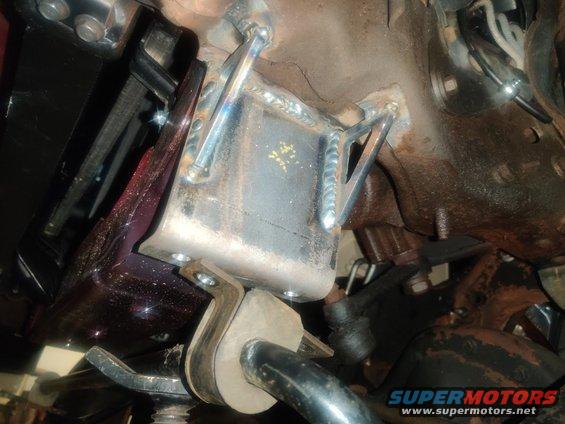
Power Steering System:Fortunately, the engine came with a power steering pump. However, it wouldn't work if I added a mechanical vacuum pump. The reservoir neck to fill the pump with fluid would point more directly upward, which wouldn't be accessible or usable due to the p7100 being mounted above it and blocking it. A lot of research revealed using an old 90's GM Astro van power steering pump reservoir over the top of a dodge power steering pump. The reservoir fill neck angles out almost 45 degrees and wouldn't get in the way. That would take a little bit of junkyard diving work.
I went with a PSC power steering solution for the 6bt's as shown in my parts list. It uses a remote reservoir, so that got mounted elsewhere near the brake booster. The power steering pump clears the fuel pump and works fantastic, much better than the old Ford one. I did have to order an extra oil line and fitting to get oil from the block to the pump, also in the parts list.
Vacuum Pump System:Vacuum is needed to operate both the AC switches and the brakes, making them power brakes. Because of that, vacuum is required in this swap. There were two options for creating vacuum, either install an electrically operated or a mechanically operated vacuum pump.
An electric vacuum pump will need lines run to the battery to operate it. I didn't research this too much, but I imagine they are probably always on unless more wiring is done to integrate the circuit with the brake or a switch to activate it when needed. I read a post about someone who did integrate the circuit with the brake, but if you want AC that probably isn't very advantageous. In the Bronco, the AC controls are vacuum operated.
I'm going with a mechanical vacuum pump. My 4bt didn't come with one, so I had to figure out how to add one that would operate with the power steering as well. Turns out the 6bt vacuum pump timing-gear-driven and fits under the fuel pump where the power steering pump was. The power steering pump mounts to the end of the vacuum pump and is also gear driven.
Exhaust:The shop and I decided 3 inch stainless exhaust would work out the best. I went with a four inch tip for it as well. The 3 inch exhaust was hard to clear between the transmission and firewall, over the rear axle, and along the side of the fuel tank. The shop is awesome and made it all work out, though. The outlet isn't quite 3 inches on the HX30w we found out, and the my turbo didn't come with a needed downpipe flange vband kit I sourced from CustomFabShop.com. That granted a 3" downpipe outlet.
Cooling:
Even though I didn't need to, I decided to go with a big cooling refit. I wanted the cooling of a Powerstroke diesel of the same era. So I swapped out the radiator support from the Bronco with an F350's of the same year. Because of this, I used a Mishimoto aluminum 7.3l radiator, a Mishimoto aluminum 7.3l transmission cooler, a 7.3l Banks Intercooler, custom FF Dynamics electric fans, and a custom-fabbed fan shroud by the shop. This did require lengthening the hood-release mechanism, but that only involved welding in a little material to elongate it. The hood-release works as factory.
Electrical:
I wanted to make sure that I had plenty of storage and redundancy for electrical, just in case, so I installed the BroncoAir dual-battery solution that uses a solenoid between the batteries to isolate each. A switch in the cab allows me to engage both if needed. This helps in really cold weather if the heater block isn't hooked up. Both batteries provide plenty of cold-crank amps to start the engine.
Interior:
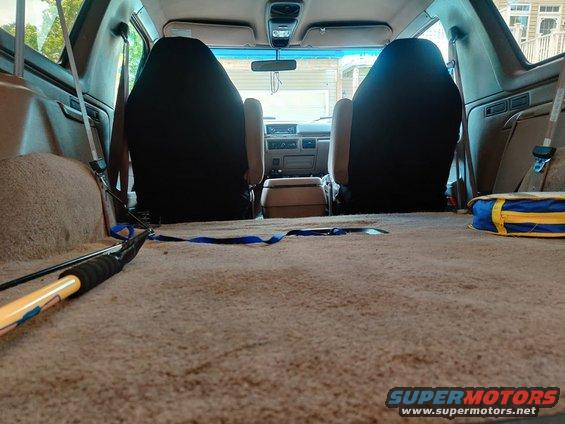
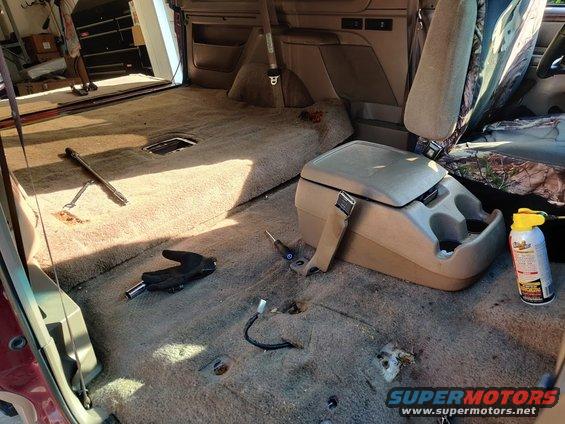
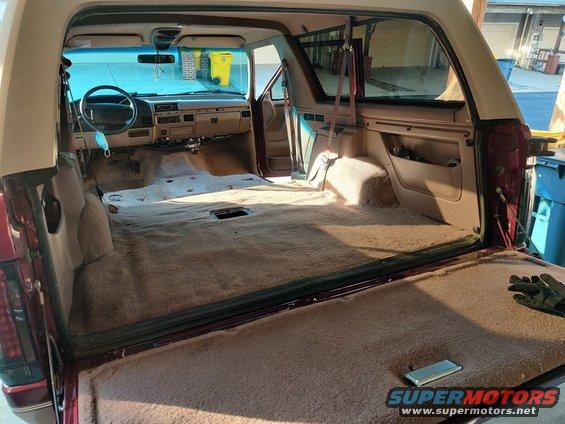
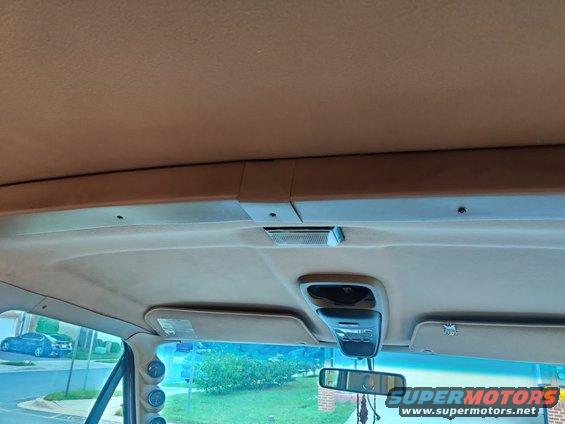
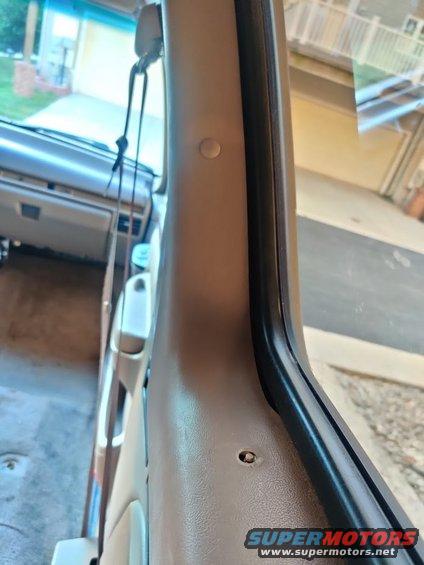
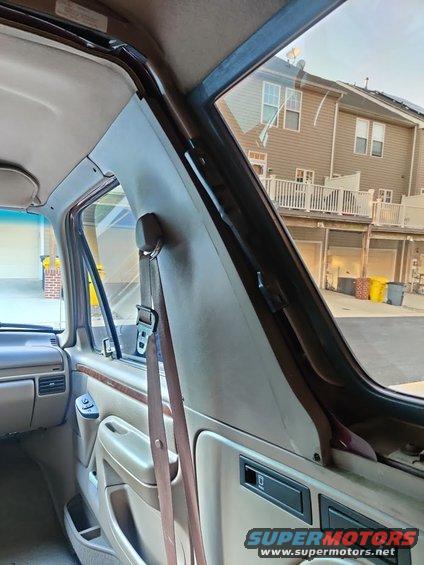
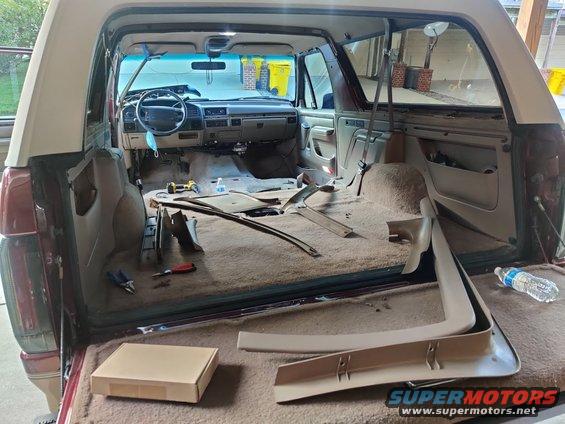
The interior is getting a ton of love. Double din stereo conversion (I love my nav and tech), 40/20/40 reupholstered front seats, all LED interior lights, new vinyl flooring, ceramic tint on all windows, all screw fasteners replaced with galvanized steel screws to stave off rusty screws, and heavy-duty sound deadening.
I used the Double Din conversion kit from OBS Interior and installed an android head unit with Nav. It works with android auto on my phone easily. The front seats I pulled from an F250 of the same era. I like them a lot better than the captain chairs that it had. The flooring I got from Bronco Graveyard. The ceramic tint massively cut down on heat in the summer.
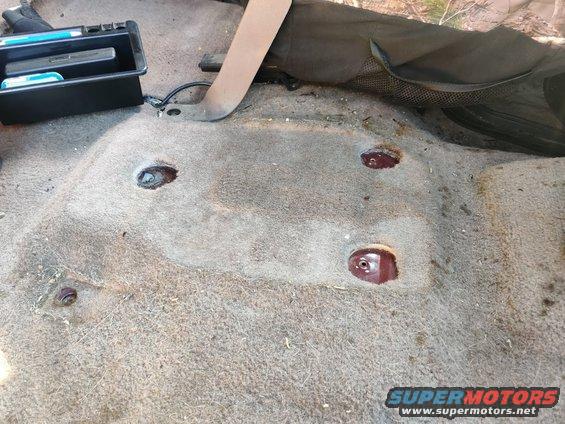
The sound deadening I went hard on. After a lot of research and comparisons, I went with Sound Deadener Showdown's products (no longer in business, RIP) to deaden as much sound in the cab as possible. These things are noisy to begin with. Add a diesel engine and fat exhaust and it's unbearable for any length of time. I applied the 3 tiered system from SDS and some materials from Resonix when I ran out. CLD (constrained layer damper) tiles for resonance in the body panels (only needs ~25% coverage). On top of that went MLV (mass loaded vinyl) for sound blocking. And lastly, wherever I could find cavities that could fit it, I installed Hydrophobic Melamine Foam to further cut down on certain frequencies of noise and help prevent rattling of panels against each other. This system went down on the floors, over the wheel wells, up under the dash, doors, and even on the roof and A/B pillars of the cab. The difference was massive. Measurements are [here]. Find pictures and descriptions of the flooring and sound deadening install starting [here].
Parts List:
Here's a comprehensive list of parts I've ordered along with the price tag at the time I bought them and links to them. Don't forget about taxes, shipping, and have extra room in your budget for last-minute smaller items (guess what I forgot about?). They stack up fast. As my dad says, "Make your budget, then add 20%". This is a little low-balled as there are shop supplies, my own supplies, and some random miscellaneous parts I needed I didn't track that stacked up extra costs by a few hundred bucks.
| Item | Notes | Supplier | PN | Price | Link |
| Engine enamel | Dupli-Color Cummins Beige | Amazon | $14.11 | [link] | |
| Engine enamel | Dupli-Color Black | Amazon | $14.11 | [link] | |
| Engine primer | Rust-Oleum Gray | Amazon | $7.50 | [link] | |
| Gas Tank Skid Plate | Aluminum | Desolate Motorsports | DES-01053 | $299.99 | [link] |
| Transmission Control Module | Diesel Conversion Specialists | 2159 | $750.00 | [link] | |
| Adapter Plate | Diesel Conversion Specialists | 2040 | $769.00 | [link] | |
| Flex Plate for 6.0 Starter | Diesel Conversion Specialists | 1235 | $550.00 | [link] | |
| Engine Mounts | w/ isolators | Diesel Conversion Specialists | 2081 | $350.00 | [link] |
| Oil Press., Water Temp., Adapter | Sensor adapters | Diesel Conversion Specialists | 1031 | $30.00 | [link] |
| Tee Vacuum Line for Brakes | Incl. w/ conversion kit | Diesel Conversion Specialists | [link] | ||
| Tachometer Kit | Diesel Conversion Specialists | 2142 | $303.00 | [link] | |
| AC compressor bracket | Diesel Conversion Specialists | 3068 | $595.00 | [link] | |
| AC Compressor lines | Diesel Conversion Specialists | 1027 | $131.00 | [link] | |
| AC Compressor, Dodge | Diesel Conversion Specialists | 1386 | $165.00 | [link] | |
| Power Steering Coupler | Diesel Conversion Specialists | 2351 | $25.00 | [link] | |
| Lower Water Neck (45 degree angle) | Diesel Conversion Specialists | 3102 | $110.00 | [link] | |
| Upper Water Neck (vertical) | Diesel Conversion Specialists | 1029 | $80.00 | [link] | |
| 4BT 8V 3.9L CUMMINS LOWER GASKET SET | Diesel Power Products | DPP-3802375 | $133.16 | [link] | |
| 4BT 8V 3.9L CUMMINS UPPER GASKET SET | Diesel Power Products | DPP-3804896 | $91.23 | [link] | |
| Triple Gauge Pod & Gauges | Beige, 3 pod, gauges incl. | Glowshift | GS-346T-C7-PKG | $239.96 | [link] |
| Gas tank | Plastic | Jeff's Bronco Graveyard | 30216 | $145.00 | [link] |
| Sending Unit Seal | Jeff's Bronco Graveyard | 30243 | $2.00 | [link] | |
| Gas tank breather valve | Jeff's Bronco Graveyard | 30259 | $16.00 | [link] | |
| Breather Valve Seal | Jeff's Bronco Graveyard | 30259S | $6.00 | [link] | |
| Rear Tank Filler Hose | Jeff's Bronco Graveyard | 30218 | $25.00 | [link] | |
| Upper Gas Tank Straps | Jeff's Bronco Graveyard | 30272 | $19.00 | [link] | |
| Lower Gas Tank Straps | Jeff's Bronco Graveyard | 30278 | $45.00 | [link] | |
| Diesel filler neck | 92-98 F350 | LMC Truck | 43-3331 | $209.95 | [link] |
| Core Support 92-97 PS | For 92-98 F350 Core Support | LMC Truck | 43-2868-T | $229.95 | [link] |
| Radiator Insulator Set-LWR | For 92-98 F350 Core Support | LMC Truck | 43-0934 | $11.95 | [link] |
| Reinforcement Support-LH | For 92-98 F350 Core Support | LMC Truck | 43-2870 | $29.95 | [link] |
| Reinforcement Support-RH | For 92-98 F350 Core Support | LMC Truck | 43-2871 | $29.95 | [link] |
| Bolt-Support | For 92-98 F350 Core Support | LMC Truck | 50-0216 | $0.95 | [link] |
| U-Nut-Support | For 92-98 F350 Core Support | LMC Truck | 40-0888 | $0.95 | [link] |
| Rad Core Mounting Kit 18pc | For 92-98 F350 Core Support | LMC Truck | 43-0963 | $89.95 | [link] |
| Bracket-Radiator Core Mount | For 92-98 F350 Core Support | LMC Truck | 45-1465 | $29.95 | [link] |
| Bolt-Mount Bracket | For 92-98 F350 Core Support | LMC Truck | 40-0591 | $1.25 | [link] |
| Nut-Mount Bracket | For 92-98 F350 Core Support | LMC Truck | 40-0871 | $0.60 | [link] |
| Transmission Rebuild (96-97 PS converter) | 4r100 steel internals | Maryland Transmission Specialist | $3,810.74 | [link] | |
| Pod, Gauges, Sensors | Came w/GlowShift kit & wiring | Glowshift | GS-346T-C7-PKG | $239.96 | [link] |
| Additional Sensor, different pod, additional gauge | Came w/GlowShift kit & wiring | Glowshift | GS-346T-C7-PKG | $71.29 | |
| 4bt Cummins Diesel Engine | CPL#1839 p7100 pump | Other | $3,500.00 | ||
| Dowel Pin Tab w/ Bolt | Killer dowel pin fix | Power Driven Diesel | 54001010006 | $125.00 | [link] |
| Budget Builder 3K/4K Governor Springs | Added adjustment tool | Power Driven Diesel | 60700000001 | $150.00 | [link] |
| Adjustable Turbo Boost Elbow | Power Driven Diesel | 10920920512 | $20.00 | [link] | |
| 4BT Cummins 055 Fuel Delivery Valves | Power Driven Diesel | 62001020001 | $130.00 | [link] | |
| AFC LIVE in Cab Fuel Tuner | Power Driven Diesel | 61001010000 | $345.00 | [link] | |
| AFC Foot for AFC LIVE Installation | Added on AFC Tuner Page | Power Driven Diesel | 61001010008 | $40.00 | [link] |
| AFC Max Travel Kit | Added on AFC Tuner Page | Power Driven Diesel | 61001010007 | $35.00 | [link] |
| Machined 8v Rocker Pedestal | Required for ARP Head Studs | Power Driven Diesel | 51816141300-1 | $200.00 | [link] |
| Intercooler pipes | Possibly reuse banks pipes | Wit's End | $1,255.00 | [link] | |
| Downpipe and exhaust | 4 inch exhaust | Wit's End | $1,309.50 | [link] | |
| Dual Battery Kit | BroncoAir | $418.00 | [link] | ||
| Labor | Wit's End | $22,006.42 | [link] | ||
| Ford 6.0 PS Starter | Mean green starter | Xtreme Diesel Performance | MG6670 | $369.95 | [link] |
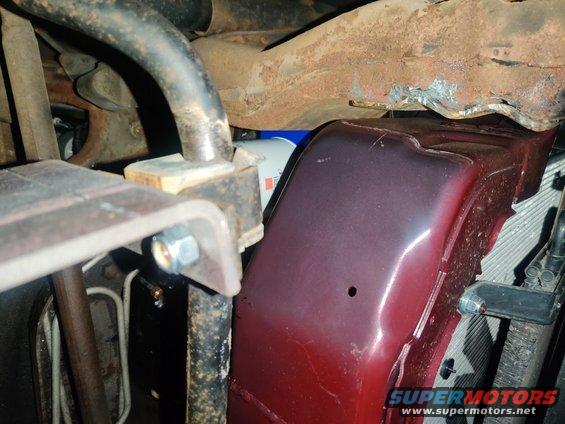
| Oil Remote Filter Kit | PacBrake | Xtreme Diesel Performance | PBHP10007 | $234.13 | [link] |
| Radiator - 96-97 PS | Mishimoto Aluminum | Xtreme Diesel Performance | MIMMRAD-F2D-95 | $395.95 | [link] |
| Front Mount Intercooler | Banks | Xtreme Diesel Performance | BP25970 | $1,531.75 | [link] |
| PSC PK1490 High Performance Pump Kit | Dodge Ram 2500/3500 4WD | Xtreme Diesel Performance | PSCPK1490 | $460.75 | [link] |
| ARP 247-4206 Diesel Head Stud Kit | 3.9L Cummins 4BT | Xtreme Diesel Performance | ARP247-4206 | $332.31 | [link] |
| Dorman 904-810 Vacuum Pump | Dodge 5.9L Cummins | Xtreme Diesel Performance | DOR904-810 | $236.87 | [link] |
| AFE 49-90002 Mach Force XP Exhaust Tip | 4" In x 5" Out x 12" L | Xtreme Diesel Performance | AFE49-90002 | $66.49 | [link] |
| 12V FREEZE PLUG BLOCK HEATER (89-98) | CPP Diesel | 3313272 | $72.95 | [link] | |
| Mishimoto Transmission cooler for 7.3l | Mishimoto | MMTC-F2D-99SL | $349.95 | [link] | |
| SEM Medium Prairie Tan Vinyl Paint | AutoPlus Auto Parts | ||||
| Vinyl Paint Adhesion Promoter | AutoPlus Auto Parts | ||||
| CLD, MLV, HMF, Butyl Rope, Velcro | Sound Deadener Showdown | $467.12 | |||
| CLD, Butyl Rope, Velcro | Resonix | $127.89 | [link] | ||
| Transmission cooler 11" | American Volt | $137.75 | [link] | ||
| Ceramic tint | $950.00 | ||||
| Mag Hytec Transmission Pan | Mag-Hytec | $371.00 | [link] | ||
| Electric Radiator Fans | FF Dynamic | $550.00 | |||
| Turbo cartridge & Fuel pump governor | Rebuild / balance / advanced 14* | $1,604.15 | |||
| 40/20/40 Seats & Reupholstered | Upholstered in Porsche Terracotta | $2,000.00 | |||
| Off Road Power Steering Reservoir | PSC | $275.00 | [link] | ||
| Odyssey AGM Batteries x2 | 950 cca each | Autozone | 65-PC1750T | $610.54 | [link] |
| Throttle Position Sensor | TCI | 377450 | $229.95 | [link] |
Questions & Answers:
Questions I or others have had and their answers. I'll do my best to keep updated here to help avoid people needing to dig through comments on this thread for answers.
Is swapping the instrument cluster from a 96-97 F350 diesel OBS into a Bronco a straightforward swap?
This is not a straightforward swap. It's likely the PSOM will need to come with the cluster. Also try the OBS or PowerStrokeNation forums for more information (thanks TravisITGuy).
Does anyone know how the glow plug indicator works on the 96-97 F350 diesel OBS instrument cluster?It appears these years did not have a glow plug indicator, just a wait-to-start (WTS) light.
Also, the 4bt does not have a glow plug. An engine block heater and/or a heater grid is recommended.
The block heater will go into a freeze plug port. You can find a block heater here [link] (thanks curtwow).
The heater grid installs between the intake elbow and the head of the engine. Image for heater grid here [link] (thanks texaswoodswalker893).
What kind of mileage can I expect to get with a swap like this?I will get a more accurate number through testing once the swap is complete. I have been told with my current drivetrain I can expect to see between 20-25mpg. I've seen a couple of posts say 30mpg and one say 35mpg. I imagine the higher numbers are without performance upgrades like I'm doing, even though what I'm doing I think is very mild.
Should I upgrade the cooling system such as the radiator and fan?Generally 4BT does not get very hot by design. Since you don't plan to boost 4BT (bigger turbo etc.), stock Bronco or F150 radiator is sufficient enough to cool that engine even in hot climate. The only recommendation would be to get rid of 4BT stock mechanical fan and replace it with el. fan for the case if you tow some heavy trailer uphill in hot climate. Recommended el. fan would be from Ford 500 or similar. Junk yards are full of these very powerful dual fans, but it would not be bolt on. That would be the only thing needed. Bigger radiator is unnecessary overkill [link](thanks @milan65).
Will I need to upgrade the suspension?That is up to you, but initially, no. The 4bt weighs in at ~750lbs depending on dressings and fluids [link]. The 351w weighs in at ~510lbs with block, heads, and manifolds alone [link] and [link]. If your Bronco has the dual shock and coilover suspension up front already because it had a v8 (I don't know about the i6 model) general consensus seems to be you'll be fine. Additionally, Diesel Conversion Specialists confirmed this under the the "Engine Weight" section on their instruction page here: [link]. Understand your ride will be a little more nose heavy, but no more than if you put a snow plow or a heavy duty bumper on the front of your rig.
Story Time!
Would you like some pictures? And a story too? Here you go!
But seriously, this is a story and not meant to be technical at all. I have crap memory so I figured I'd write down the journey here.
20190727 - Toll Hell
![Image]()
![Image]()
20190729 - Up A Creek
![Image]()
20190731 - Lost the Battle
![Image]()
20190801 - Won the War
![Image]()
![Image]()
20190926 - Best Laid Plans
![Image]()
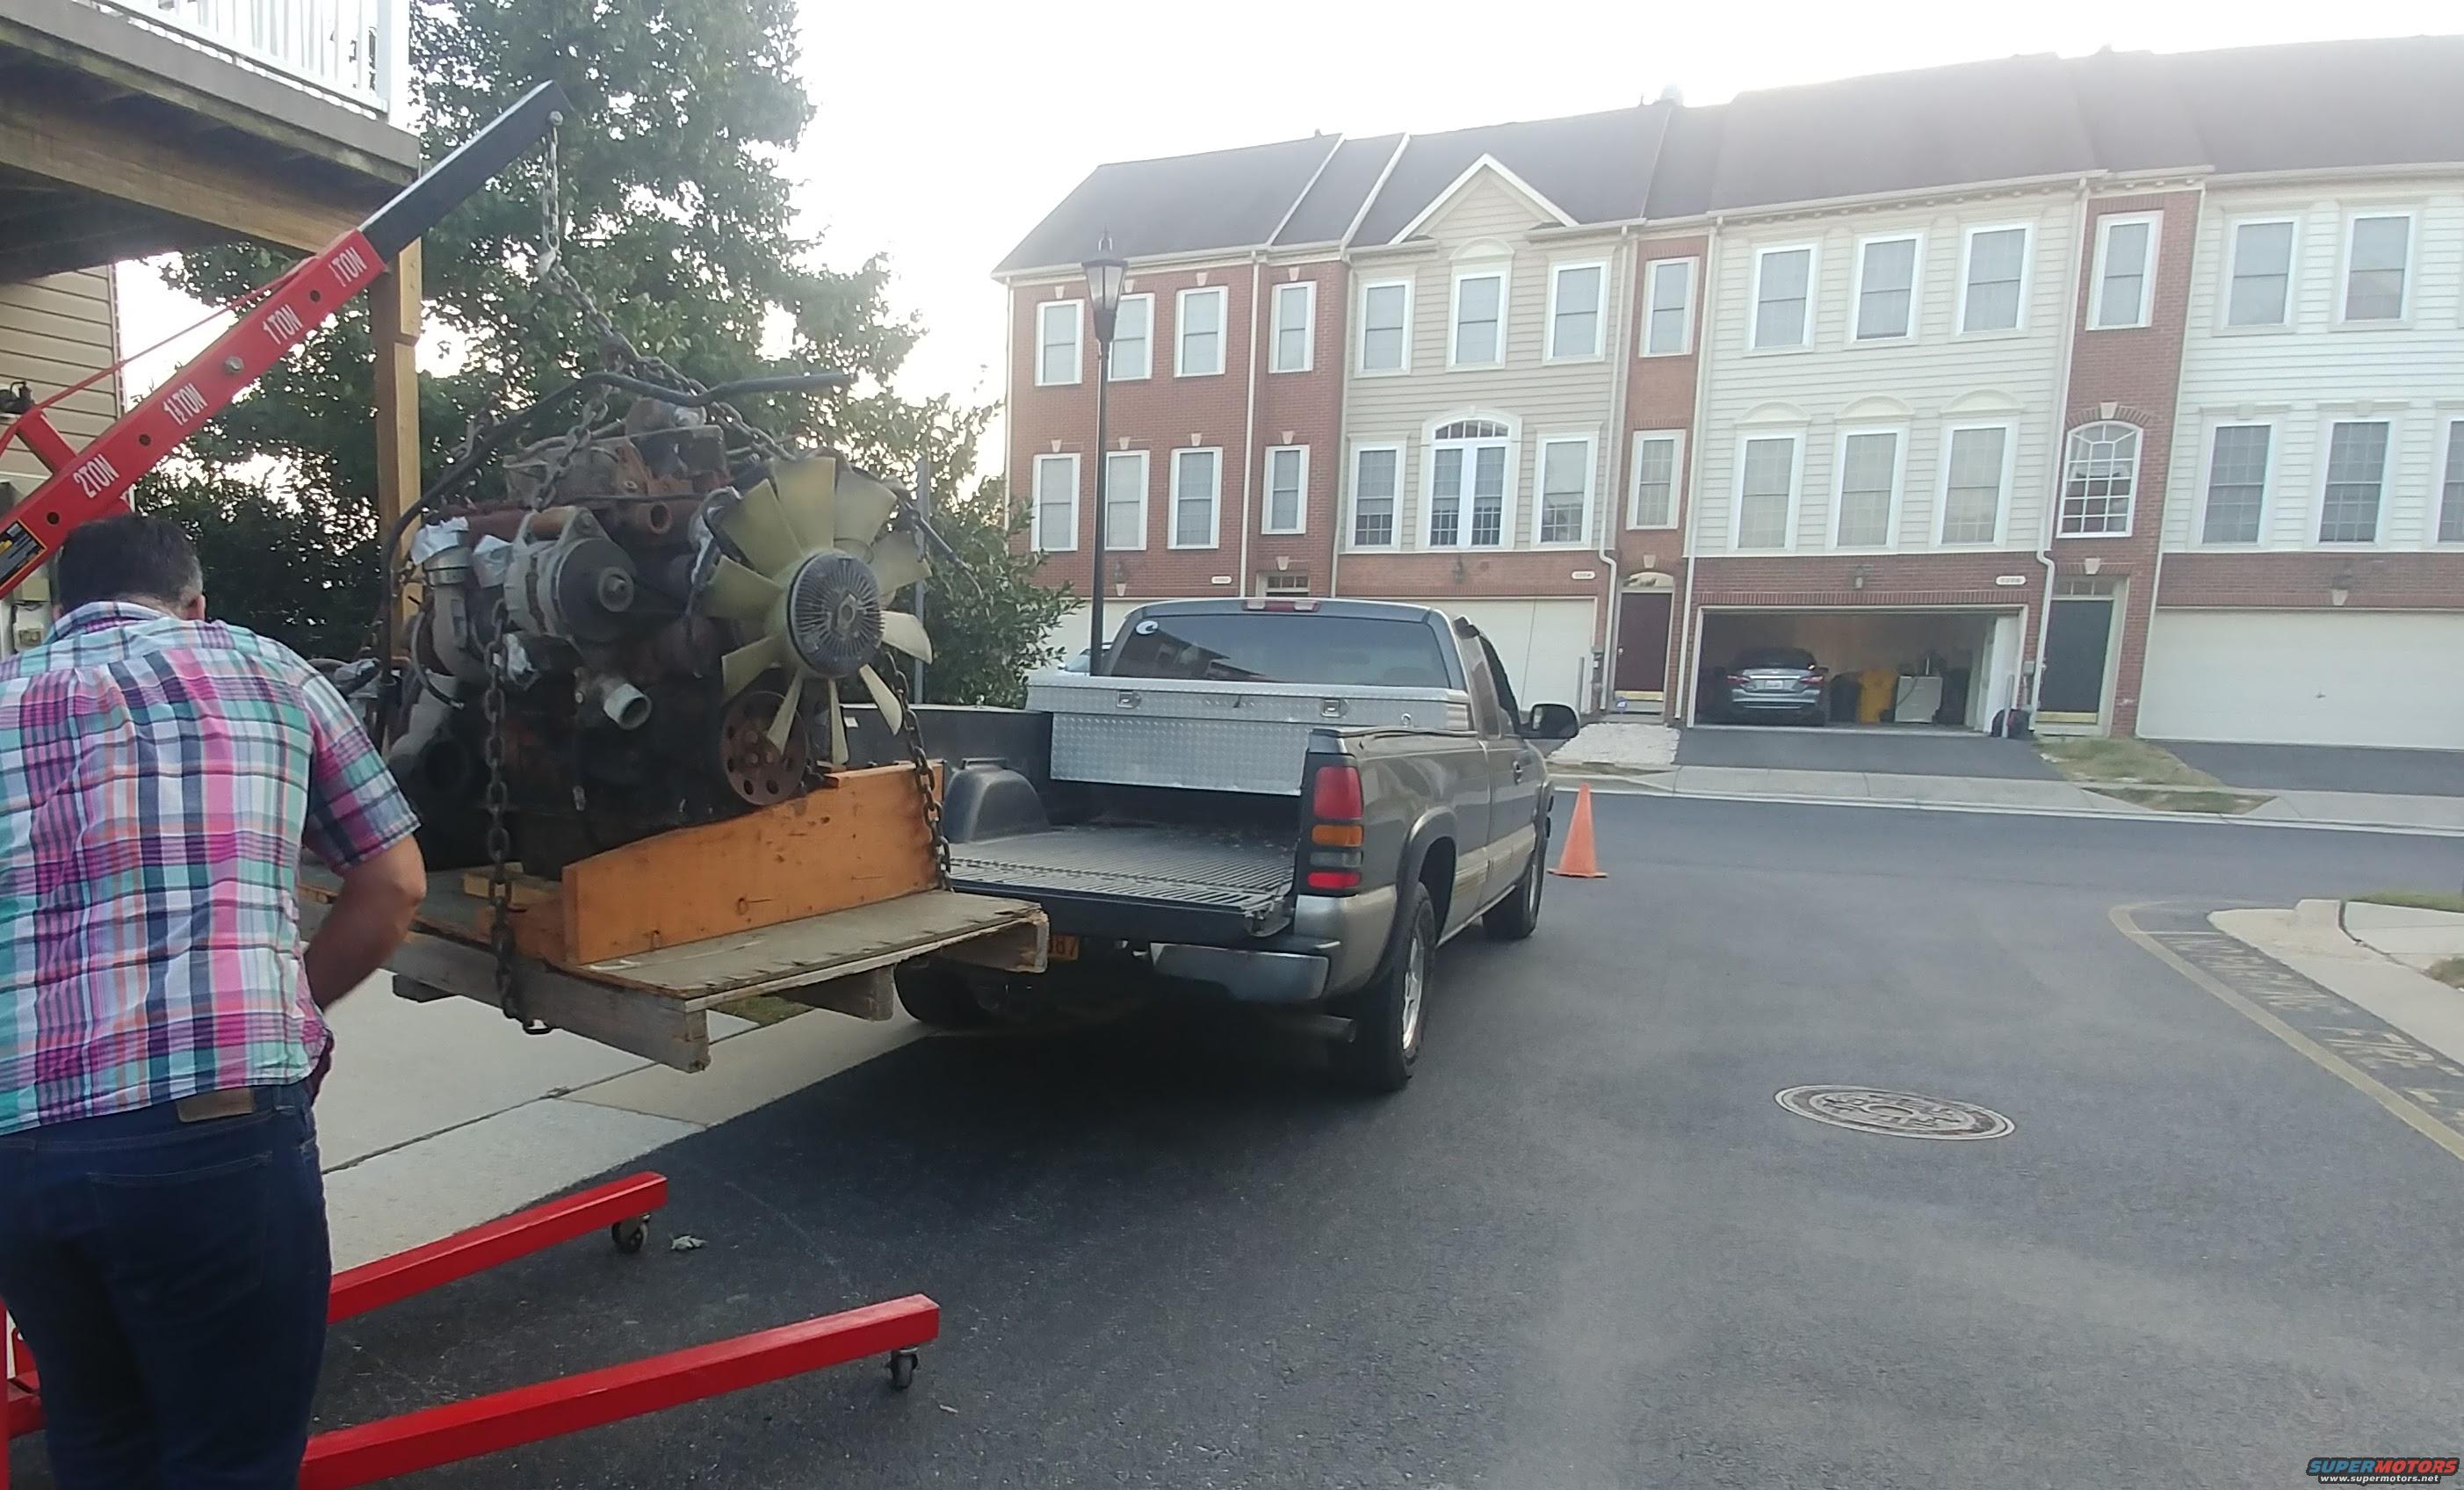
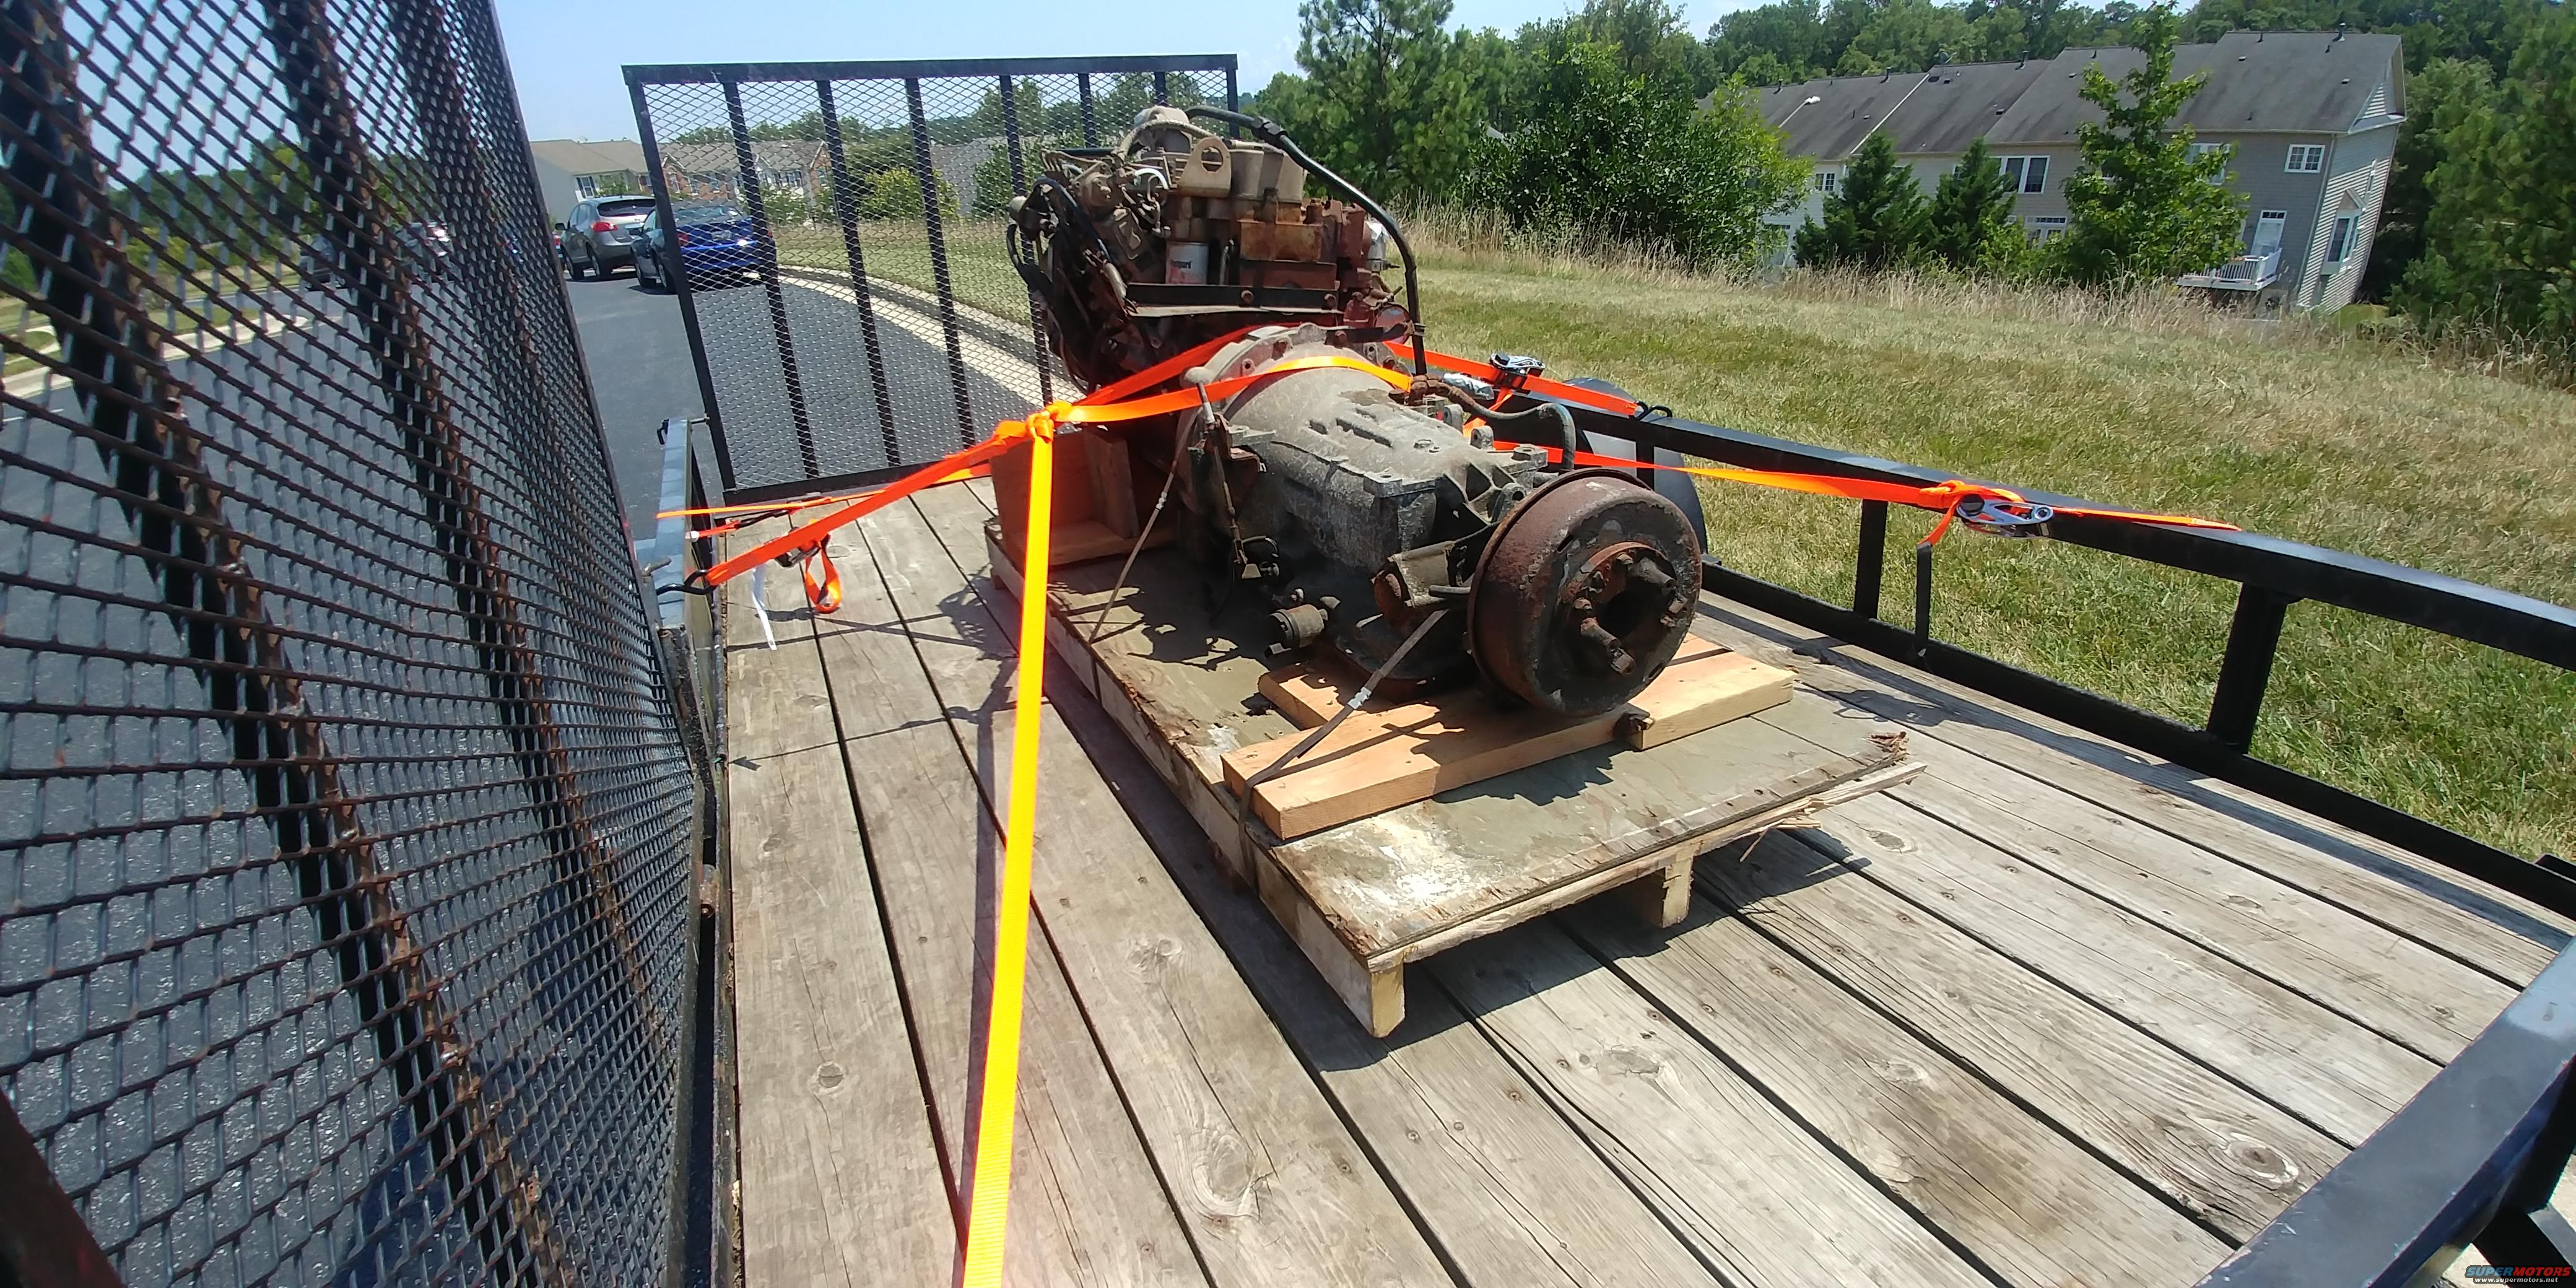
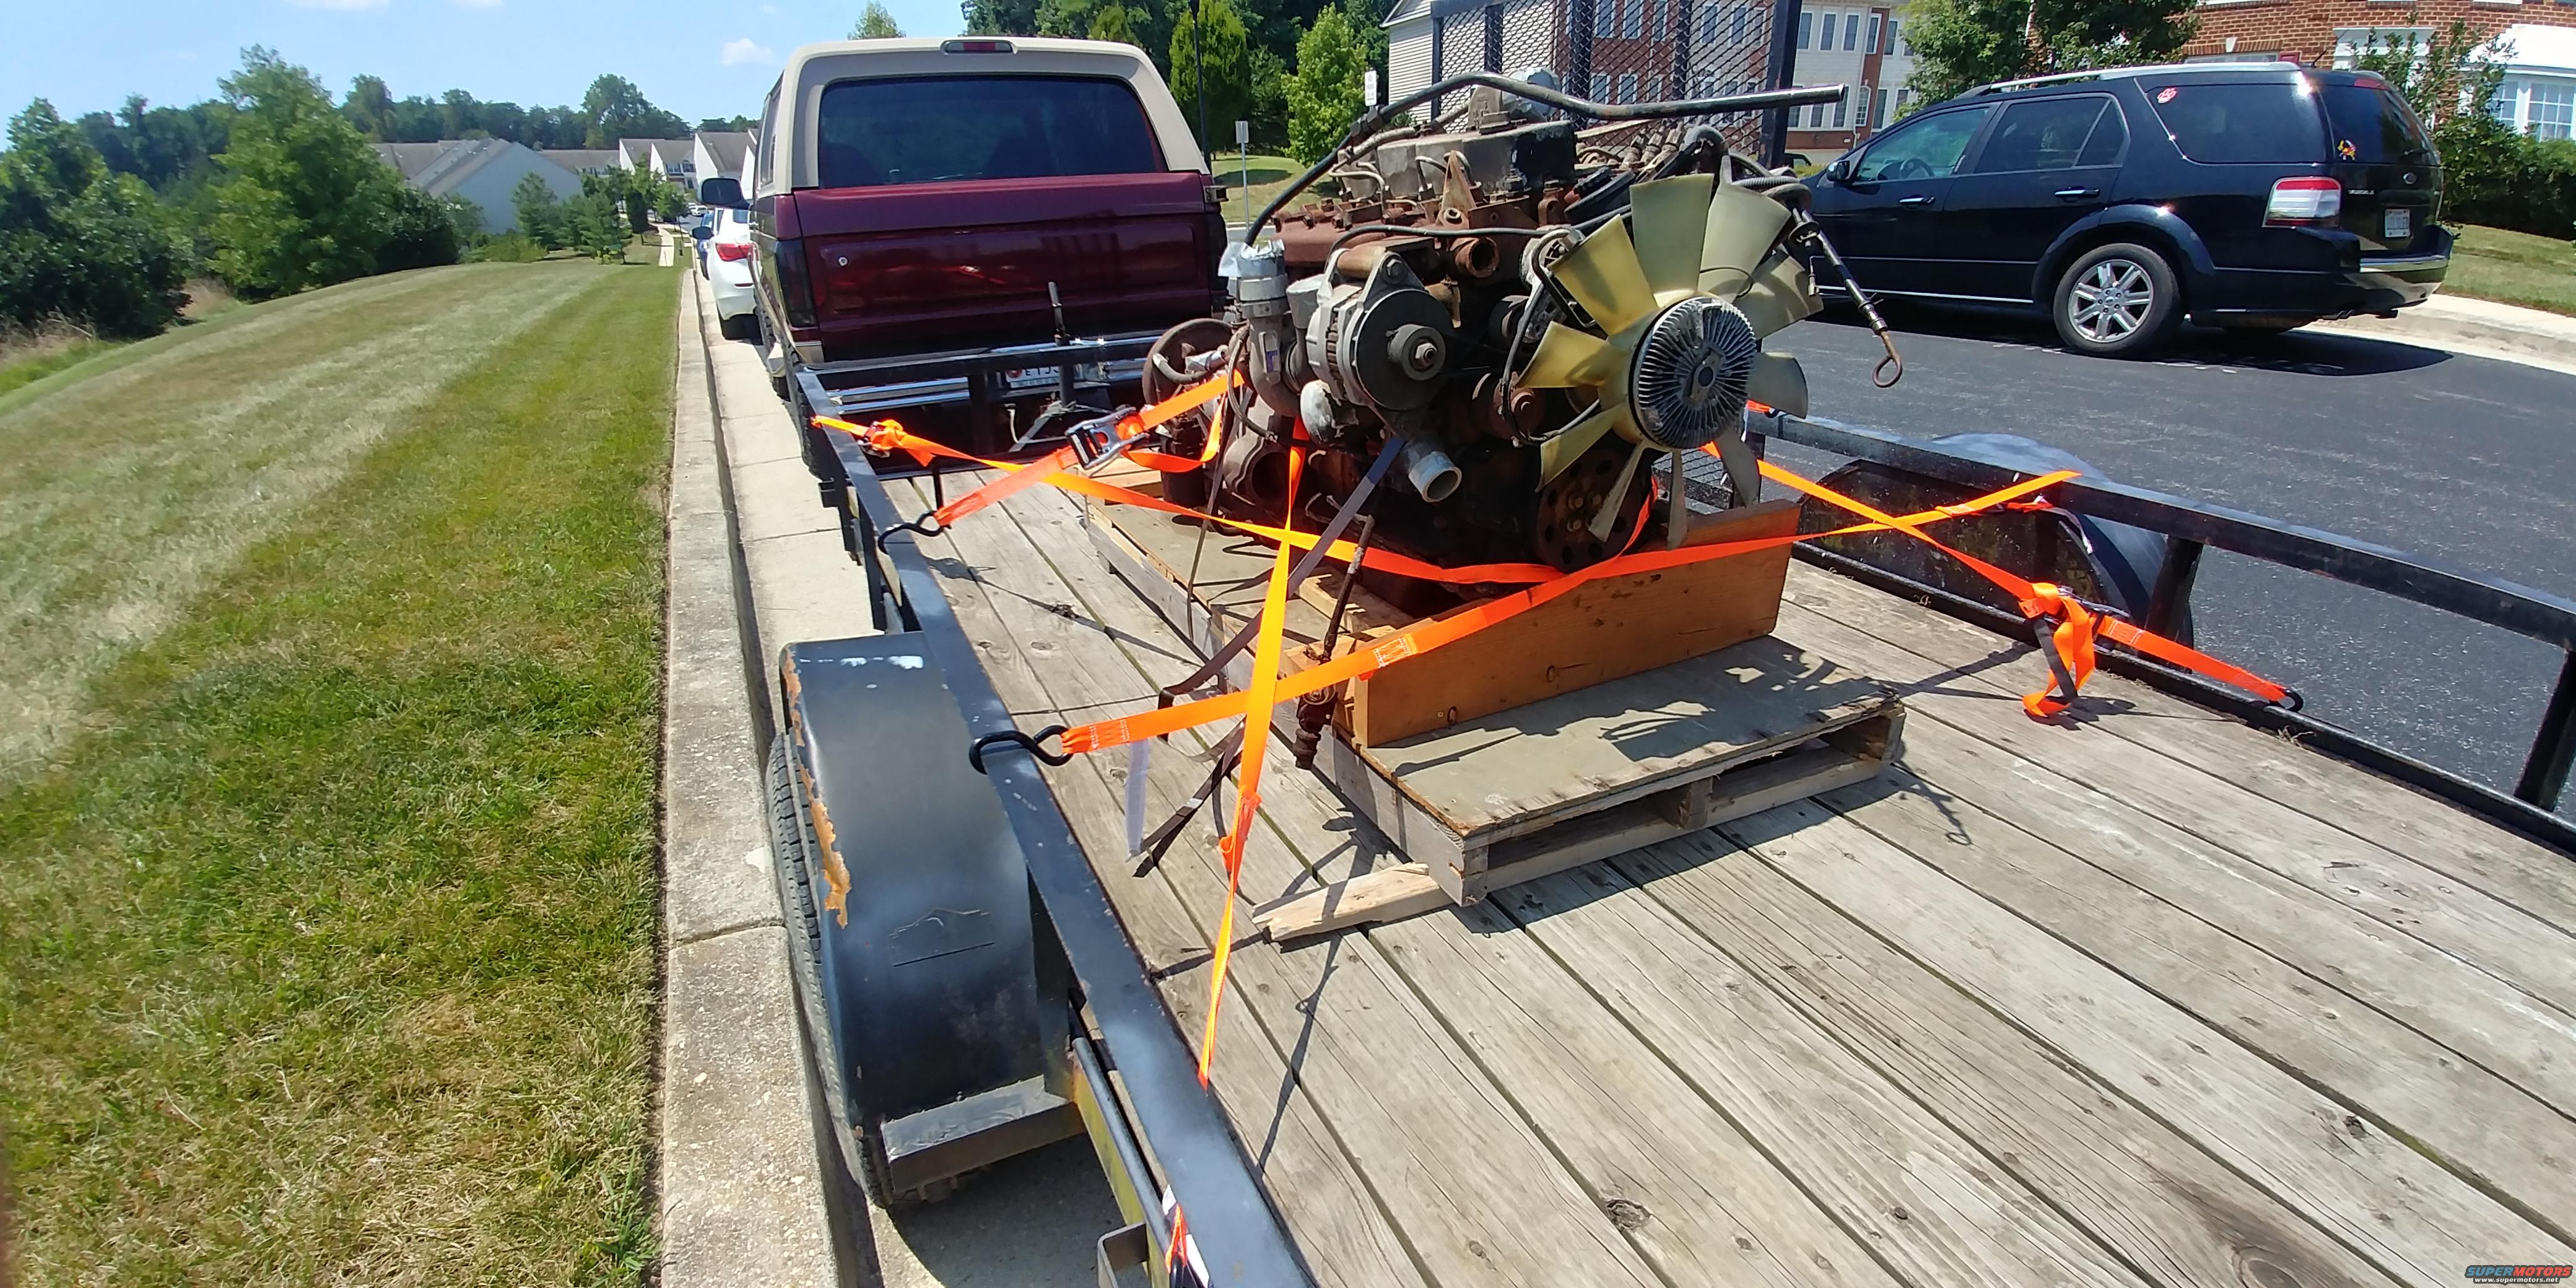
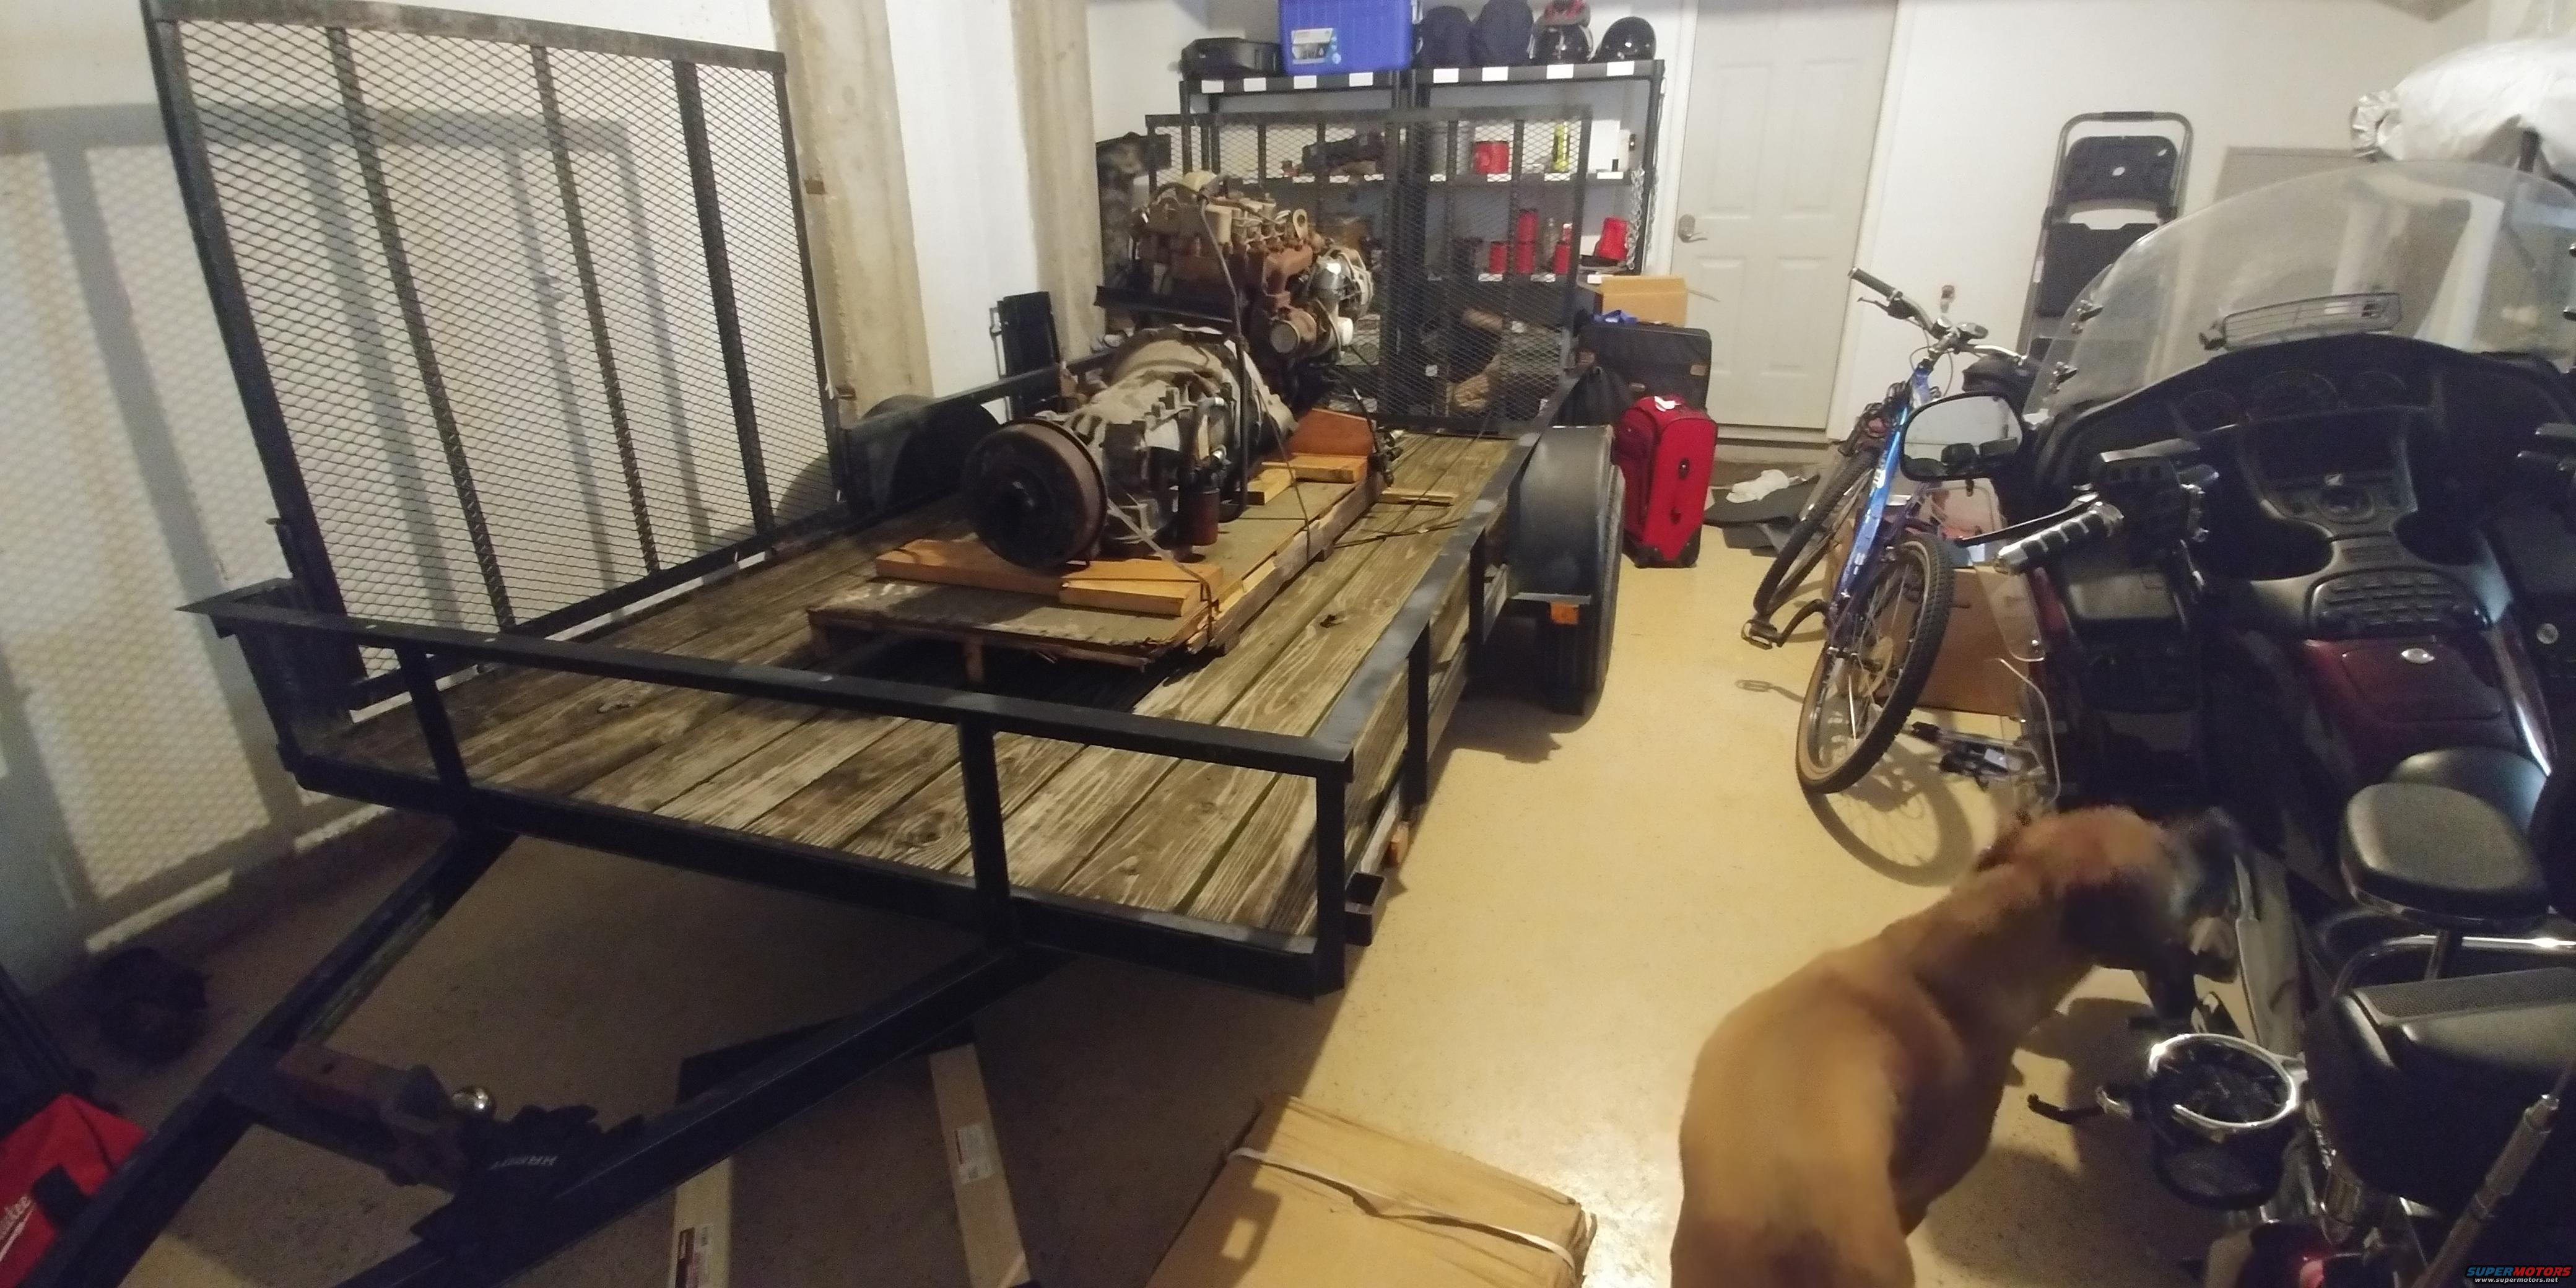
I really hate tolls. Being from the West, I had never experienced them prior to moving East. It's especially expensive when you have a third axle... go figure. Borrowed the trailer from a buddy after work. Three states and several hours later I get to the seller's house just before dark. He's ready to go with a backhoe and four or so other guys to help load this engine on the trailer. Not going to lie, I was concerned carrying that much cash and being confronted with several guys, but they were all incredibly cool and helpful. Weighed down with ~1000lbs of new dead weight, I cruise to a friends place nearby-ish, do dinner, and get home Saturday early in the AM.
20190729 - Up A Creek
Finally get the trailer to (barely) fit in the garage. How the hell do I get this damn thing off the trailer? Time to shuffle things around and clean up this disaster of a man cave.
20190731 - Lost the Battle
Rented an engine lift and had just enough clearance. Turns out trying to get it lifted and maneuvered alone was a chore. Didn't die, though. I discovered much too late that the cherry picker was actually bad. Left leg was bent upward just enough and the boom twisted to the left just enough that when I got it in the air, it started leaning and falling toward that leg. I hopped on the back of the lift like I was doing a box jump at the Crossfit Open, and it was just enough to rock it back and put the three good points-of-contact on the ground. After much shouting and banging on the ceiling, my girlfriend came down and helped me get an old damaged rim under the engine so I could sit it down and not be stuck standing on the lift all night. Precarious, but it was late and I had work. Keeping the lift partially loaded with the weight and a good jiggle-check confirmed it was tomorrow's problem.
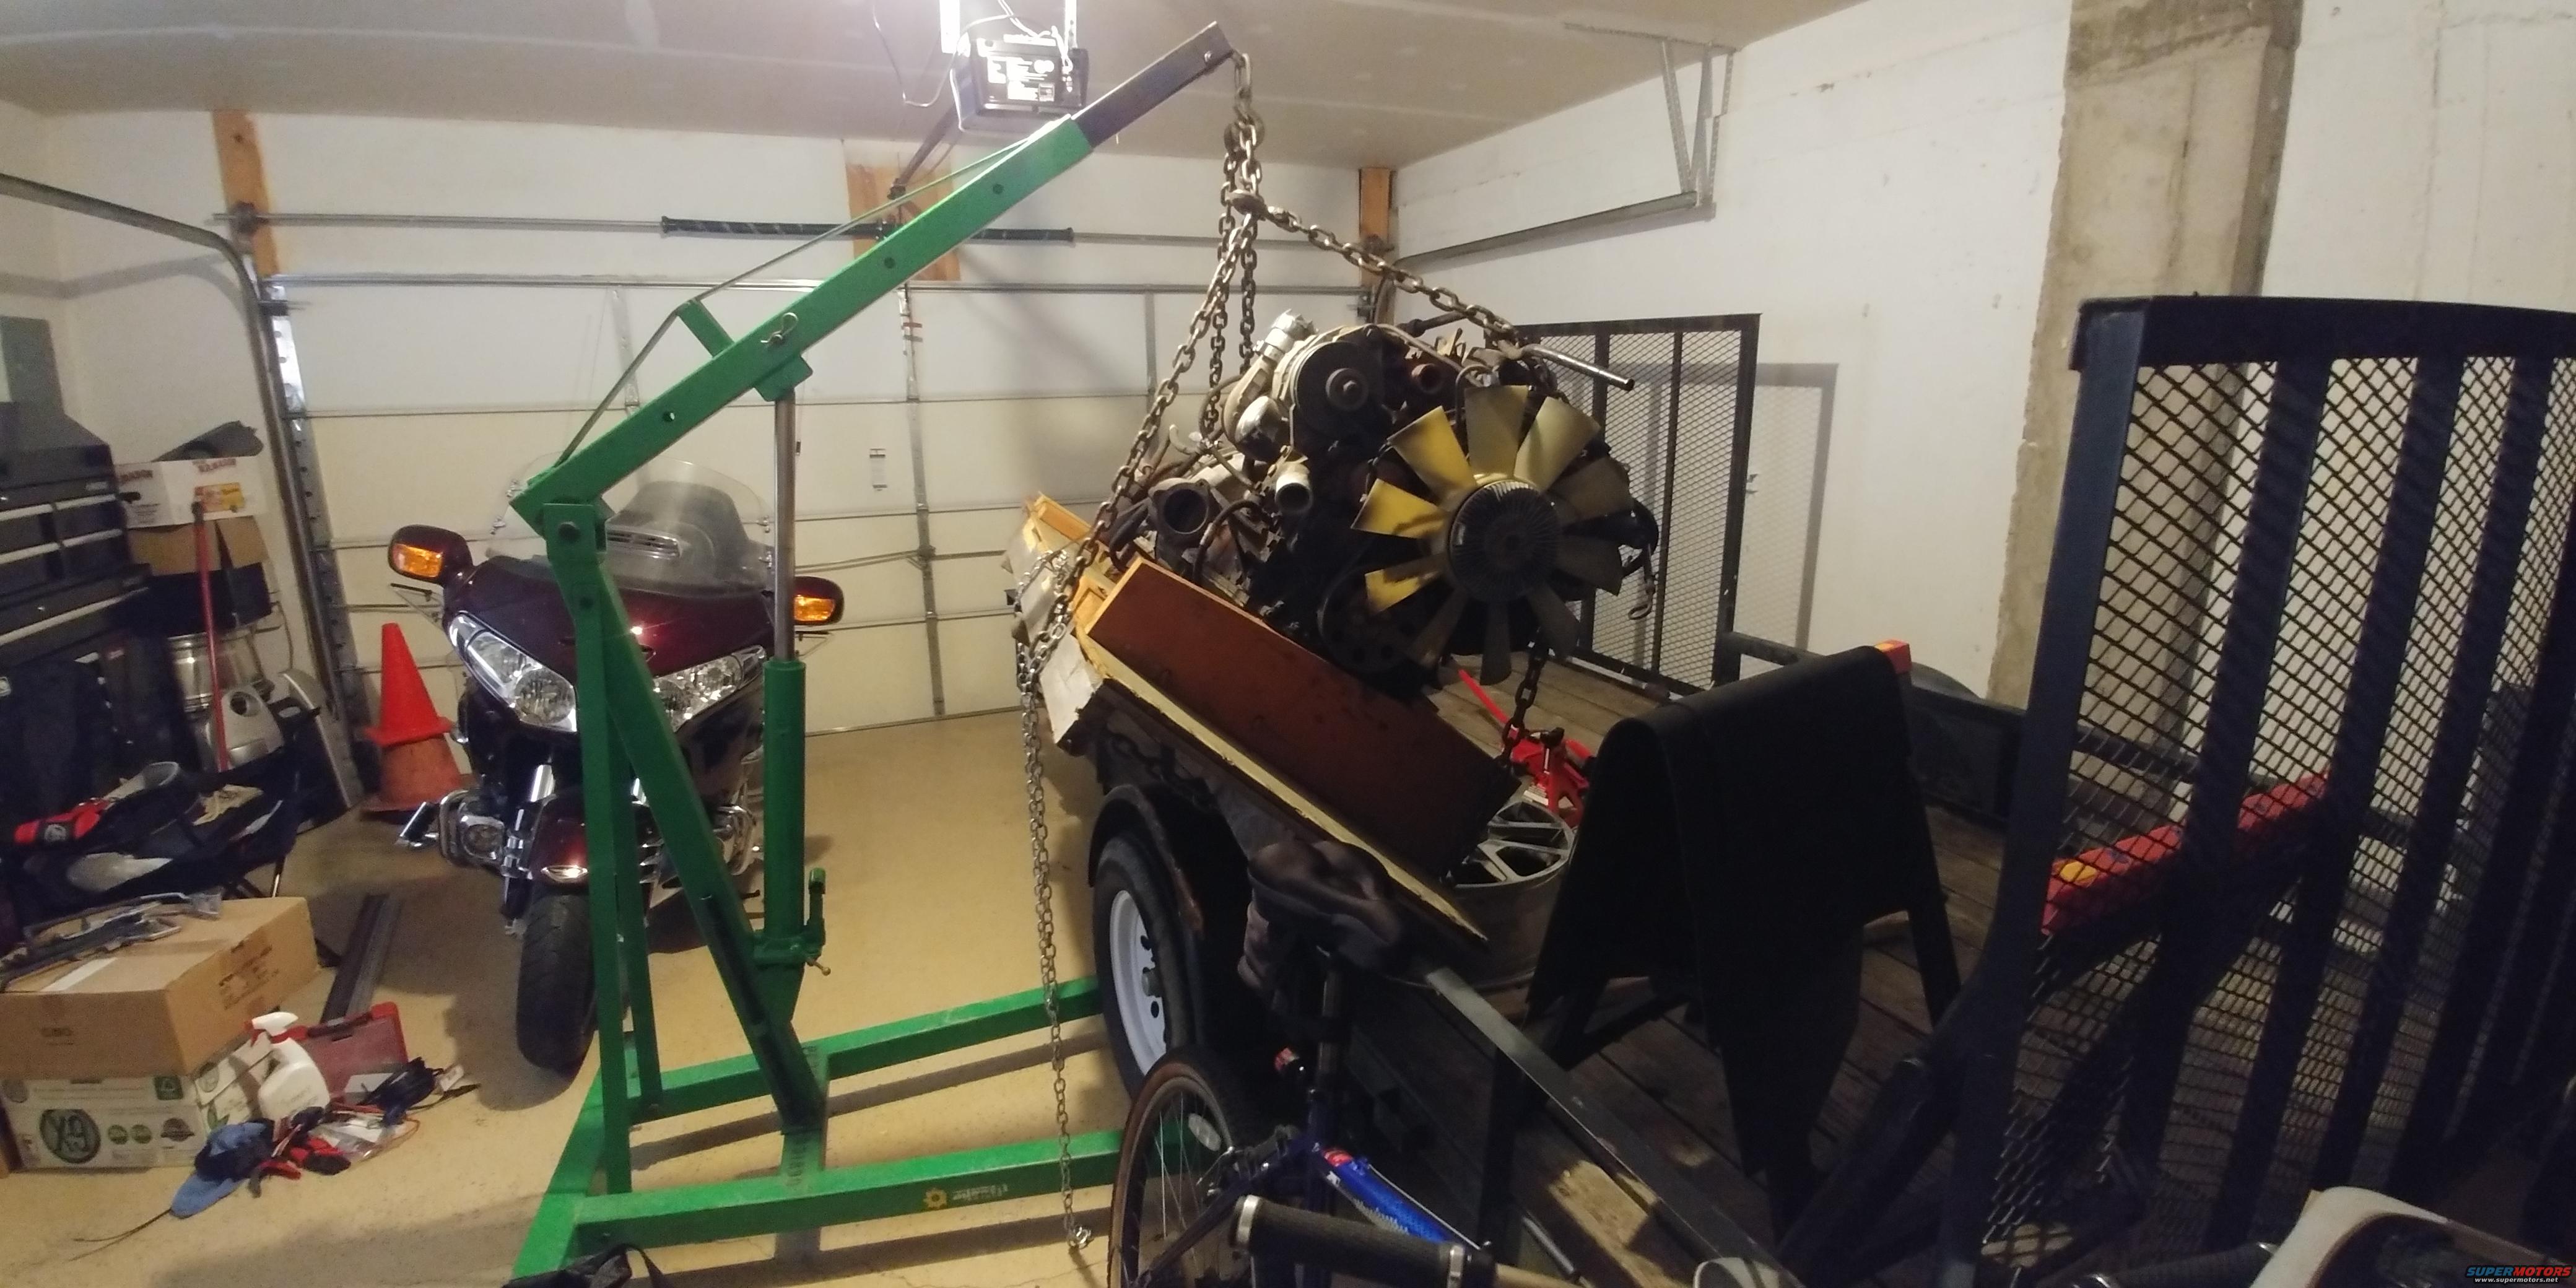
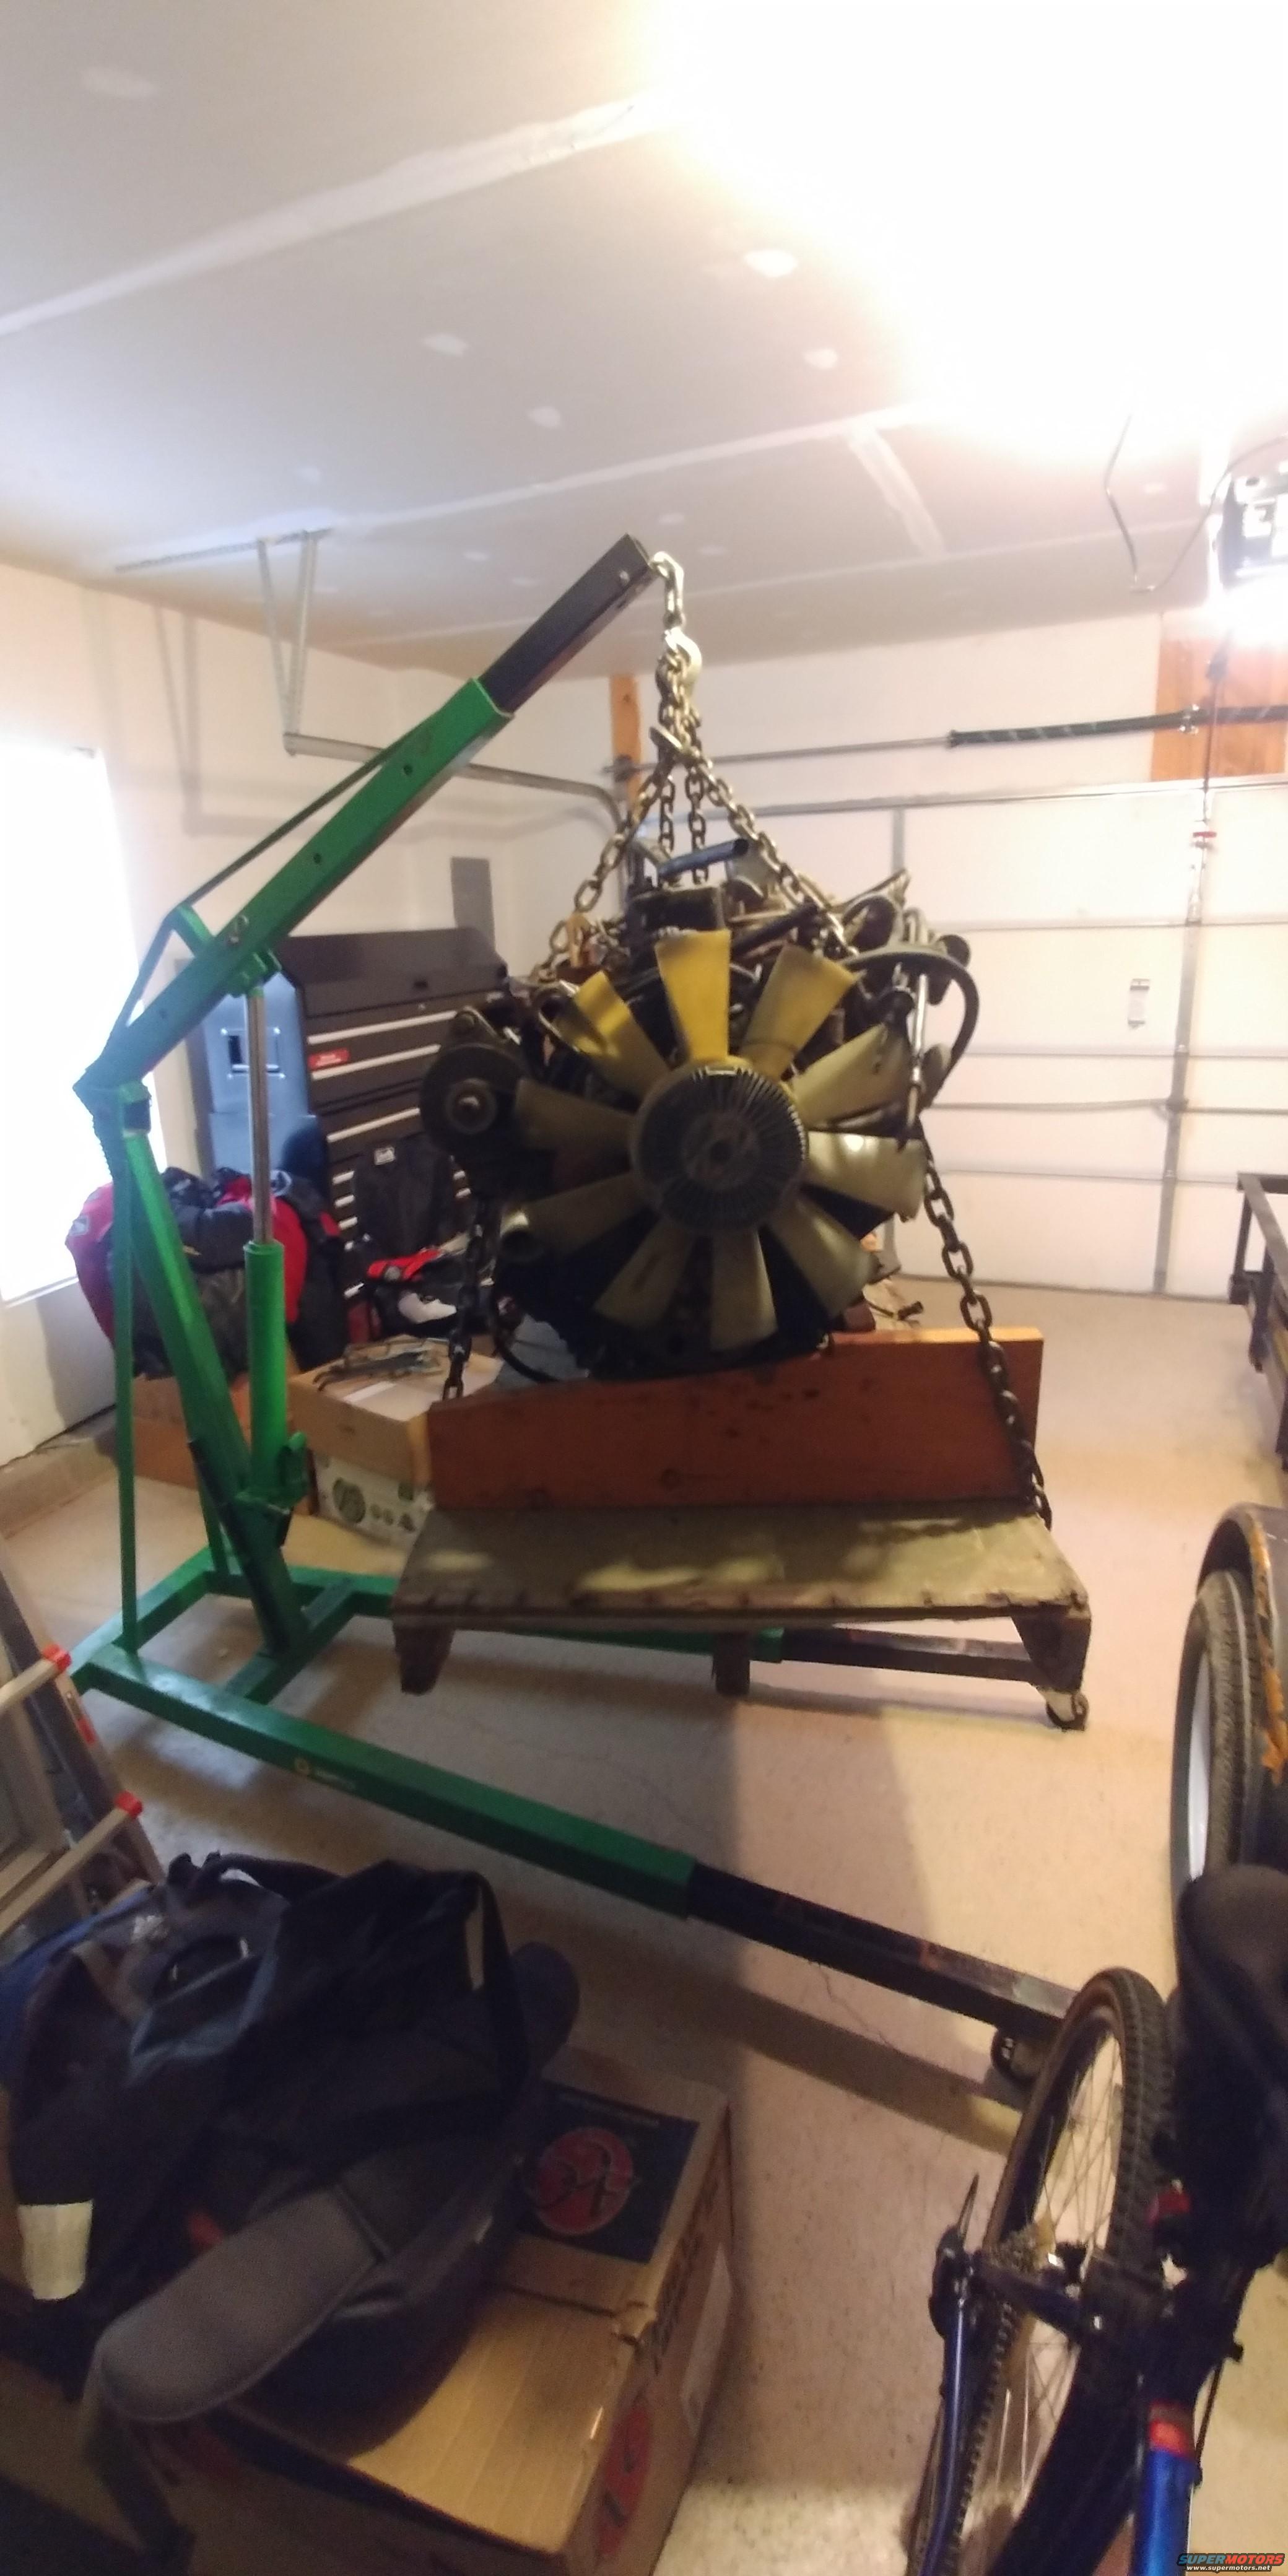
20190801 - Won the War
Attempt #2. I get the chain adjusted, shift the weight of the engine more toward the right leg, and voila! Finally get the dang thing off and tucked into the corner directly behind the lift on jackstands. The following day I take the cherry picker back and let the shop I rented it from know how it almost killed me. Y'know, brighten their day a little.
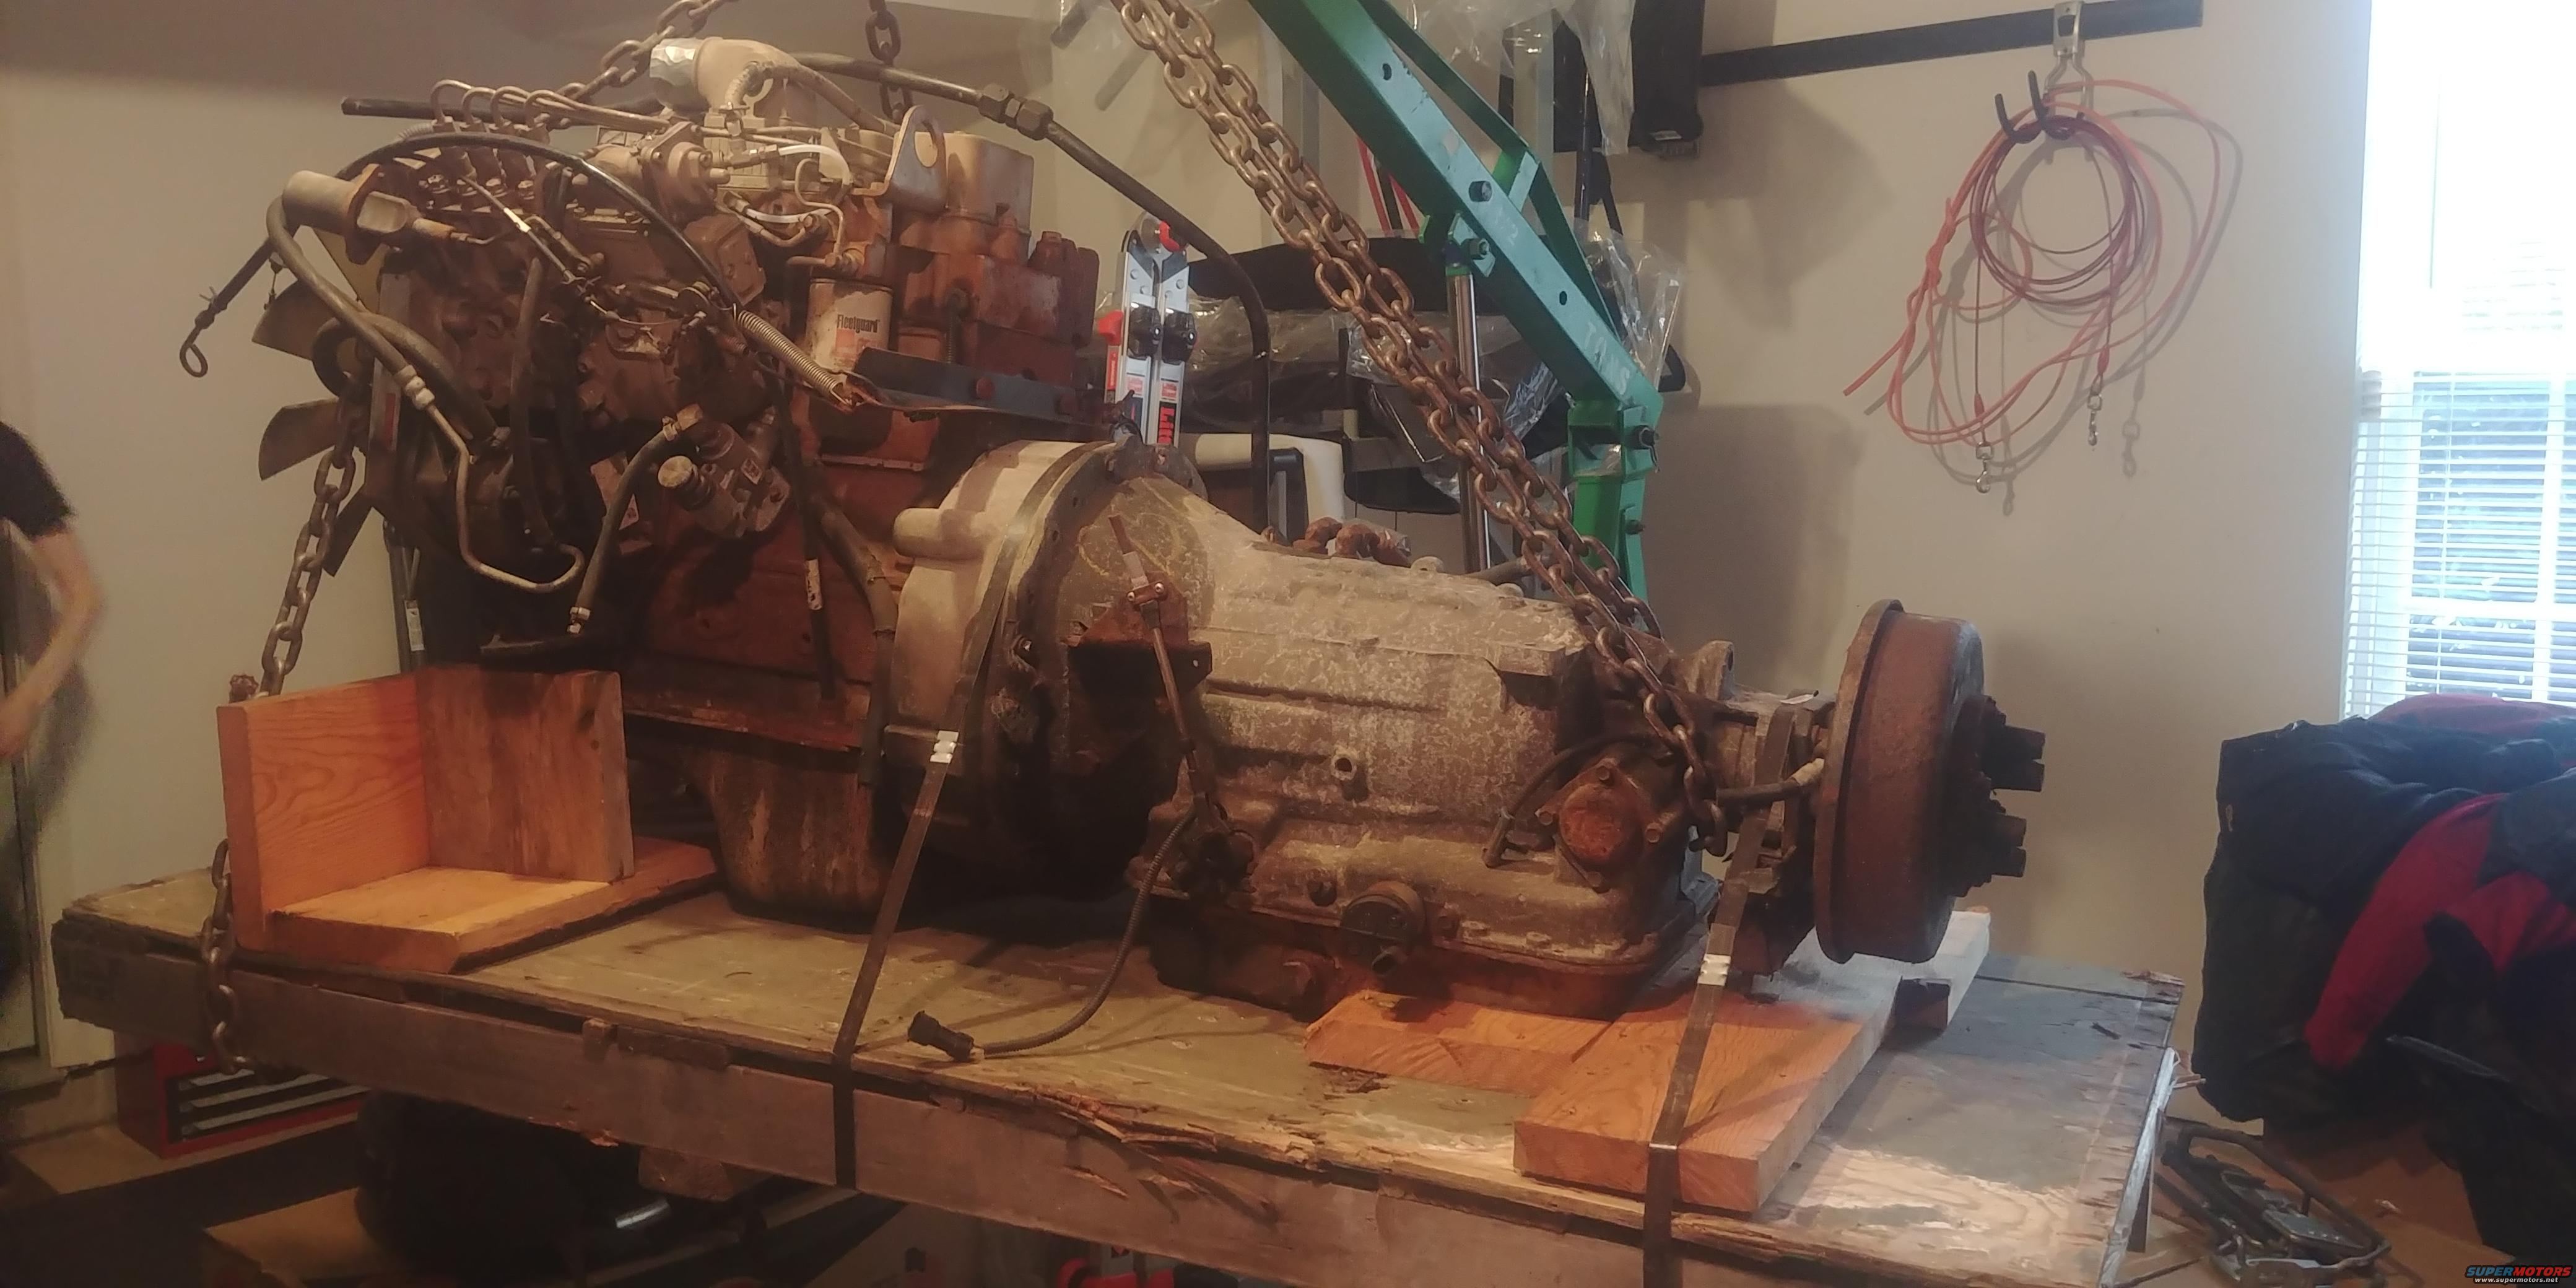
Over the next couple of weeks I start unbolting the transmission since I'm not going to need it. I'm going to clean it up and paint it, I tell myself, before I take it to the shop and ask them to install it. Actual spoiler: I didn't clean it up before taking it to the shop. Two sheared off bolts and several days of soaking the sheared bolts in WD40 later, I decide the shop is better equipped to handle it.
20190926 - Best Laid Plans
Tons of research and lots of communicating with the shop happen. I've made the parts list. I've built too many spreadsheets, compiled too many interwebs links, and obtained copious amounts of information from diesel shops and vendors around the country. I'm good to go... I think. I pull the trigger.
After the shop graciously lets me borrow their known-good lift and I recruit a long-time friend and his truck, the engine (and transmission) goes to the shop.