Bronco Forum - Full Size Ford Bronco Forum banner
181 - 200 of 247 Posts
Discussion starter · #185 ·
Those are some sharp rims. Is that a Holley Truck Avenger or a 4160 on there?
There was a Street Avenger in there but that was swapped out for a throttle body unit by FItech.

Going with a spool, not to worried and street manners I guess.
Not really, can't be any worse than a Detroit. If it is, I'll build another 3rd member and swap it out.
 
Discussion starter · #187 ·
Your two cents

So as some of you may recall I put long arms on this Bronco. With those I upgraded my shocks to a reservoir shock with more travel. But with those reservoirs the stock shock towers don't allow the shocks to reach their full travel both extended and compressed. I purchased a set of the f-250 towers with the thought they would work. They are taller than the stockers which will give me what I want. The stock towers are bolted to the frame and those bolts also hold the perches to the frame. Enough talking now pictures.


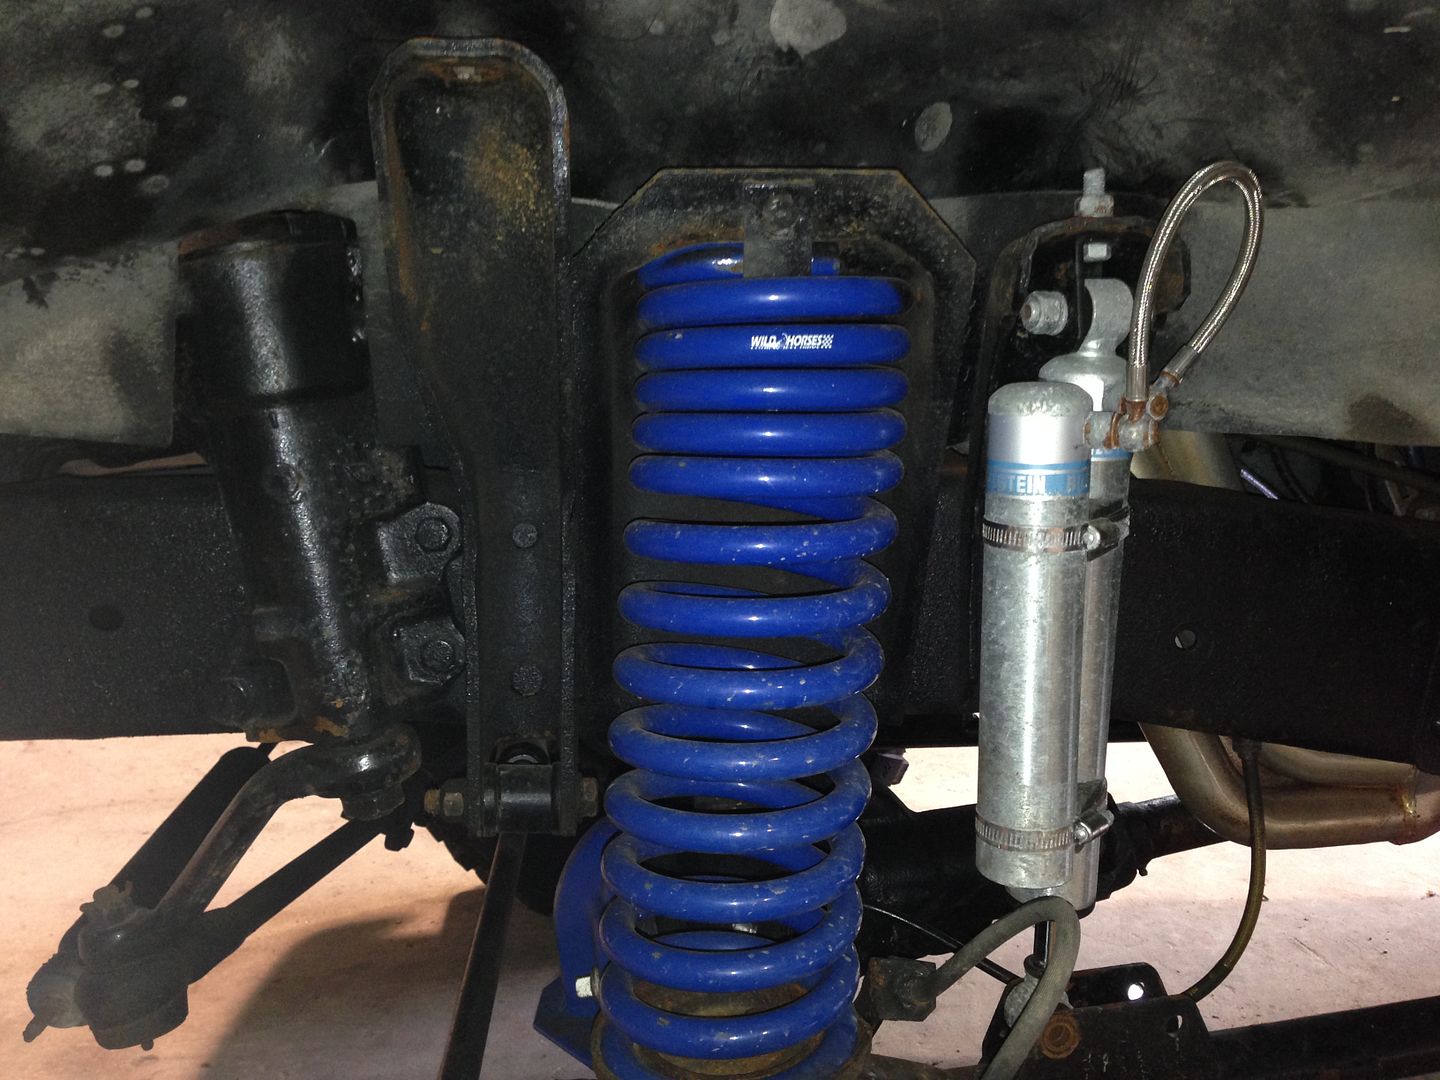
This is the tower I was going to replace. As you can see that shock has no up travel.


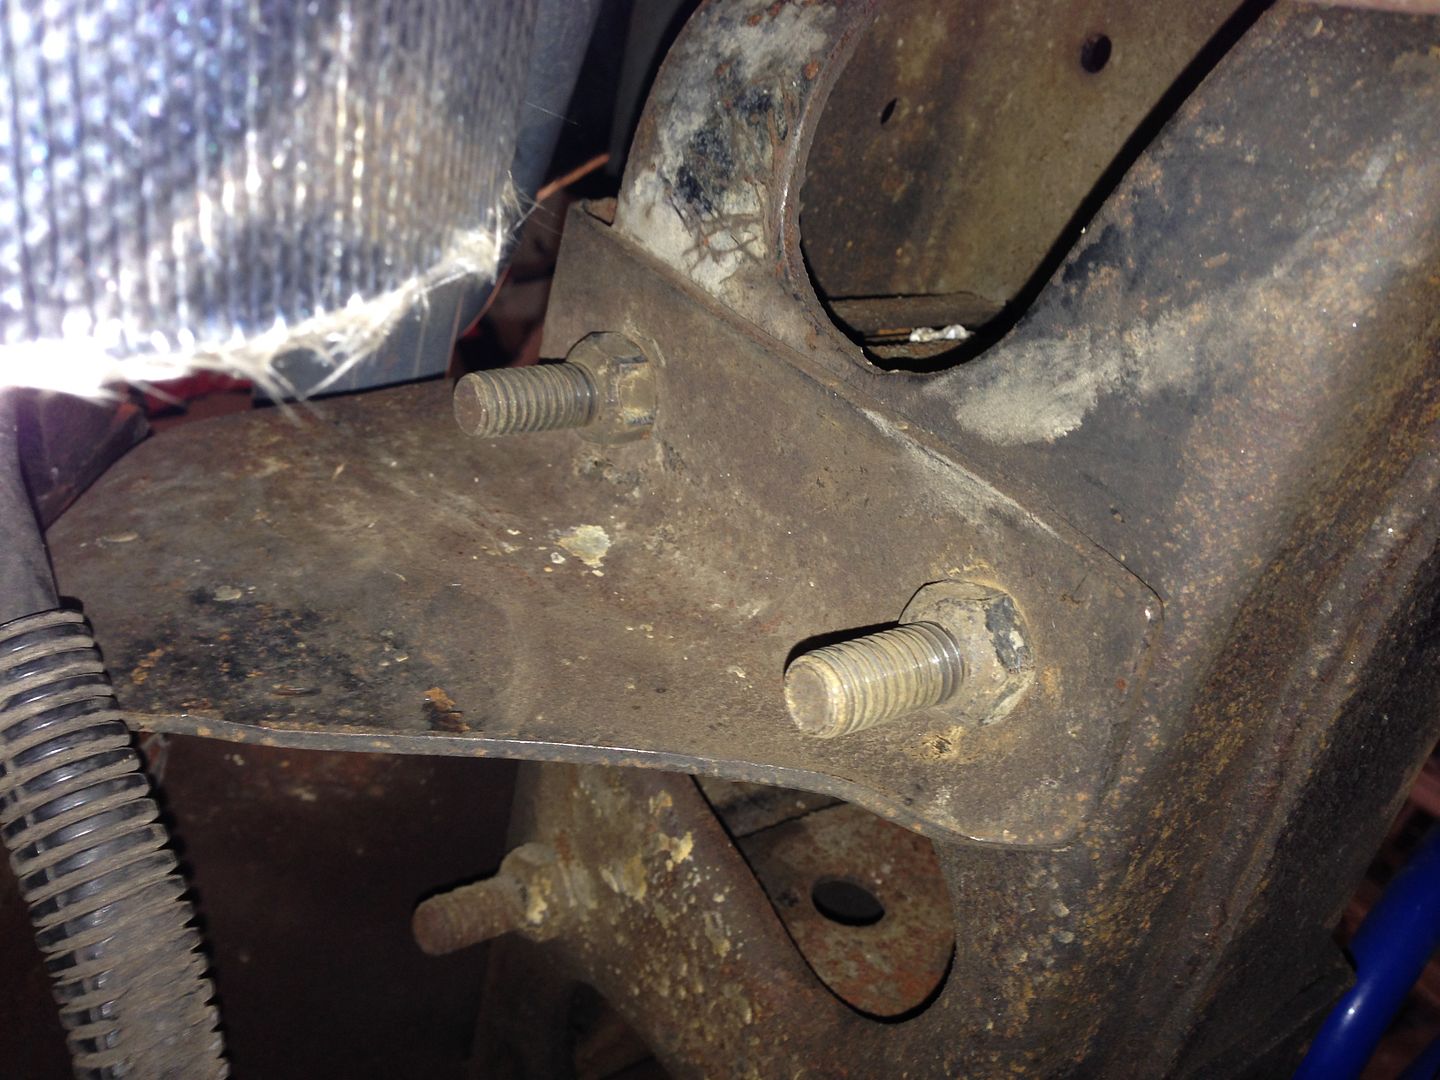
The two bolts that secure both the shock tower and perch.


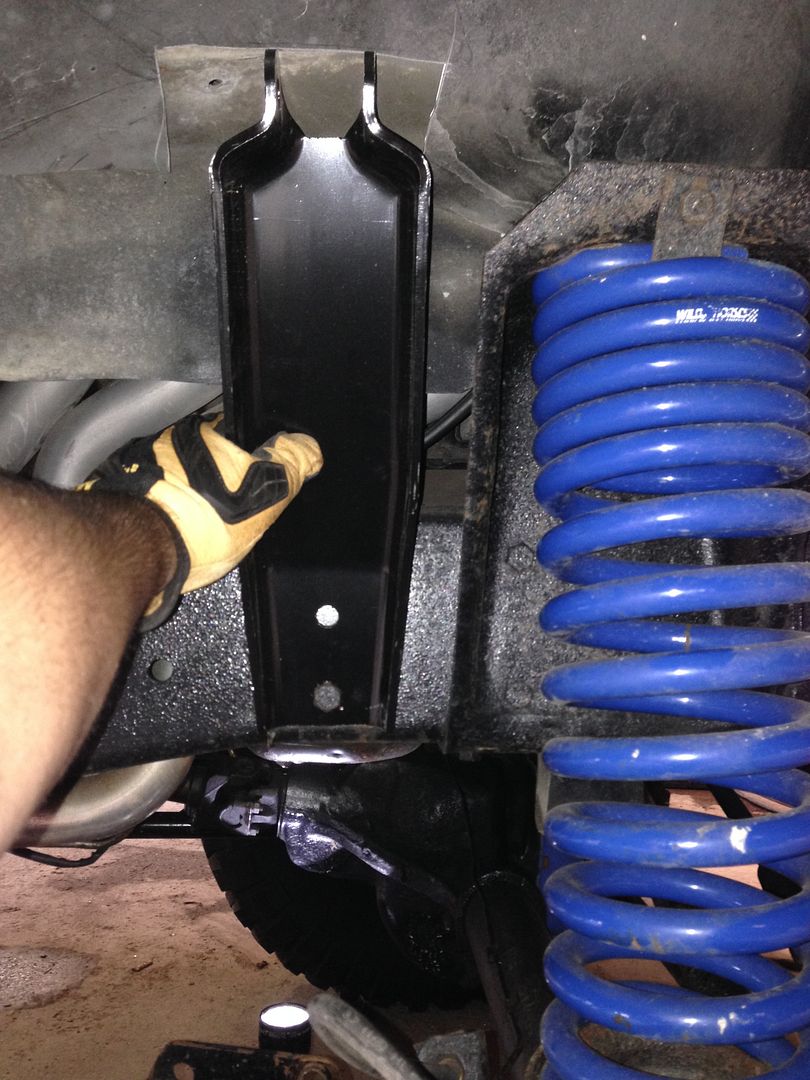
The f-250 tower with one bolt through. The second hole you see does not line up with the original hole. I was thinking of bolting this one through and then welding the tower to the frame through that hole. Thoughts on that or any other options I'm not thinking of?

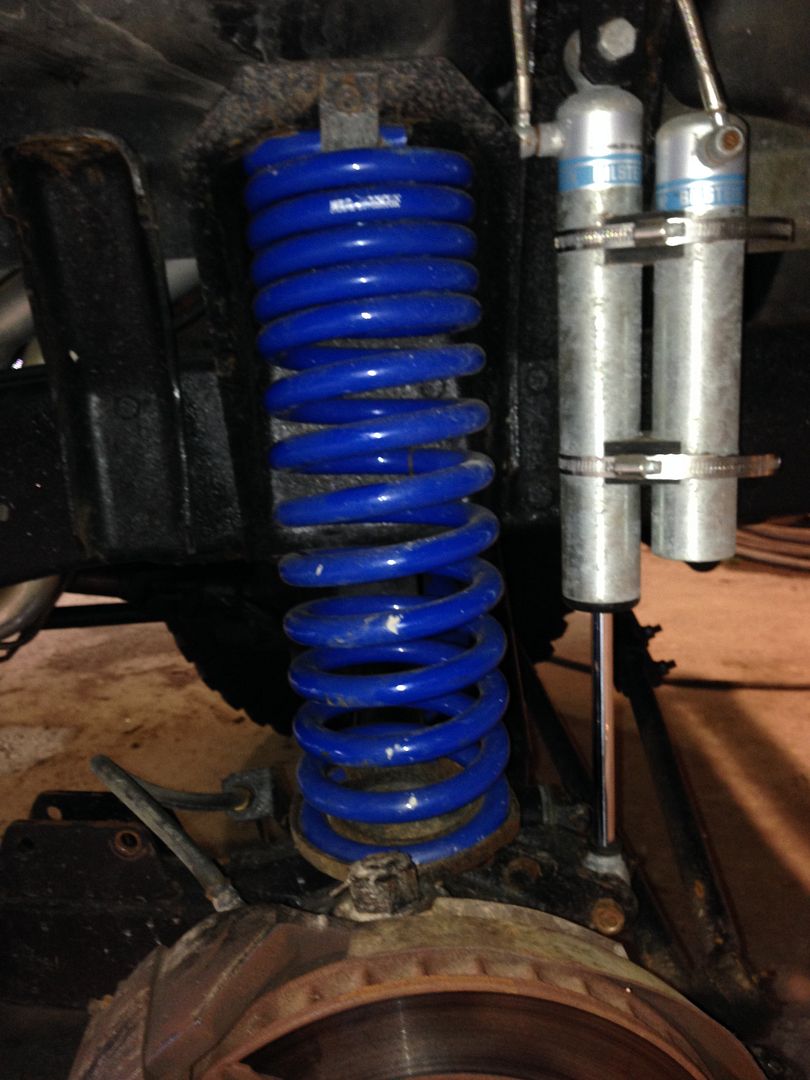
I temporarily mounted the shock up front to achieve my travel but would like to use that for a limiting strap.


Vote me your Sept. FOTM!
 
Those look to be pretty short shocks to be running the F250 towers, they look to be maybe 10" shocks?
I like to set mine up with 30-35% up and 65-70% down, currently I have 14" Bilsteins and have 5" up and 9" down.
I will be adding bump stops to stop it at 4" up and limit straps to stop at 8" down.
I also have the F250 towers and used the one hole that lined up and drilled another to line up with the existing frame hole then welded a shim on the back to take up the space left.
 
The Filly build

If I place it where the stock rear was I will have 7" down and 5" up.


Vote me your Sept. FOTM!

Those are good numbers, just add bump stops so you don't bottom out the shocks.

Just saw a good tip for checking shock travel. Put a zip tie around the shaft and against the body and flex it out, the zip tie will stay and show you how much travel you are using.
 
How do the new shocks feel? Looking pretty sweet! I usually set my rebound about 20% less than compression, just enough to take the bounce out. Compression I do a bumpy test ride and set for feel, it also totally depends on terrain of course. Road feel is totally different than washboard gravel.
 
I would take the coils out and cycle the front. To me this is really the only way to get it right.
Pay extra attention to the front driveshaft and full droop, you may find it is binding, before anything else starts to have issues. The steering joints also start to get to their extremes. This is how I set the bumps and straps on the 78
 
Discussion starter · #196 ·
Soft-top installation

I've had it in the box now 4 years! Time to get it installed :twak. As a special treat I inlisted the help of my Pop to give me a hand. Pop's retired so it's not like he had anything else to do :histerica.


I lost the instructions a couple of weeks ago when I was looking them over. Thank good for the internet, I found some that were identical I could use.

Image


Image


Image


Image


Image


First snap drilled and set on the aluminum channels.
Image


Image


The biting the tongue trait skipped my generation and landing with my son.
Image


Image


Finished! (well 95% that is. I have to figure out how I'm attaching the back window. I'm not digging drilling 10 holes in it)
Image


Image


Image


Image


Image


Image
 
For back window, what I did on my soft top was take a strip of aluminum and put Velcro on it, then I bolted that to the top material, and put the other half of the Velcro on the tailgate. I could never get the Velcro to stick to the soft top material.
On yours you maybe able to do the same but make it snap on, using those existing snaps... Another option would be to sew the Velcro onto the top material or have it sewn. I like the extra weight of the aluminum on the back part though, as it stays down even without the Velcro.

Also looks nice, nice find on one of those tops. Looks nicer then my JBG one I made fit for sure. :thumbup
 
Discussion starter · #198 ·
For back window, what I did on my soft top was take a strip of aluminum and put Velcro on it, then I bolted that to the top material, and put the other half of the Velcro on the tailgate. I could never get the Velcro to stick to the soft top material.
On yours you maybe able to do the same but make it snap on, using those existing snaps... Another option would be to sew the Velcro onto the top material or have it sewn. I like the extra weight of the aluminum on the back part though, as it stays down even without the Velcro.

Also looks nice, nice find on one of those tops. Looks nicer then my JBG one I made fit for sure. :thumbup

The Velcro is a good idea Brandon. I was thinking of running a piece of L shaped aluminum across the back. In-cert the snaps on that and then its secured. I'm not in a big hurry on this one. I want it done right without screwing it up. The zippers keep it pretty snug in the back. Thanks on the compliments, it was one of those finds you don't wait on.

On another note. I've been fighting a tight throttle on the FItech. I couldn't find a bind in the cable system or the linkage. I moved the cable up a notch on the butterfly attachment and wow what a big improvement. Almost too soft now. While relocating linkage, I found that the nut had backed out a bit on the butterfly. A slight turn with a socket and all is well.
 
181 - 200 of 247 Posts